How to Install the latest OpenSSL version from Source on Linux
OpenSSL is a widely used crypto library that implements SSL and TLS protocols for secure communication over computer networks. Many programs like Apache Web server, PHP, Postfix, and many others use OpenSSL. OpenSSL provides support for various cryptographic algorithms such as ciphers (AES, Blowfish, DES, IDEA etc.), cryptographic hash functions (MD5, MD4, SHA-1, SHA-2, etc.), and public key cryptography (RSA, DSA, Diffie-Hellman key exchange).
In this tutorial, I will show you step by step how to install the latest stable OpenSSL version from source on Ubuntu 22.04 and CentOS 7.6 servers.
What will we do?
- Install Dependencies
- Download OpenSSL Source Code
- Install OpenSSL
- Compile and Install OpenSSL
- Configure Link Libraries
- Configure OpenSSL Binary
- Testing
Step 1 - Install Dependencies
Before we can compile the OpenSSL library from source, the first step is to install some package dependencies, including the 'build-essential' package on Ubuntu, or 'Development Tools' package on CentOS.
On Ubuntu
Update the Ubuntu repository and install package dependencies for software compilation using the apt command below.
sudo apt update
sudo apt install build-essential checkinstall zlib1g-dev -y
On CentOS
Install the 'Development Tools' and some packages libraries using the yum command.
yum group install 'Development Tools'
yum install perl-core zlib-devel -y
After the installation is complete, go to the next step.
Step 2 - Download OpenSSL
In this tutorial, we will install the latest stable version of OpenSSL - OpenSSL 3.0.7. You can download the source code from the OpenSSL site.
Go to the '/usr/local/src' directory and download the OpenSSL source code using wget.
cd /usr/local/src/
wget https://www.openssl.org/source/openssl-3.0.7.tar.gz
Now extract the openssl.tar.gz file, and go to the 'openssl' directory.
tar -xf openssl-3.0.7.tar.gz
cd openssl-3.0.7
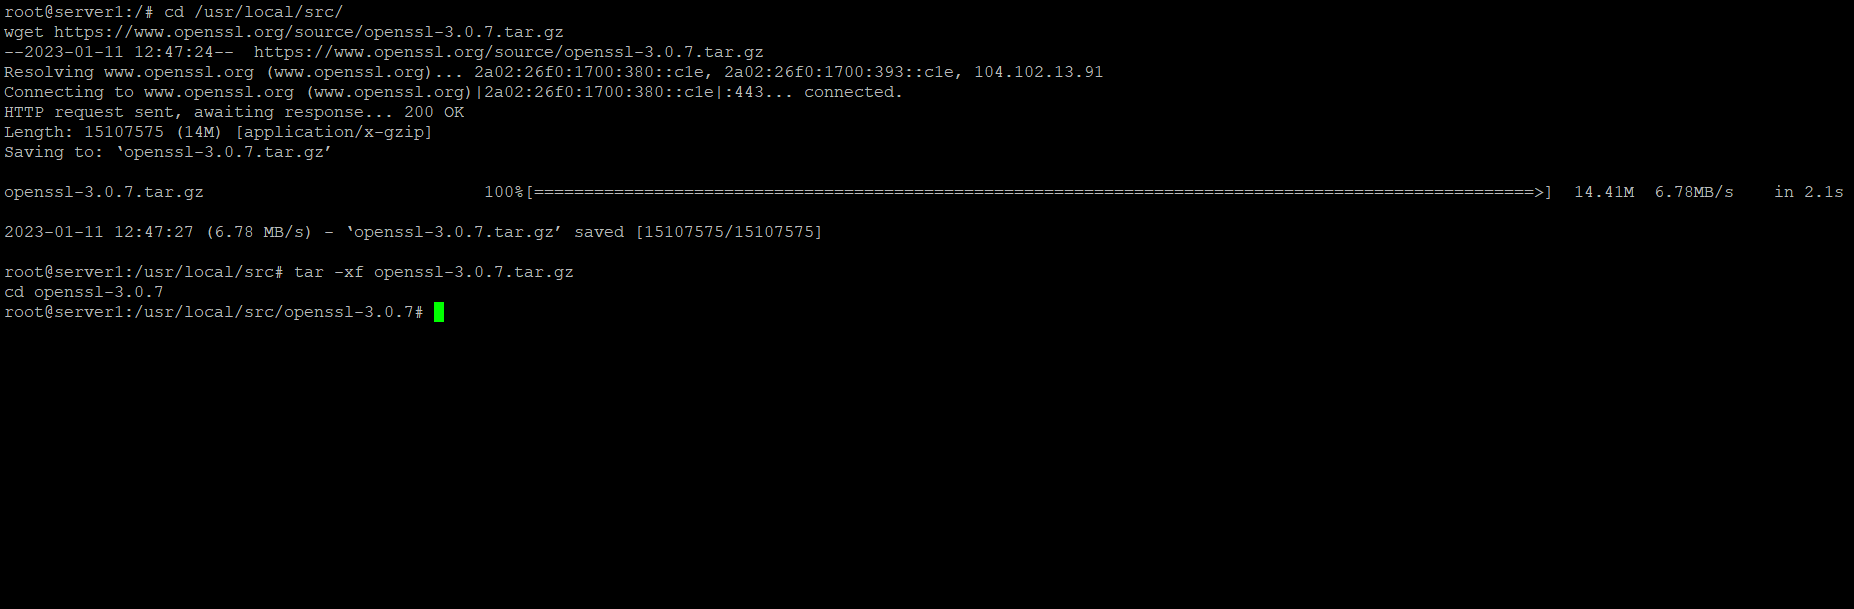
The OpenSSL source code has been downloaded.
Step 3 - Install OpenSSL
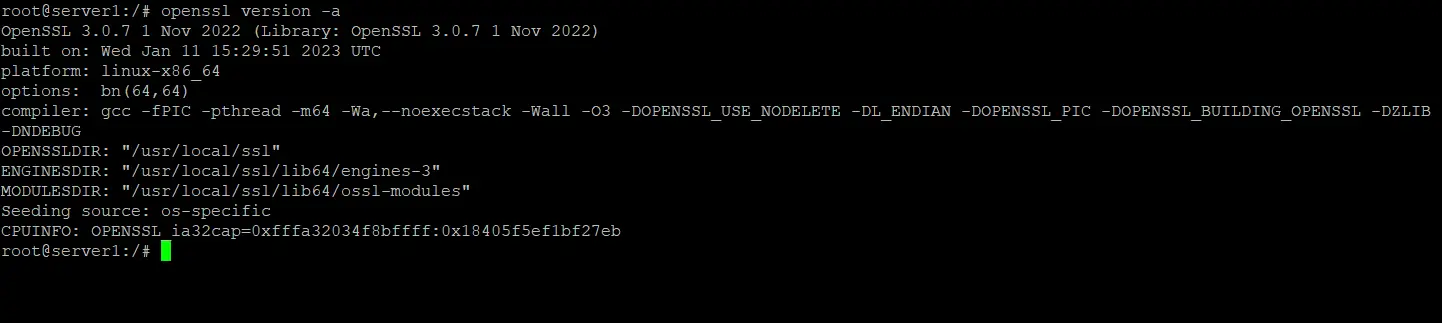
Before installing the custom OpenSSL version to the system, let's check the installed version using the command below.
openssl version -a
Below is my results on Ubuntu:
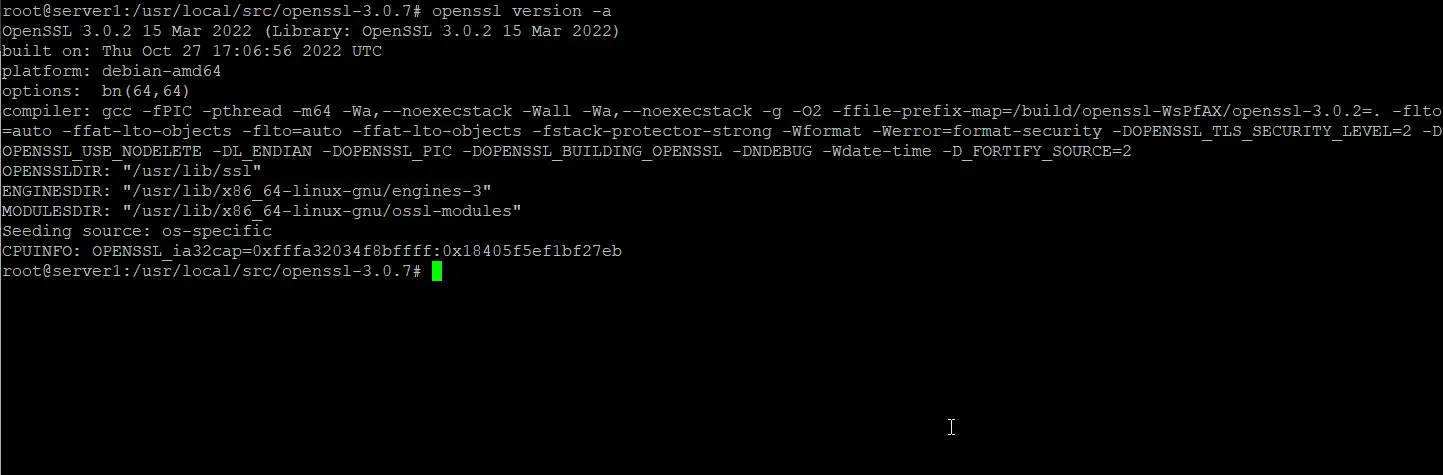
We will replace version 3.0.2 with latest stable version OpenSSL 3.0.7.
We will install the new OpenSSL version to the specific directory '/usr/local/ssl', and then enable the Link Libraries of OpenSSL, and configure the new binary PATH for OpenSSL.
Install and Compile OpenSSL
Go to the openssl downloaded directory '/usr/local/src/openssl'.
cd /usr/local/src/openssl-3.0.7
Configure and compile OpenSSL with the commands below.
./config --prefix=/usr/local/ssl --openssldir=/usr/local/ssl shared zlib

make
make test
Wait for the OpenSSL compile process.
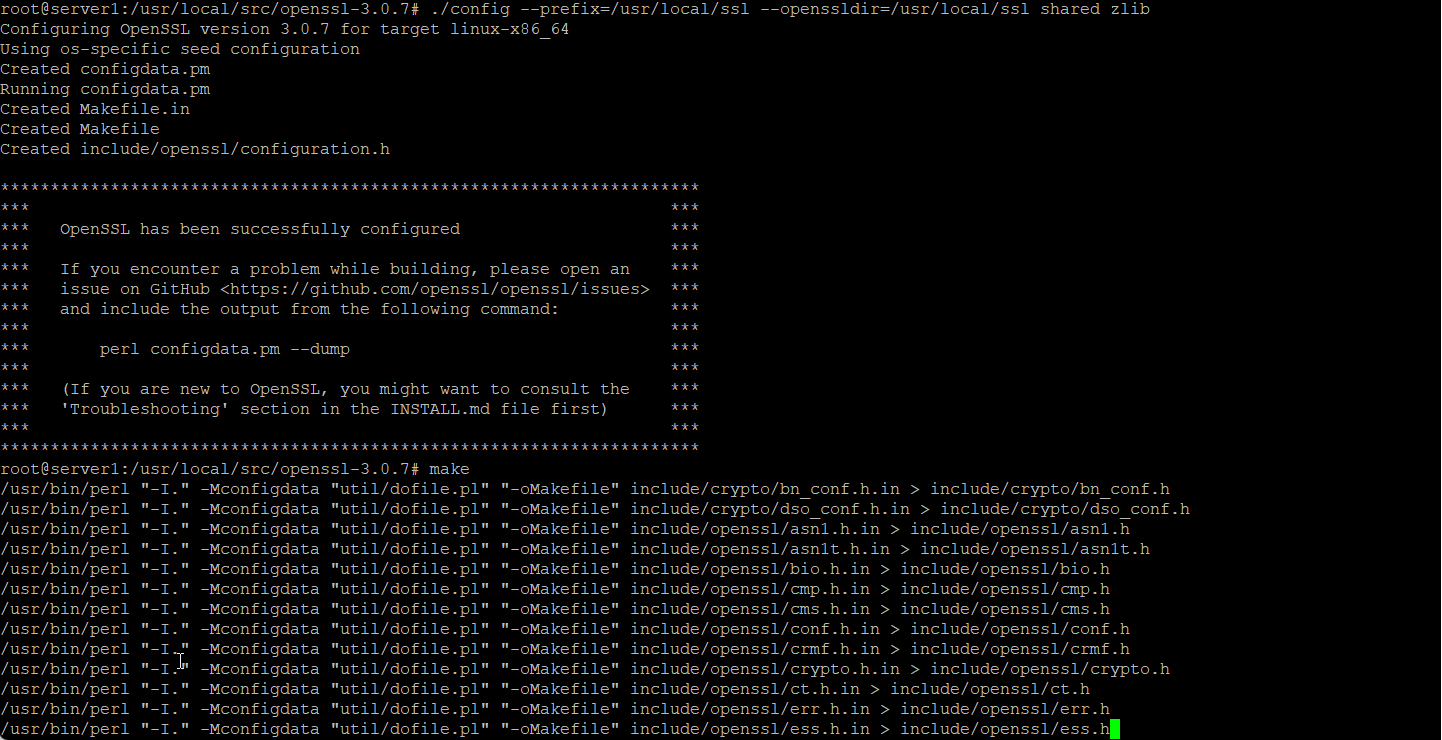

Note:
- --prefix and --openssldir = Set the output path of the OpenSSL.
- shared = force to create a shared library.
- zlib = enable the compression using zlib library.
When the compile process is complete, install the OpenSSL using the command below.
make install
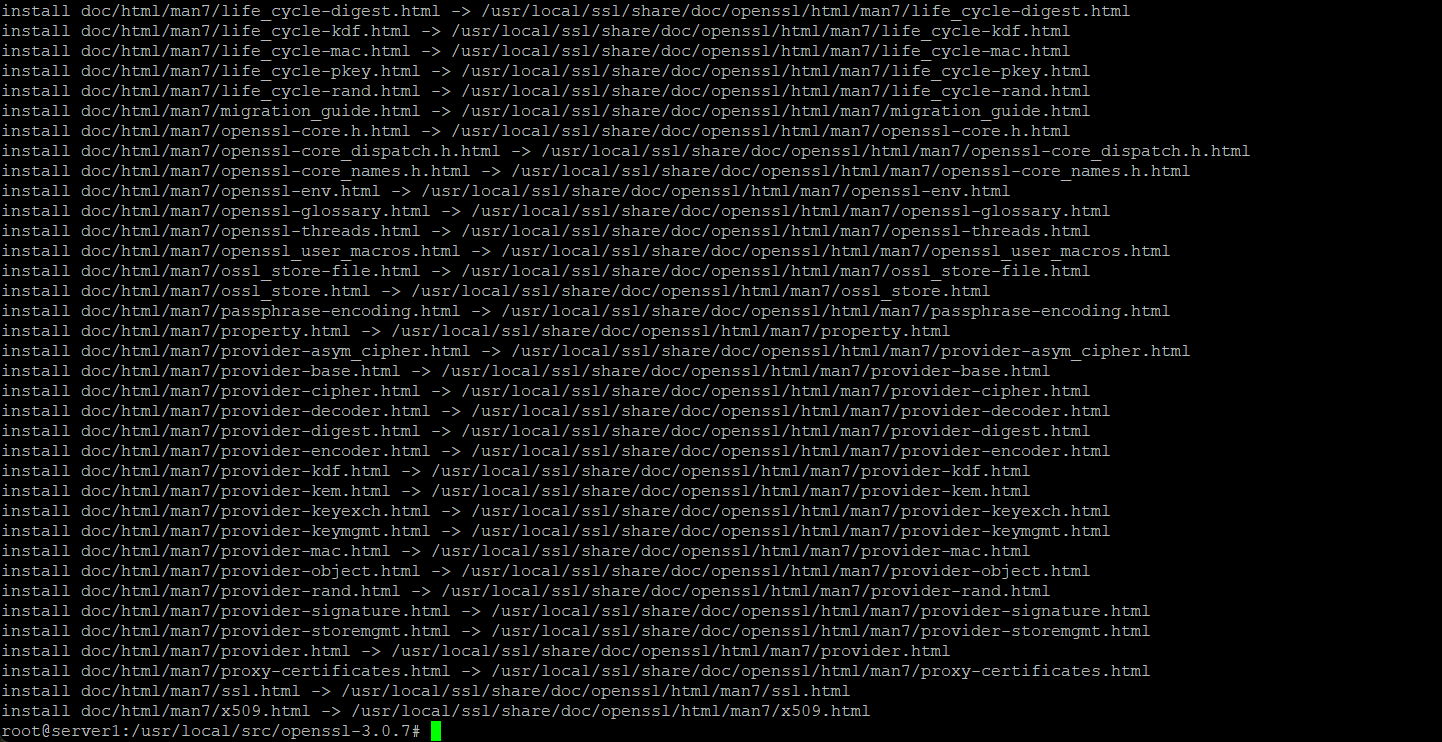
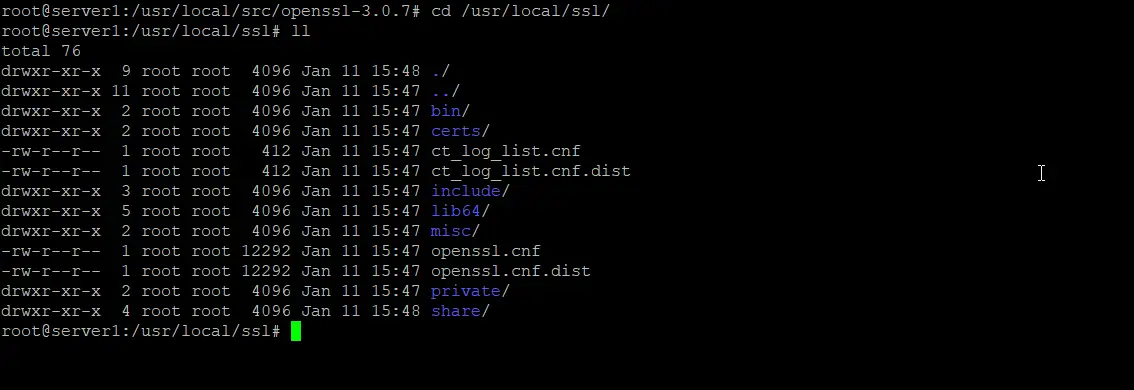
OpenSSL is installed in the '/usr/local/ssl' directory.
Configure Link Libraries
Next, we will configure the shared libraries for OpenSSL. The new OpenSSL binary will load library files from the '/usr/local/ssl/lib' directory.
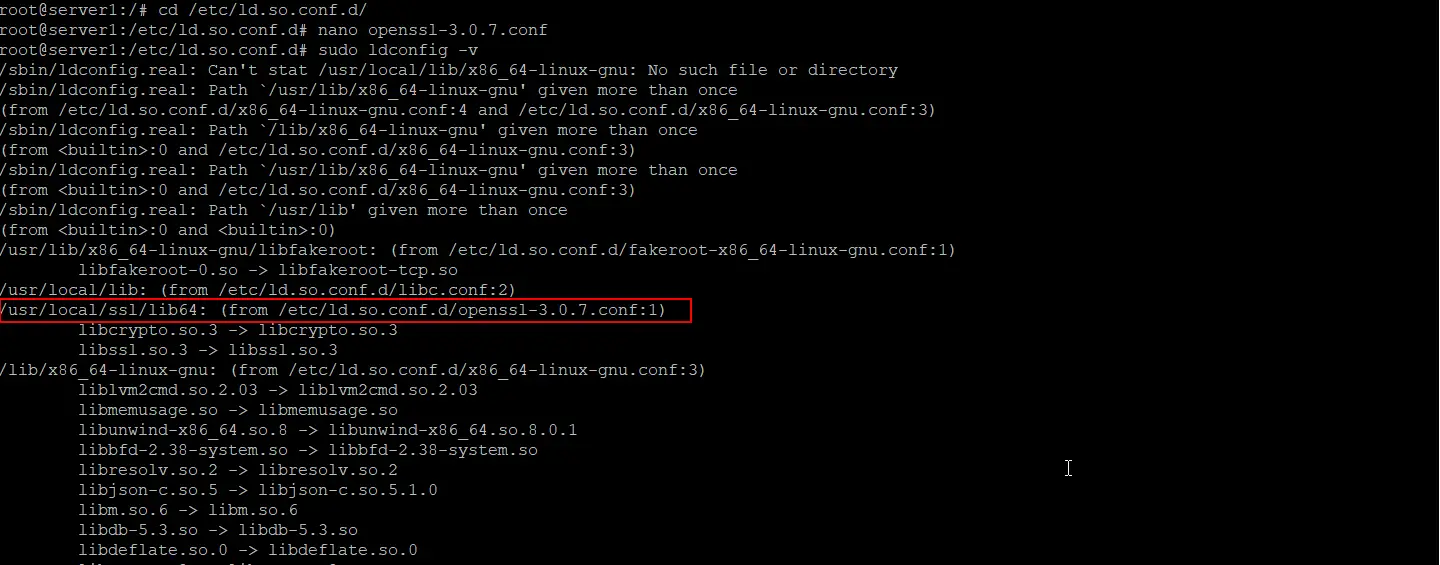
Go to the '/etc/ld.so.conf.d' directory and create new configuration file 'openssl-3.0.7.conf'.
cd /etc/ld.so.conf.d/
nano openssl-3.0.7.conf
Paste the openssl library path directory.
/usr/local/ssl/lib64
Save and exit.
Now reload the dynamic link using the command below.
sudo ldconfig -v
And you will see the OpenSSL libraries on the '/usr/local/ssl/lib64' directory has been loaded.
Ubuntu:
Configure OpenSSL Binary
We will replace the default openssl binary '/usr/bin/openssl or /bin/openssl' with the new version '/usr/local/ssl/bin/openssl'.
On Ubuntu 22.04 LTS
Backup the binary files.
mv /usr/bin/c_rehash /usr/bin/c_rehash.bak
mv /usr/bin/openssl /usr/bin/openssl.bak
Edit the '/etc/environment' file using nano.
nano /etc/environment
Now add the new OpenSSL binary directory as below
PATH="/usr/local/sbin:/usr/local/bin:/usr/sbin:/usr/bin:/sbin:/bin:/usr/games:/usr/local/games:/snap/bin:/usr/local/ssl/bin"
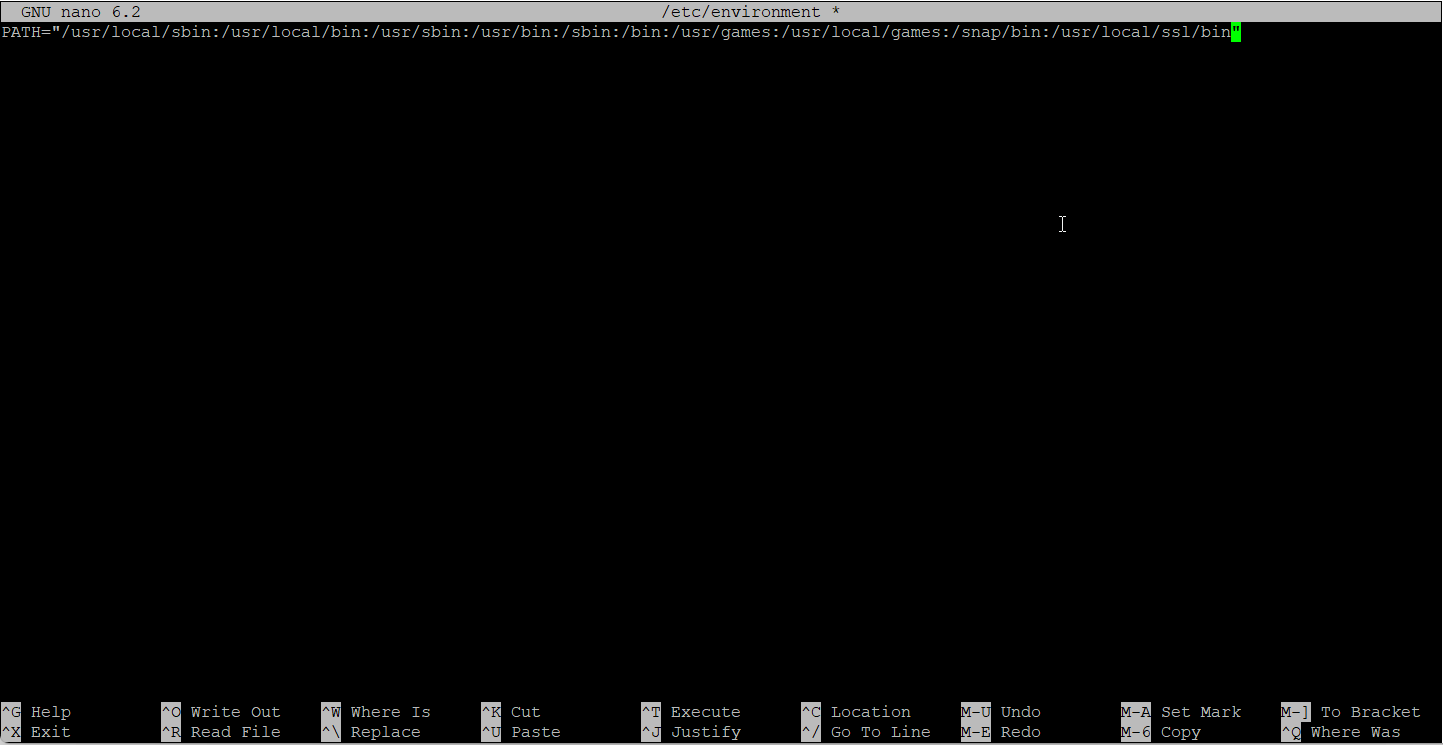
Save and exit.
Reload the environment file and test the new updated binary PATH.
source /etc/environment
echo $PATH
Now check the OpenSSL binary file again.
which openssl
You will get the result as below.
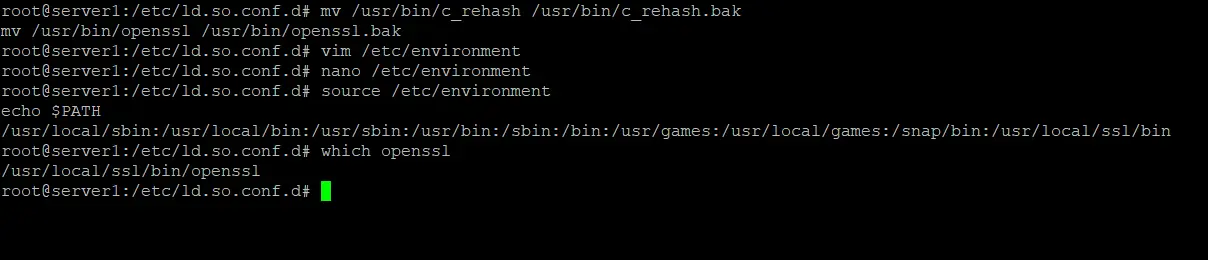
The binary path of OpenSSL for Ubuntu has been updated.
On CentOS 7.6
Back up the CentOS OpenSSL binary files.
mv /bin/openssl /bin/openssl.bak
Create new environment files for OpenSSL.
vim /etc/profile.d/openssl.sh
Paste the configuration below.
#Set OPENSSL_PATH
OPENSSL_PATH="/usr/local/ssl/bin"
export OPENSSL_PATH
PATH=$PATH:$OPENSSL_PATH
export PATH
Save and exit.
Make the openssl.sh file executable.
chmod +x /etc/profile.d/openssl.sh
Load the OpenSSL environment and check the PATH bin directory using the commands below.
source /etc/profile.d/openssl.sh
echo $PATH
Now check the OpenSSL file.
which openssl
The binary path for OpenSSL on CentOS has been updated.
Step 4 - Testing
Test the new OpenSSL version using the following command.
openssl version -a
The result on Ubuntu.
The latest stable version of OpenSSL has been installed from source on Linux Ubuntu 22.04 and CentOS 7.6.

