How to Install CouchDB on Ubuntu 20.04
This tutorial exists for these OS versions
- Ubuntu 20.04 (Focal Fossa)
- Ubuntu 18.04 (Bionic Beaver)
On this page
CouchDB is an open-source NoSQL database, it has been created by Apache Software Foundation in the year 2005. It is optimized for multi-tasking functions. CouchDB has two modes, standalone mode, and clustered mode. If you are using a single server you can use standalone mode and if you are using more than one server, then you can use clustered mode. In this guide, you will learn how to install CouchDB NoSQL database on Ubuntu 20.04 and how to create your first CouchDB database using the integrated Foxton Control panel.
Prerequisites
- The server having Ubuntu 20.04 installed and running
- A user with sudo privileges
Follow the below steps as mentioned, to successfully install CouchDB on Ubuntu 20.04.
Update your Linux System
At the very start, it is recommended to update the system and upgrade it by checking the packages which are already installed. For this purpose, press Ctrl+Alt+T from your keyboard. Try the apt command in your terminal using sudo privileges:
$ sudo apt update && upgrade
It will ask for your root user password to proceed. Add password to continue.
![]()
Configure your Server
To install Apache CouchDB on your Ubuntu 20.04 Linux System, you have to install the software as a prerequisite. This software is hlpful for the configuration of the CouchDB repository in Ubuntu 20.04. So, to install this software, try this command:
$ sudo apt-get install software-properties-common
![]()
It will ask for your root user password and you have to provide it, to precede this installation. It will ask you to confirm or cancel this installation by taping Y or N. Press Y to continue the installation process.
Install Curl Utility
After that, you must have to install the curl utility to enable the curl command in the terminal. Use the below command to install curl:
$ sudo apt install curl
![]()
In this case, it will again ask for your confirmation or cancellation. So to precede the installation of the curl command, tap Y to continue.
Download CouchDB repository key
Now, it’s time for Apache CouchDB to be loaded in Ubuntu 20.04. To enable it, use these two commands:
$ curl –L https://couchdb.apache.org/repo/bintray-pubkey.asc | sudo apt-key add

$ echo "deb https://apache.bintray.com/couchdb-deb focal main" | sudo tee –a /etc/apt/sources.list
![]()
Now again update the Ubuntu 20.04 System executing the apt command.
$ sudo apt update
Install CouchDB on Ubuntu 20.04
So, this is it. We have reached the last step. Now we will install the Apache CouchDB.Execute this command in your Ubuntu 20.04 terminal to continue:
$ sudo apt install couchdb
Wait for some time to get the installation process done. It will through a prompt message to make you understand that you have to select one mode. After reading this, press Enter to proceed.
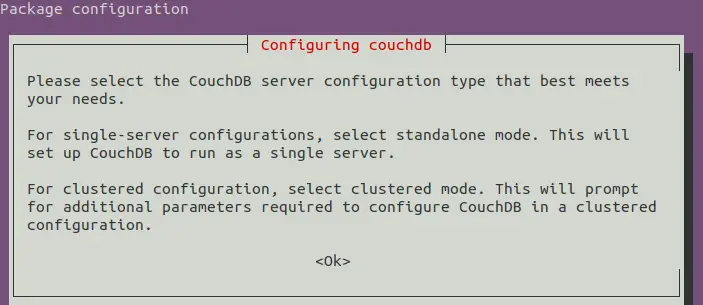
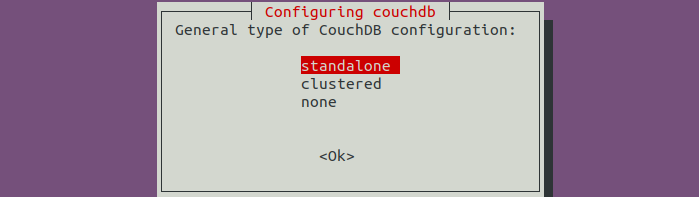
Chose Configuration Mode
Now it will display types of configurations to choose from. If a single server is used by you, choose the standalone mode or if using many servers, choose clustered. In our case, we have chosen standalone because we are using a single server system. Press Enter to proceed.
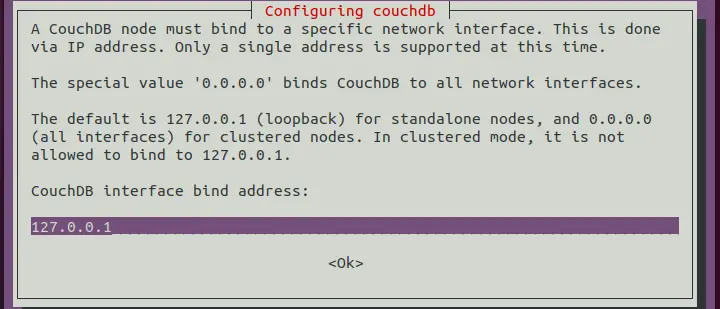
Add IP Address
After that, it will ask you for the IP address. If you are using a single server, do not change it. Continue with the default one for installation as shown in the image. As we have a single server we will carry on with the given IP which is 127.0.0.1. Press Enter to continue the process.
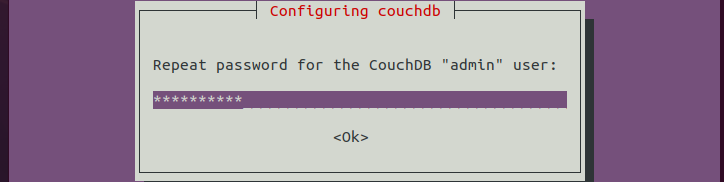
Create Password
Now, to create an admin account, it will ask for your password to proceed. Add your password and press Enter to proceed the next step. You can even leave it empty as it is not necessary to create an admin account.
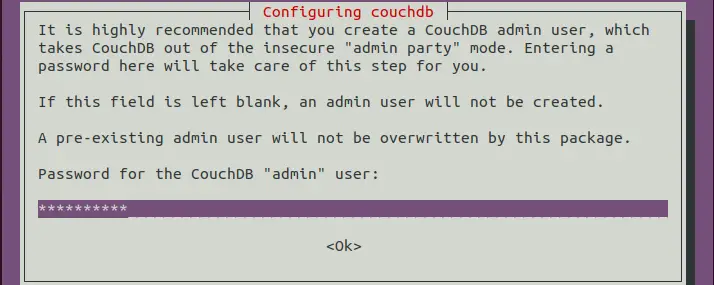
Then it will again inquire to re-enter your password. Add password again and tap Enter to continue.
The system will start installing Apache CouchDB on Ubuntu distribution. Wait for some time for the system to get the installation done.
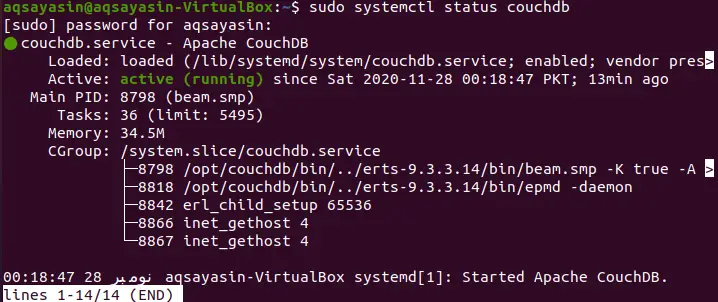
Check Installation Status
You can also check for the installation of CouchDB if it has gone properly or not. You can use the below sudo command to check the activation of CouchDB:
$ sudo systemctl status couchdb
Or
$ curl http://127.0.0.1:5984/
It will again ask you for the root user password. Add a password to proceed.
![]()
It will show the active state of the Apache CouchDB if it is working properly with all its specifications as well. As you can see in this below image that CouchDB is actively running on Ubuntu 20.04.
Create a New CouchDB Database
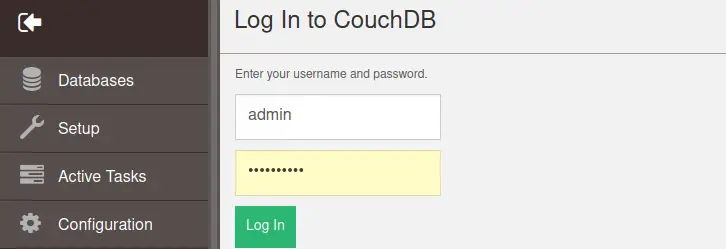
You can add a new database using CouchDB with your username and password, by using the control panel Fauxton. For this purpose open any browser installed in your Ubuntu Linux 20.04 and add the below-mentioned link to the new tab. Add your root username and password to further proceed with the creation of the database.
http://127.0.0.1:5984/_utils/
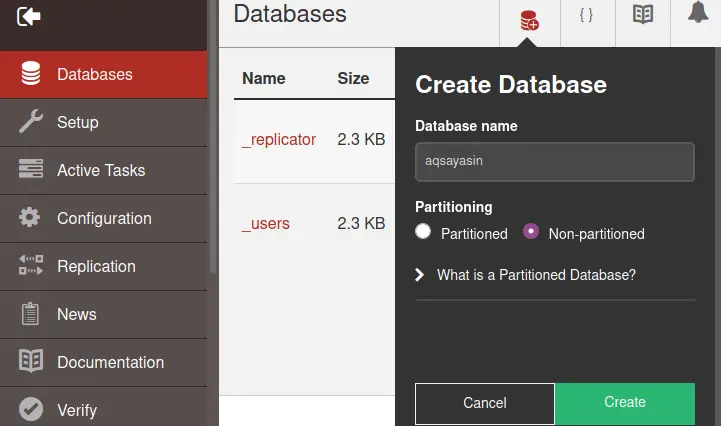
You can see an icon button at the top right corner of the Fauxton page for creating a database. Click on it to continue.
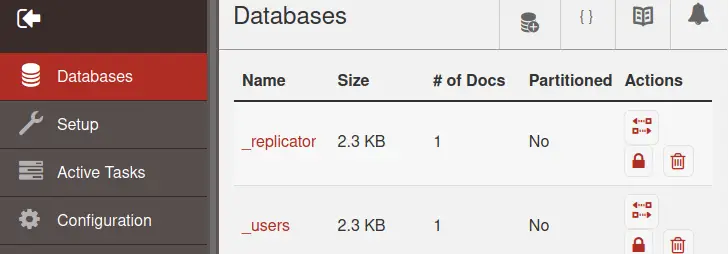
Create a database with any name. I have created it with the name aqsayasin. Select partitioned or non-partitioned. Click on the Create button to continue.
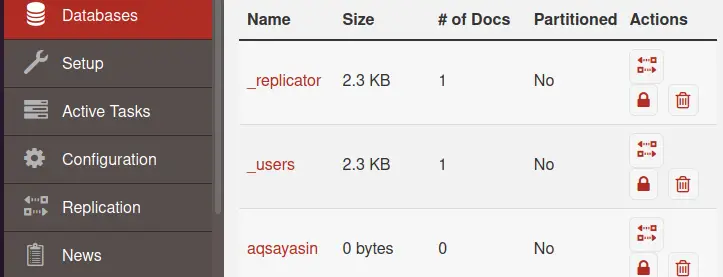
At last, you can see the database we have just created with the name aqsayasin has been displayed in the list of current databases.
Conclusion
This tutorial shows how to install the curl utility, to update the system using apt, to install CouchDB on the Ubuntu server and to create your first CouchDB database using Fauxton.

