How to install Paperwork DMS on Ubuntu 18.04 LTS
Paperwork is a free, open-source and self-hosted personal document manager that can be used to manages scanned documents and PDFs. It is alternate solutions to other services like Evernote, Microsoft OneNote, and Google Keep. It comes with lots of features including, Automatic detection of page orientation, Scan, OCR, Document labels, Search, Keyword suggestions, Quick edit of scans and much more.
In this tutorial, we will going to explain how to install Paperwork on Ubuntu 18.04 server.
Requirements
- A server running Ubuntu 18.04 server.
- A non-root user with sudo privileges.
- A static IP address 192.168.0.235 configure on your server.
Install LAMP Server
First, you will need to install Apache, MariaDB, PHP and other required packages to your server. You can install all of them by running the following command:
sudo apt-get update -y
sudo apt-get install apache2 mariadb-server php7.2 libapache2-mod-php7.2 php7.2-cli php7.2-gd php7.2-mysql php7.2-curl php7.2-xml php7.2-mbstring php-pear php7.2-zip php-dev git wget libmcrypt-dev php7.2-gd unzip -y
Next, you will need to install Nodejs to your system. By default, the latest version of Nodejs is not available in the Ubuntu 18.04 default repository. So, you will need to add Nodejs repository to your system. You can do this with the following command:
curl -sL https://deb.nodesource.com/setup_10.x | sudo bash -
Next, install Nodejs using the following command:
sudo apt-get install nodejs -y
Next, you will need to install the mcrypt PHP extension to your system. You can install it with the pecl command:
sudo pecl channel-update pecl.php.net
sudo pecl install mcrypt-1.0.1
When asked, just press enter to continue.
Next, add the extension mcrypt.so to php.ini file with the following command:
sudo sed -i.bak '927iextension=mcrypt.so' /etc/php/7.2/cli/php.ini
Next, Grab installing path and add to cli and apache2 php.ini configuration.
sudo bash -c "echo extension=/usr/lib/php/20170718/mcrypt.so > /etc/php/7.2/cli/conf.d/mcrypt.ini"
sudo bash -c "echo extension=/usr/lib/php/20170718/mcrypt.so > /etc/php/7.2/apache2/conf.d/mcrypt.ini"
Next, verify the PHP mcrypt extension with the following command:
sudo php -i | grep "mcrypt"
Output:
mcrypt
mcrypt support => enabled
mcrypt_filter support => enabled
mcrypt.algorithms_dir => no value => no value
mcrypt.modes_dir => no value => no value
ss
Next, restart Apache and MariaDB service and enable them to start on boot with the following command:
sudo systemctl restart apache2
sudo systemctl restart mariadb
sudo systemctl enable apache2
sudo systemctl enable mariadb
Configure Database
By default, MariaDB is not secured. So you will need to secure it first. You can secure it by running the following script:
sudo mysql_secure_installation
Answer all the questions as shown below:
    Enter current password for root (enter for none):
    Set root password? [Y/n]: N
    Remove anonymous users? [Y/n]: Y
    Disallow root login remotely? [Y/n]: Y
    Remove test database and access to it? [Y/n]:  Y
    Reload privilege tables now? [Y/n]:  Y
Once the MariaDB is secured, log in to MariaDB shell:
mysql -u root -p
Enter your root password, then create a database and user for Paperwork:
MariaDB [(none)]> CREATE DATABASE paperwork DEFAULT CHARACTER SET utf8 COLLATE utf8_general_ci;
MariaDB [(none)]>GRANT ALL PRIVILEGES ON paperwork.* TO 'paperwork'@'localhost' IDENTIFIED BY 'paperwork' WITH GRANT OPTION;
Next, Flush the privileges with the following command:
MariaDB [(none)]> FLUSH PRIVILEGES;
Next, exit from the MariaDB console with the following command:
MariaDB [(none)]> EXIT
Dowload and Install Paperwork
First, download the latest version of Paperwork by running the following command:
cd /var/www/html
git clone -b 1 https://github.com/twostairs/paperwork.git
Next, instruct PHP to ignore the "mcrypt_get_iv_size has been deprecated" message by running the following command:
cd paperwork/frontend/
sudo sed -i.bak '3ierror_reporting(E_ALL ^ E_DEPRECATED);' app/config/app.php
Next, you will need to install Composer to your system. Composer is a dependency Manager for PHP that can be used to install dependencies required by PHP. You can install Composer with the following command:
curl -sS https://getcomposer.org/installer | php
sudo mv composer.phar /usr/local/bin/composer
Next, install PHP dependencies through composer with the following command:
sudo composer install
Next, populate the database with the following command:
sudo php artisan migrate
Output:
PHP Warning:  Module 'mcrypt' already loaded in Unknown on line 0
**************************************
*     Application In Production!     *
**************************************

Do you really wish to run this command? y
Migration table created successfully.
Migrated: 2014_07_22_194050_initialize
Migrated: 2014_07_24_103915_create_password_reminders_table
Migrated: 2014_10_08_203732_add_visibility_to_tags_table
Migrated: 2015_01_21_034728_add_admin_to_users
Migrated: 2015_05_05_094021_modify_tag_user_relation
Migrated: 2015_05_22_220540_add_version_user_relation
Migrated: 2015_06_15_224221_add_tag_parent
Migrated: 2015_06_30_125536_add_sessions_table
Migrated: 2015_07_29_130508_alter_versions
Migrated: 2016_10_21_224100_fix_timestamps_for_postgres_again
Next, install npm and bower dependencies:
sudo npm install -g gulp bower
sudo npm install
You should get some warning messages after running above command. Just ignore all of them and run the following command:
sudo bower install --allow-root
sudo gulp
Next, give proper permissions to the paperwork directory:
sudo chown www-data:www-data -R /var/www/html/paperwork
sudo chmod -R 755 /var/www/html/paperwork
Configure Apache for paperwork
Next, you will need to create an Apache virtual host for paperwork:
You can do this with the following command:
sudo nano /etc/apache2/sites-available/paperwork.conf
Add the following lines:
<VirtualHost *:80>
     ServerAdmin [email protected]
     DocumentRoot /var/www/html/paperwork/frontend/public
     ServerName example.com

     <Directory /var/www/html/paperwork/frontend/public>
          Options Indexes FollowSymlinks
          AllowOverride All
          Require all granted
     </Directory>

ScriptAlias /cgi-bin/ /usr/lib/cgi-bin/
<Directory "/usr/lib/cgi-bin">
    AllowOverride None
    Options +ExecCGI -MultiViews +SymLinksIfOwnerMatch
    Order allow,deny
    Allow from all
</Directory>

     ErrorLog ${APACHE_LOG_DIR}/error.log
     CustomLog ${APACHE_LOG_DIR}/access.log combined
</VirtualHost>
Save and close the file. Then, enable apache virtual host with the following command:
sudo a2ensite paperwork
Finally, enable Apache rewrite module and restart Apache service to apply all the changes:
sudo a2enmod rewrite
sudo systemctl restart apache2
Access Paperwork Web Interface
Paperwork is now installed and configured, it's time to access it through a web browser.
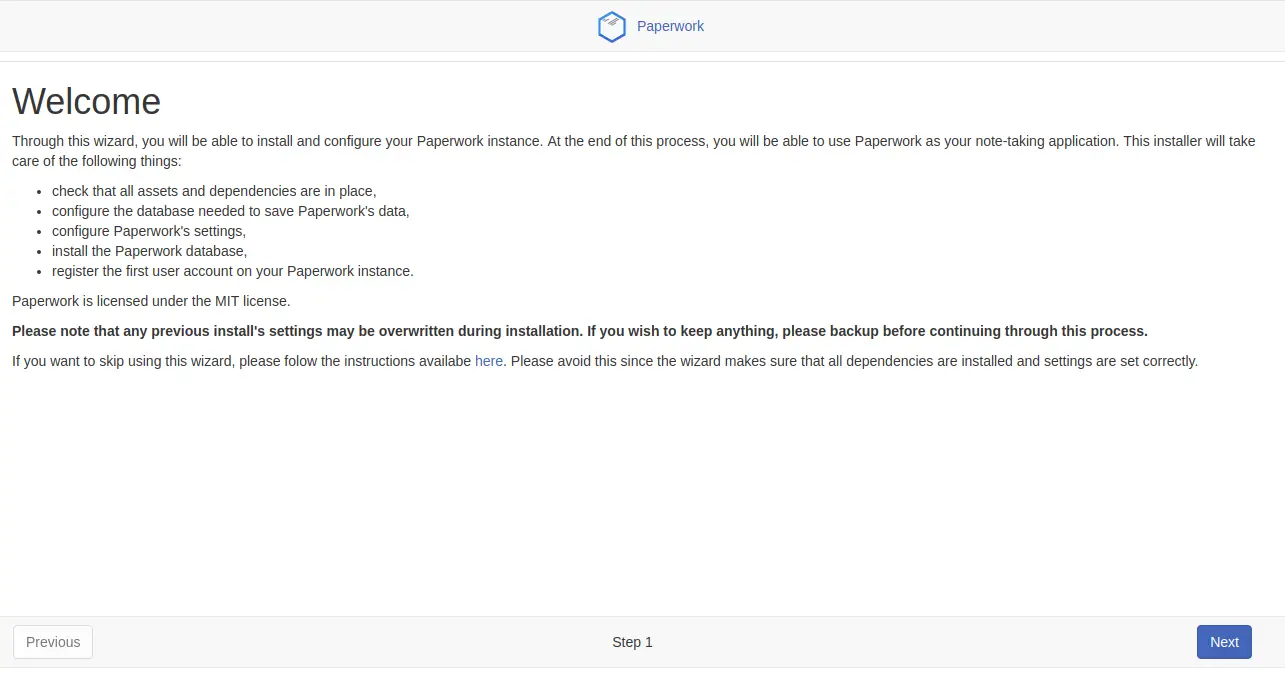
Open your web browser and type the URL http://example.com. You will be redirected to the Paperwork welcome page:
Click on the Next button to continue. You should see the following page:
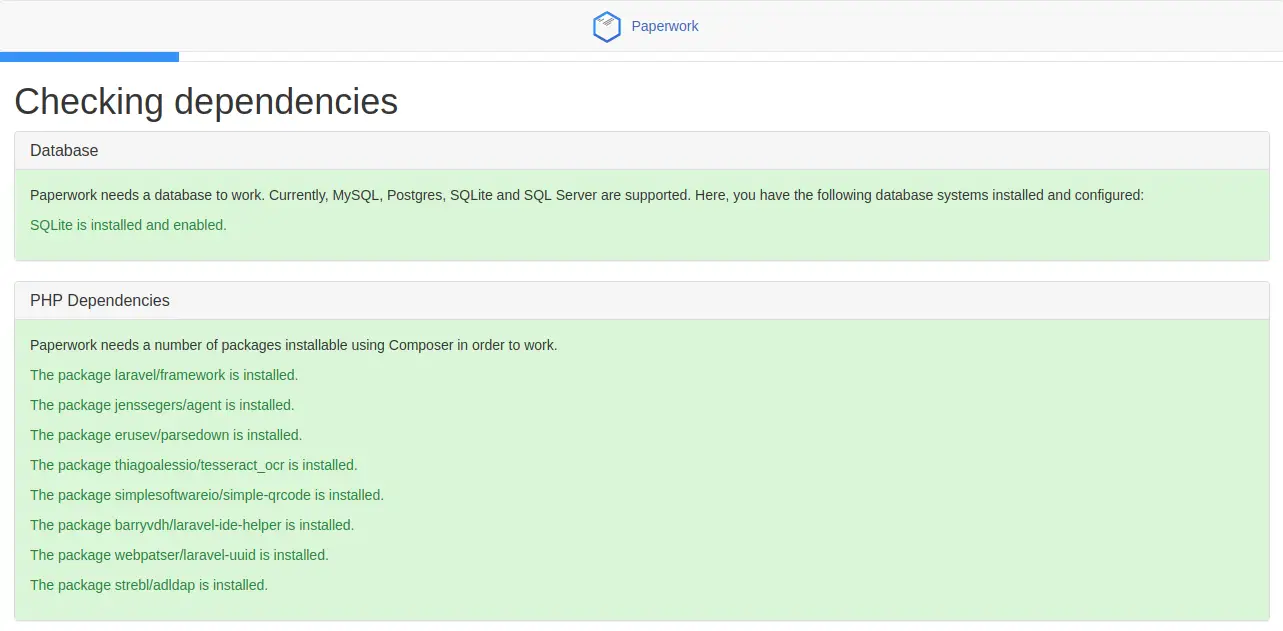
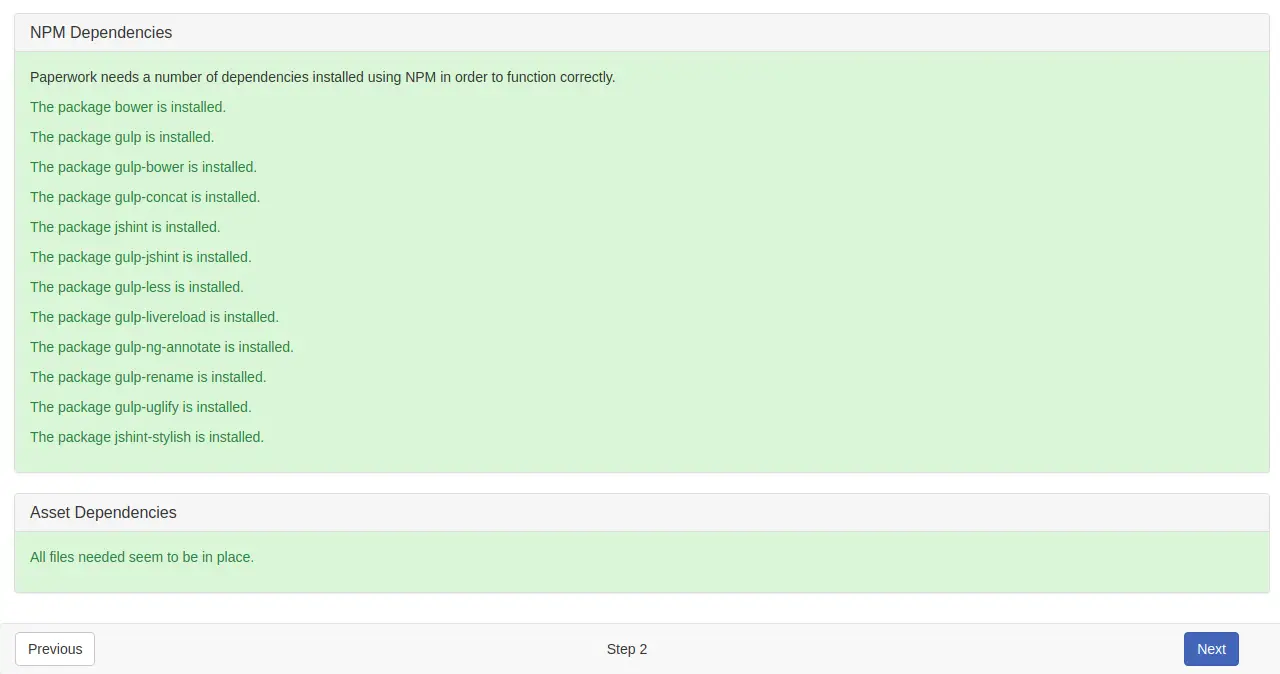
Make sure all the required dependencies have been installed. Then, click on the Next button, you should see the following page:
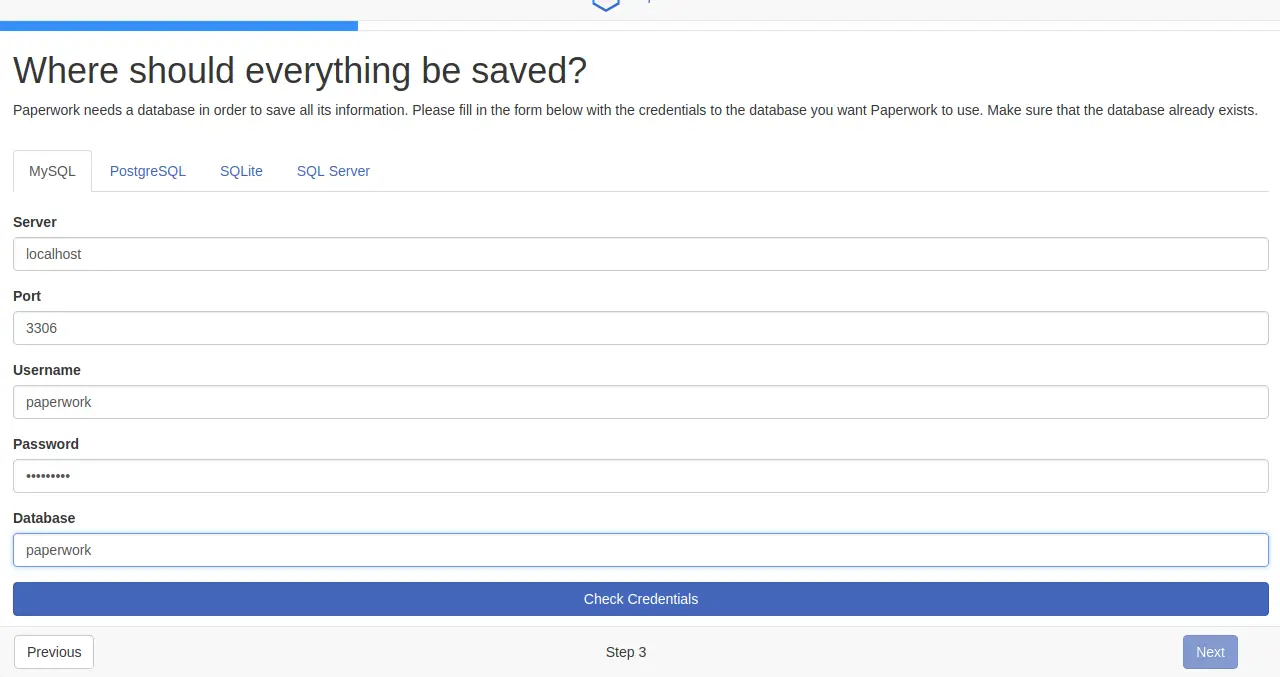
Here, provide your database details like, database name, username, password and port. Then, click on the Next button. You should see the following page:
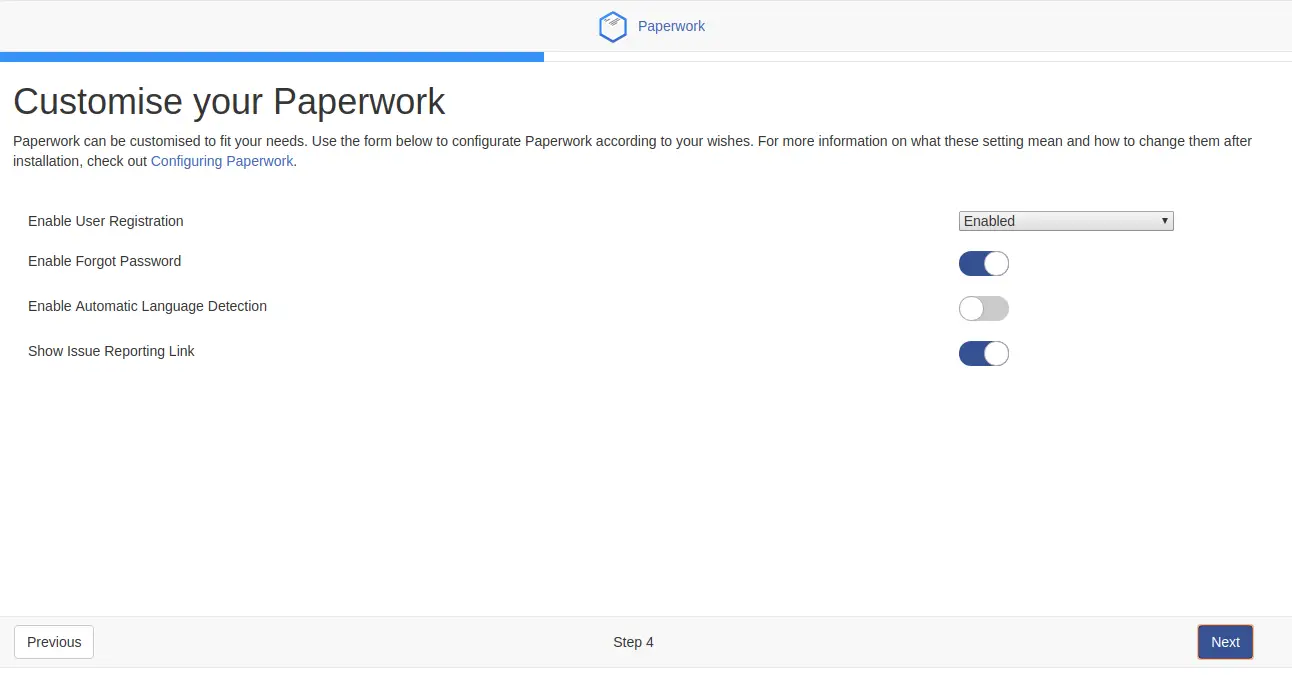
Here, customize Paperwork as per your need. Then, click on the Next button. You should see the following page:
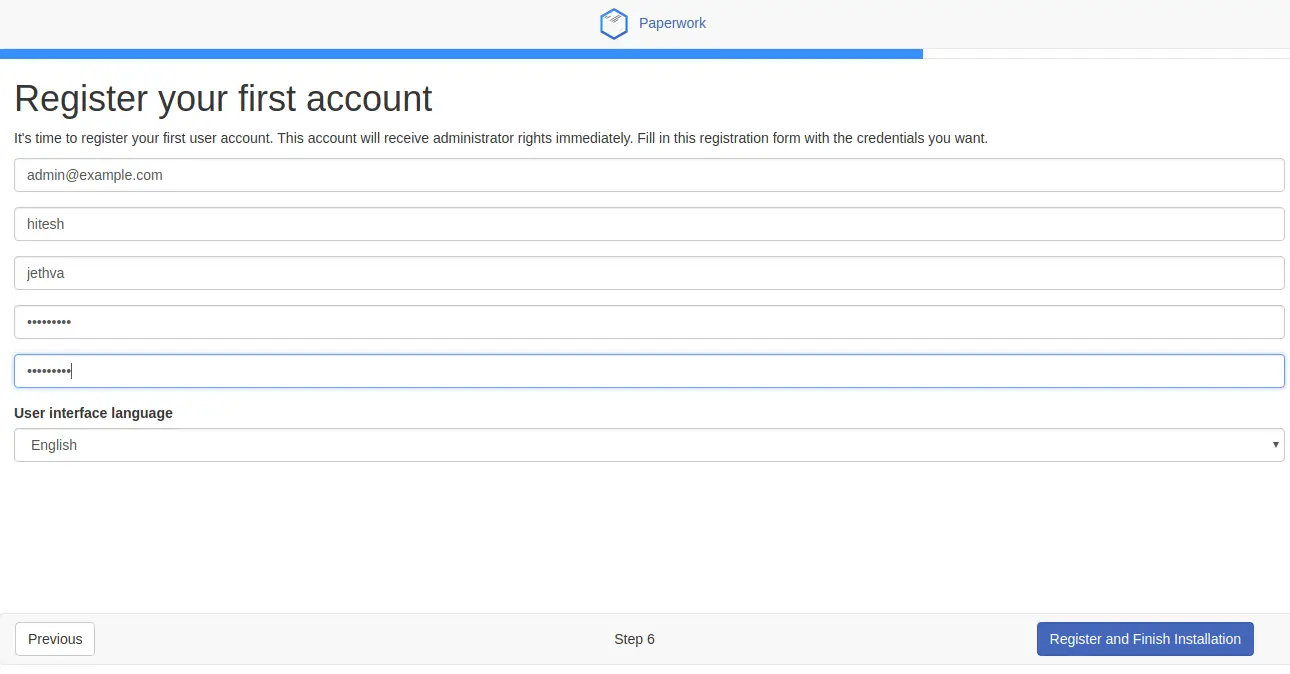
Here, provide your admin user details. Then, click on the Register and Finish Installation button. you should see the following page:
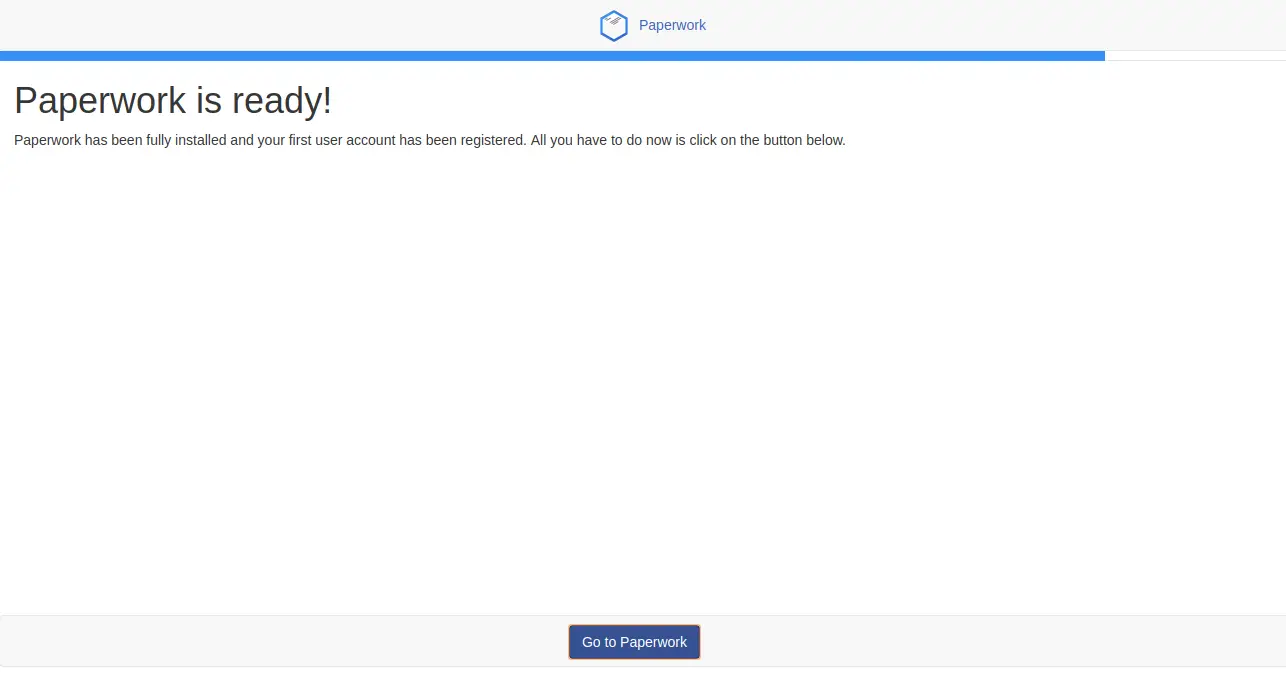
Now, click on the Go to Paperwork button. You will be redirected to the Paperwork Login page as shown below:
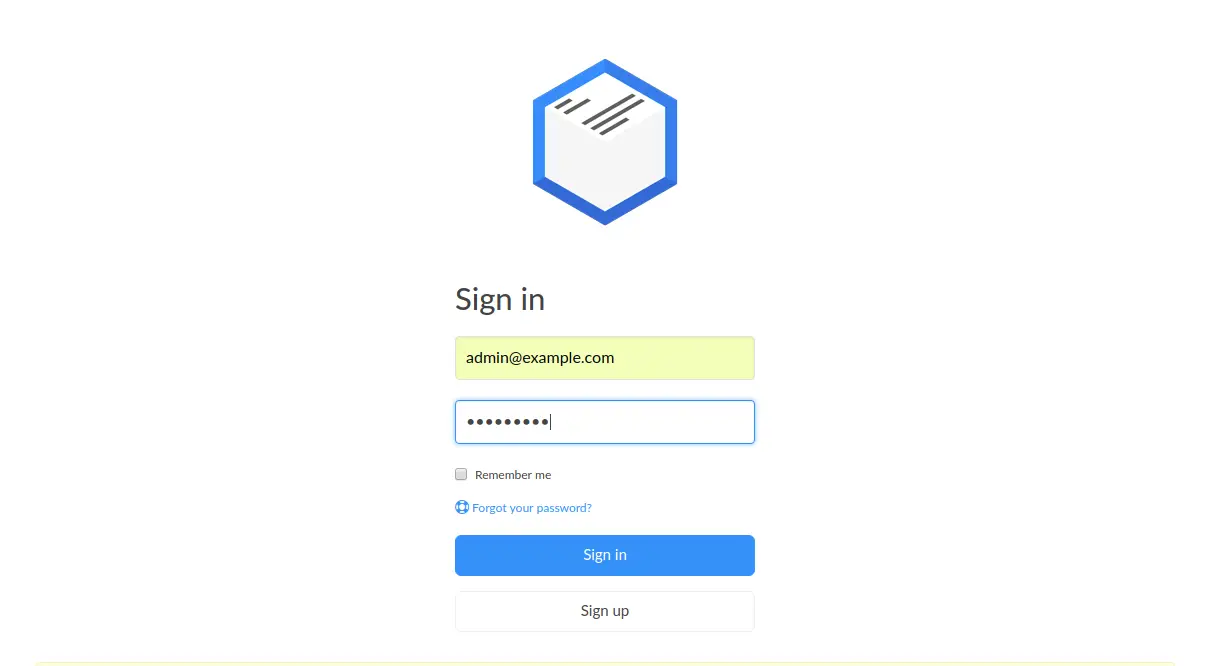
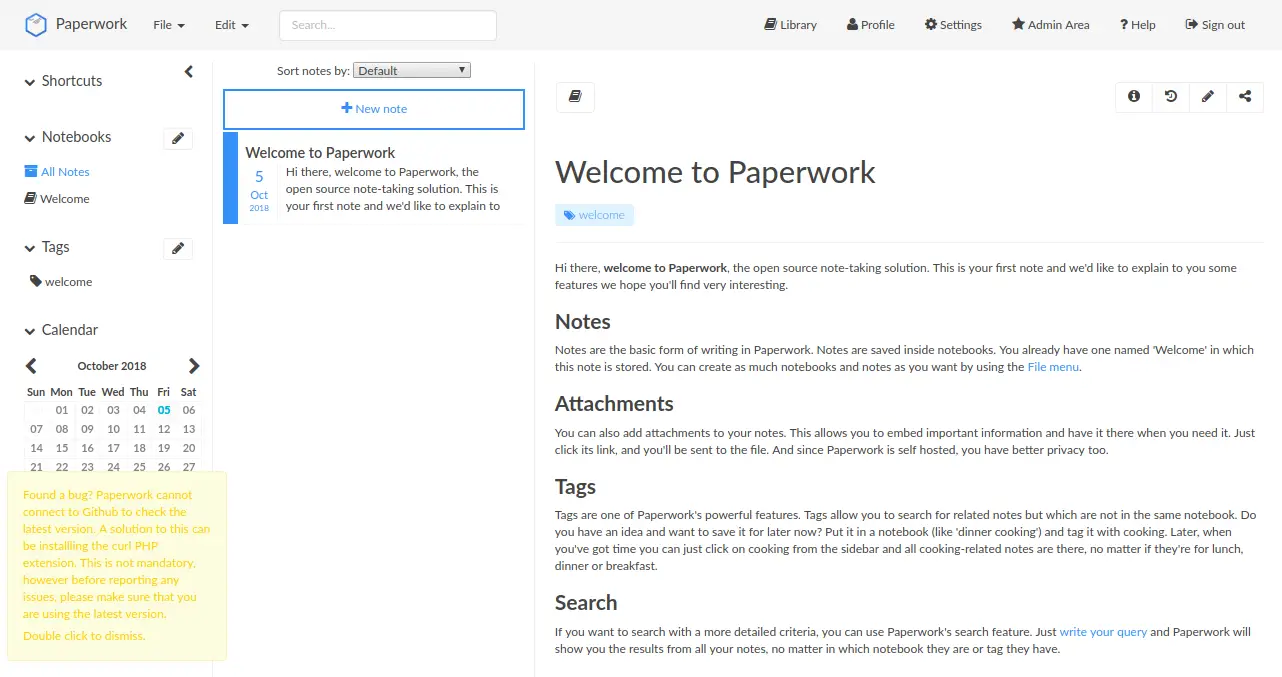
Here, provide your admin email address and password. Then click on the Sign In button. You should see the Paperwork dashboard in the following page: