How to Install and Configure Mantis Bug Tracker on Ubuntu 18.04 LTS
Mantis is a free and open-source bug tracking web-based application tool available for Windows, OS X, and Linux. It is written in PHP and supports different type of databases. Mantis Bug Tracker also is known as MantisBT.
MantisBT is simple to use and it has lots of features like
- Users can customize fields for issue creation/view/ issue work-flow as well as notification
- Mantis support Release Features to manage various releases of a project
- Easy collaboration with team members and client
- Report issues via email
- Email notification whenever any changes being made on issues
- Easy to use Dashboard
- User-based access levels, user can have a different type of access levels for different projects
- Support lots of Plug-in
In this tutorial, we will learn how to install MantisBT on Ubuntu 18.04 LTS.
Prerequisites
An Ubuntu 18.04 operating system with minimal installation.
A sudo user with root privileges.
1 Getting Started
First, log in to your server with sudo privileges and update the system with the latest stable version using the following command:
sudo apt update && apt upgrade -y
2 Install LAMP Server
Mantis requires Apache2, PHP and Database Server to be installed on your server.
Install Apache Web Server
You can install apache web server by the following command:-
sudo apt install apache2 -y
Now let's check apache service
sudo systemctl status apache2
If apache webserver not running then run the following command
sudo systemctl start apache2
Now enable apache service to start at boot time by running the following command:
sudo systemctl enable apache2
Install PHP
Mantis is written in PHP so you need to install PHP and other required modules in your system. Run following command in Terminal
sudo apt install wget php php-cli php-fpm php-mysql php-zip php-gd php-mbstring php-curl php-xml php-pear php-bcmath
Now check the version of PHP by the following command
php -v
You will see output like
PHP 7.2.24-0ubuntu0.18.04.1 (cli) (built: Oct 28 2019 12:07:07) ( NTS )
Copyright (c) 1997-2018 The PHP Group
Zend Engine v3.2.0, Copyright (c) 1998-2018 Zend Technologies
with Zend OPcache v7.2.24-0ubuntu0.18.04.1, Copyright (c) 1999-2018, by Zend Technologies
Now you can tune PHP settings by editing the following file.
sudo vim /etc/php/7.2/apache2/php.ini
set upload filesize as per your requirement
upload_max_filesize = 50M
Install and Configure Database server for Mantis
Next, run the following command to install the MariaDB server.
sudo apt install mariadb-server mariadb-client
Now start MariaDB service and enable it to start at boot time then check MariaDB service status with the following command:
sudo systemctl start mariadb
sudo systemctl enable mariadb
sudo systemctl status mariadb
Next, secure MariaDB installation with the following command:
sudo mysql_secure_installation
Answer all the questions as below:
Set root password? [Y/n] Y
New password:
Re-enter new password:
Remove anonymous users? [Y/n] Y
Disallow root login remotely? [Y/n] Y
Remove test database and access to it? [Y/n] Y
Reload privilege tables now? [Y/n] Y
Your MariaDB installation is now secure.
Next, log in to MariaDB console as shown below:
sudo mysql -u root -p
Enter your root password when prompted.
NOTE:- If you are not able to login into mysql without sudo and it is showing ERROR 1698 (28000): Access denied for user 'root'@'localhost
For this ERROR run following commands
sudo mysql -u root
mysql> USE mysql;
mysql> UPDATE user SET plugin='mysql_native_password' WHERE User='root';
mysql> FLUSH PRIVILEGES;
mysql> exit;
sudo systemctl restart mariadb
Next, create a database for Mantis:
MariaDB [(none)]> CREATE DATABASE mantisdb;
Next, create a user and password with the following command:
MariaDB [(none)]>CREATE USER 'mantis'@'localhost' IDENTIFIED BY 'mentispassword';
Then grant privileges to the mantisdb database with the following command:
MariaDB [(none)]>GRANT ALL PRIVILEGES ON mantisdb.* TO 'mantis'@'localhost' IDENTIFIED BY 'mentispassword' WITH GRANT OPTION;
Next, run following command to reload privileges table
MariaDB [(none)]>FLUSH PRIVILEGES;
Now run exit from MariaDB console with the following command:
MariaDB [(none)]>exit;
Install Mantis BT
You can download the latest version of the mantis from their official website. You can download it with the wget command:
wget https://excellmedia.dl.sourceforge.net/project/mantisbt/mantis-stable/2.22.1/mantisbt-2.22.1.zip
After downloading Mantis BT, extract the downloaded file and move it to apache web root directory using following commands:
unzip mantisbt-2.22.1.zip
sudo mv mantisbt-2.22.1 /var/www/html/mantis/
Next Set proper permissions for mantis directory
sudo chown -R www-data:www-data /var/www/html/mantis
Next, run following command to create an apache virtual host file for Mantis.
sudo vim /etc/apache2/sites-available/mantis.conf
Now add the following lines in mantis.conf
<VirtualHost *:80>
    ServerAdmin [email protected]
    DocumentRoot "/var/www/html/mantis"
    ServerName yourdomain.com
    ServerAlias www.yourdomain.com
    ErrorLog "/var/log/apache2/mantis-error_log"
    CustomLog "/var/log/apache2/mantis-access_log" combined
        <Directory "/var/www/html/mantis/">
            DirectoryIndex index.php index.html
            Options FollowSymLinks
            AllowOverride All
            Require all granted
        </Directory>
</VirtualHost>
Save and close the file. Then enable the virtual host with the following command.
sudo a2ensite mantis.conf
Finally, restart the apache service by running the following command.
sudo systemctl restart apache2
Configure the Firewall
You need to allow port 80 through UFW firewall for Mantis BT. You can enable UFW firewall and check it's status by the following command:
sudo ufw enable
systemctl status ufw
Next, allow port 80 by the following command
sudo ufw allow 80
Access Mantis BT Web Interface
Open your web browser and type the URL http://yourdomain.com, you should see the following page:
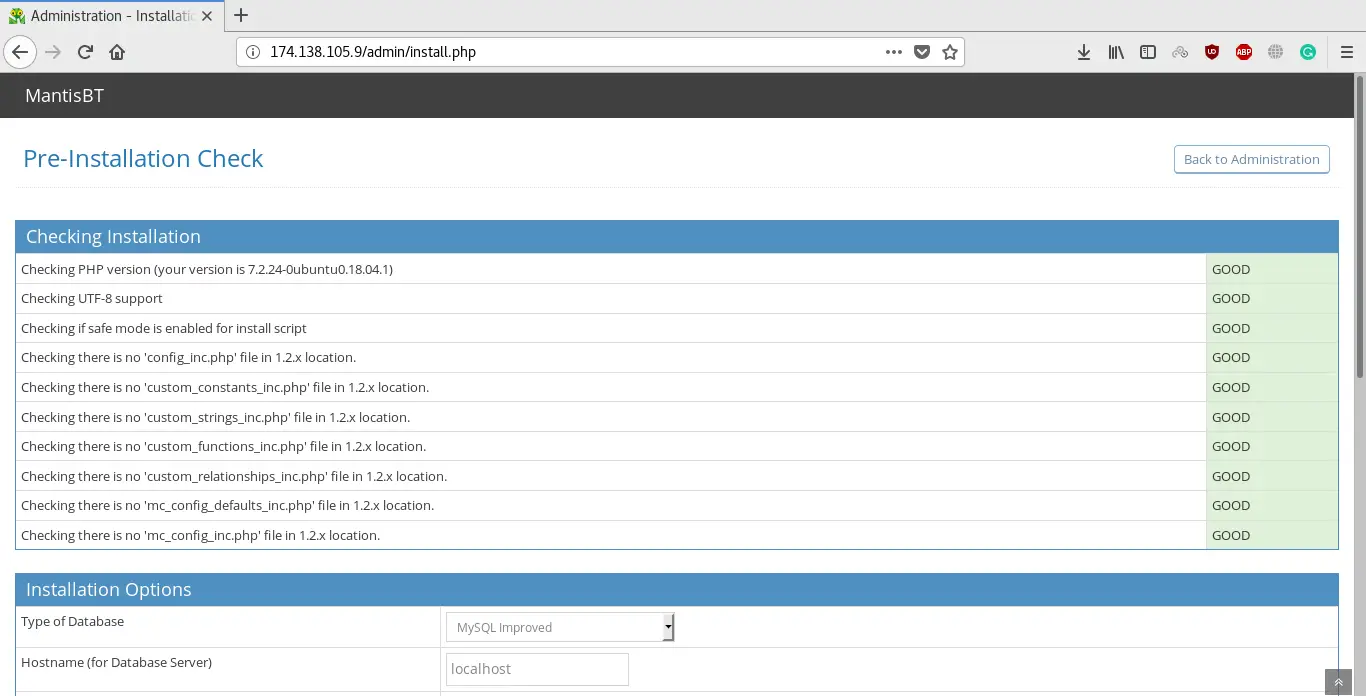
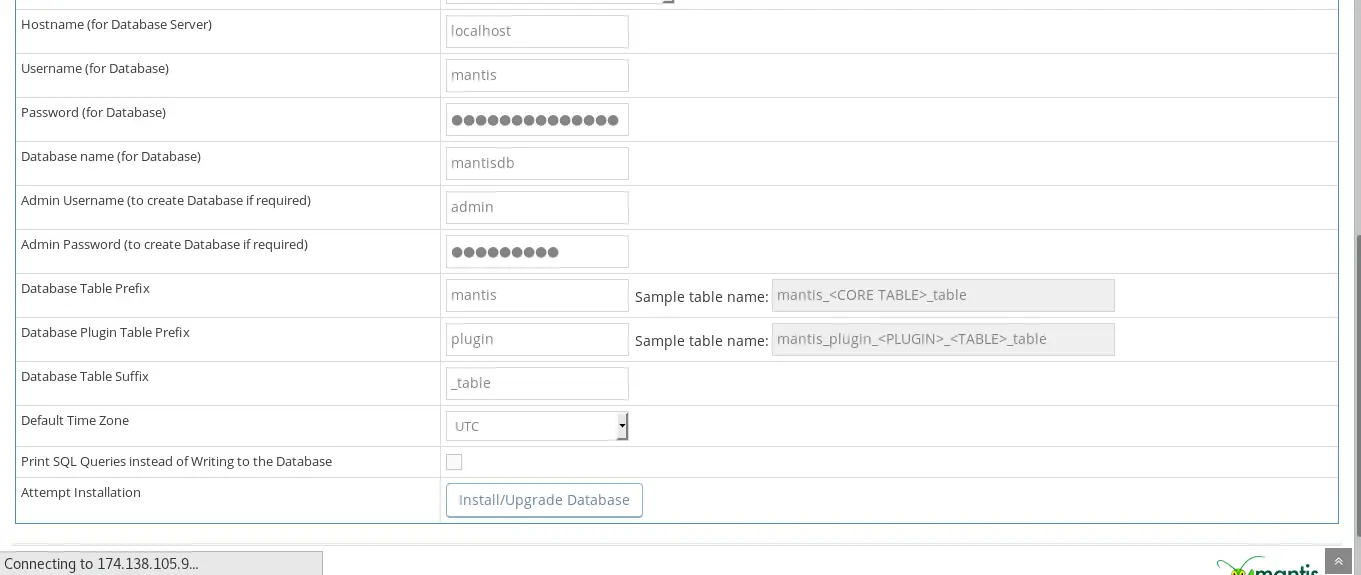
Now, Provide all the required information such as database name, database username, password, admin username, and password. Then click on the "Install/Upgrade" Database button. After the installation is completed, you should see the following page:
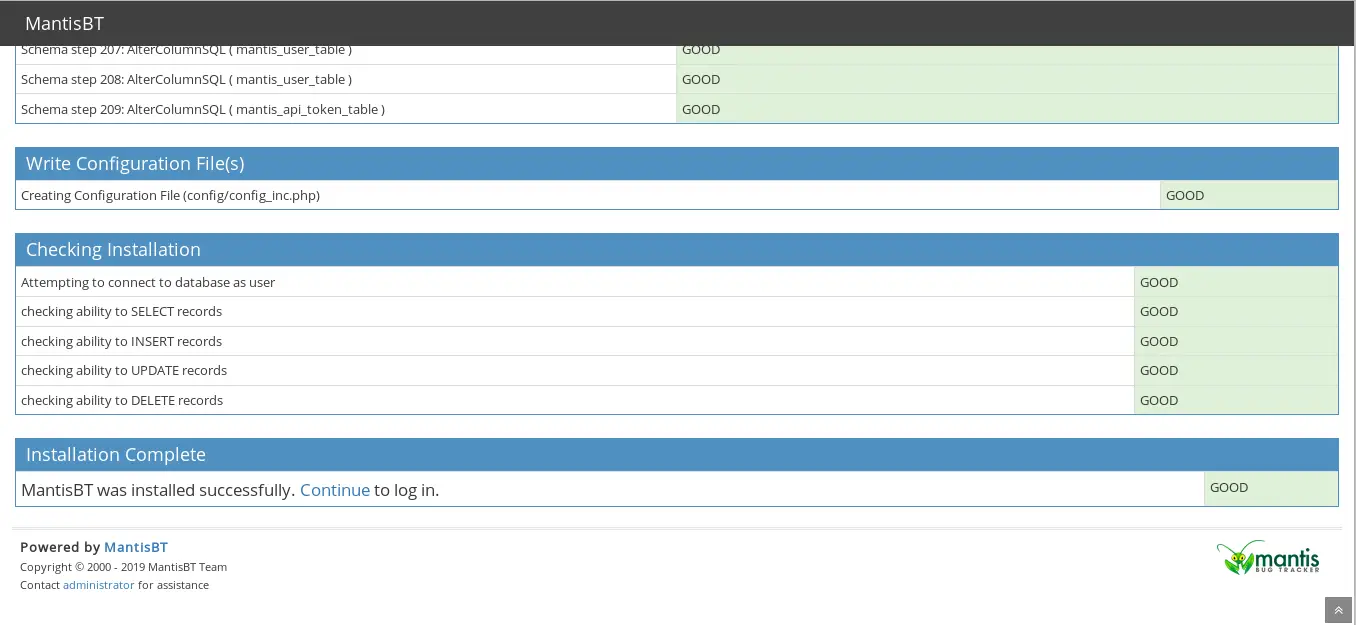
Next, click on the "Continue" button, you should see the Mantis BT login page as below
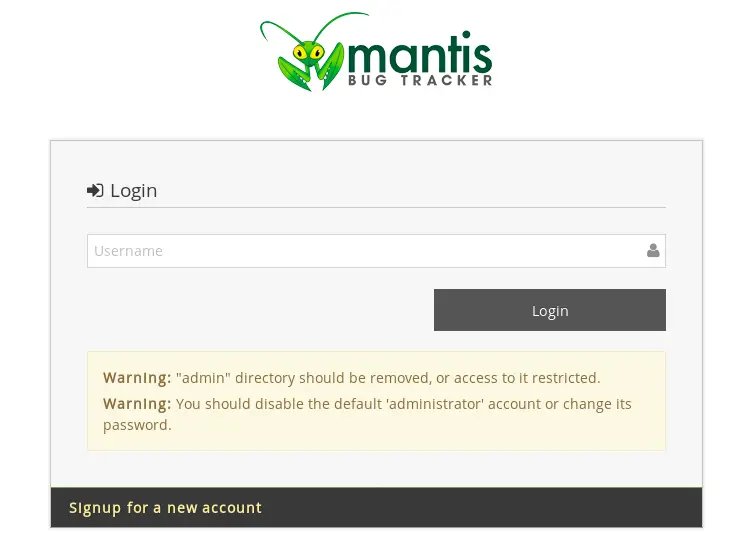
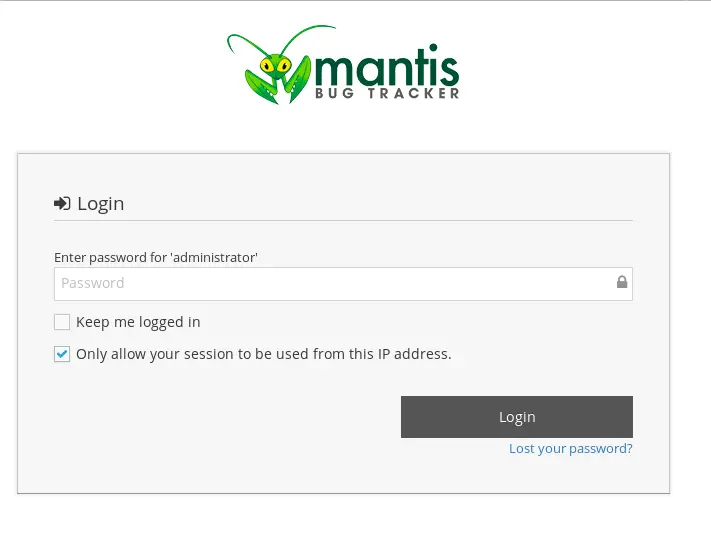
Provide a default Mantis BT username "administrator" and password "root". Then click on the "Login" button and you should see the Mantis BT Dashboard in the following image:
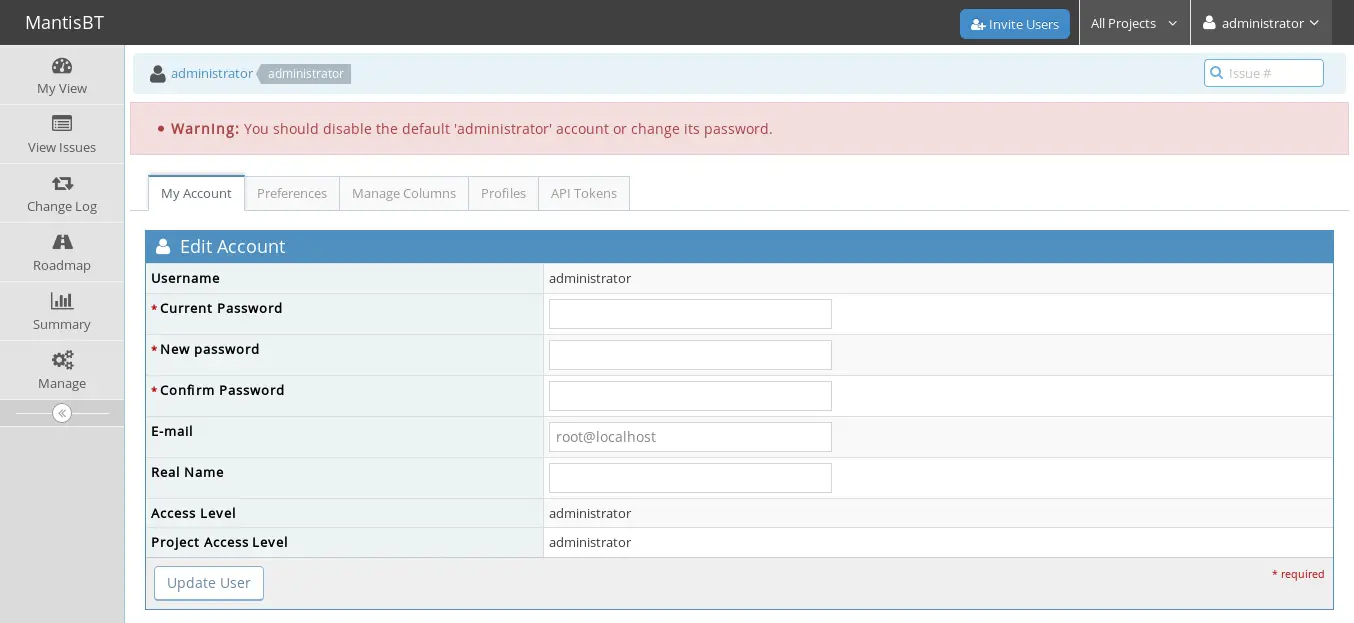
Finally, you have successfully installed Mantis BT on Ubuntu 18.04 server.

