How to create a Virtual Private Cloud (VPC) in AWS
VPC (Virtual Private Cloud) falls under the service "Network and Content Delivery" in AWS (Amazon Web Services). VPC provides us with a virtual private isolated cloud. In short, we can have a private network that is isolated from all other networks on AWS. We have complete control over all the components that are responsible for building the network. We can have IPs, CIDR (Classless Inter-Domain Routing) blocks of our choice. We can define our own rules in routing tables. We can have a public network, a private network or a private network with access to the Internet. We can have security groups that help restrict the network and access to it. We can have peering between two isolated networks, from site to site VPN.
Some of the components of VPC are charged for their usage. Click here to know the pricing of VPC and to understand VPC service more in detail you can refer AWS official documentation.
VPC can be created in 2 ways, either using the Wizard provided by AWS or manually.
In this article, we will see how to create a VPC using the Wizard as this is the simplest way to start with.
Pre-requisites
- AWS Account (Create if you don’t have one).
What we will do?
- Primary components of a VPC in brief.
- Login to AWS.
- Create a VPC using AWS Wizard.
- Delete the VPC
Primary Components of VPC in brief
The main components of a VPC are as mentioned below.
- Virtual Private Cloud: Logically isolated private network on AWS.
- Subnet: Logical division of VPC to create multiple sub networks.
- Internet Gateway: Component responsible to establish a connection with the Internet
- NAT Gateway: Network Address Translation (NAT) service for our resources in a private subnet to access the Internet, but the Internet can not access the resources belonging to this subnet keeping it Private.
- Route Tables: Component responsible to determine where network traffic from our subnet is directed.
Login to AWS
- Click here to go to AWS Login Page.
When we hit the above link, we will see a web page as follows where we are required to login using our login details.

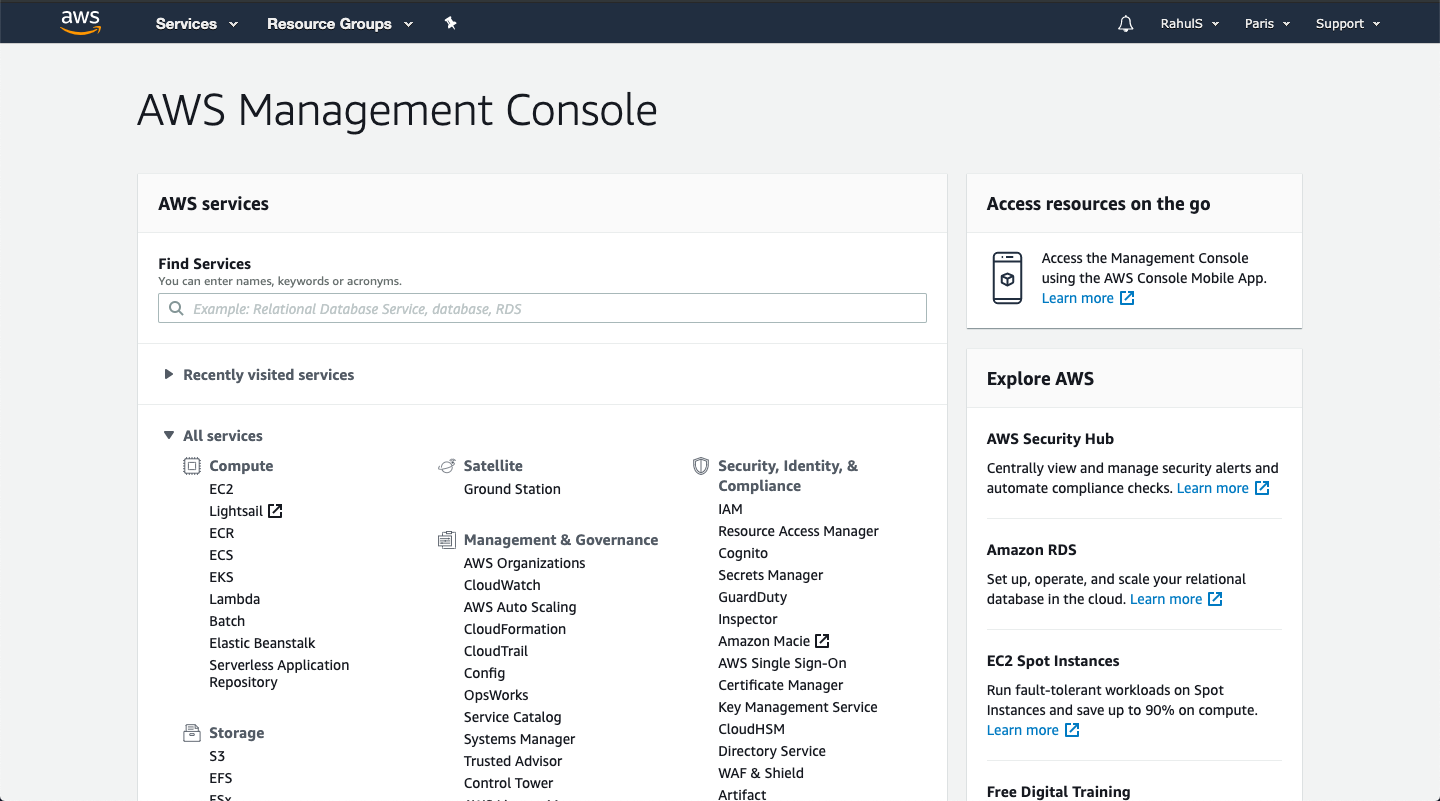
Once we login into AWS successfully, we will see the main console with all the services listed as follows.
Create a VPC
As I said, there are 2 ways using which you can create a VPC. If you want to create a VPC manually, this will require your deep understanding of the VPC and its components. The other way is to use the Wizard which does all the work for you.
In this article, we will create a VPC using the Wizard.
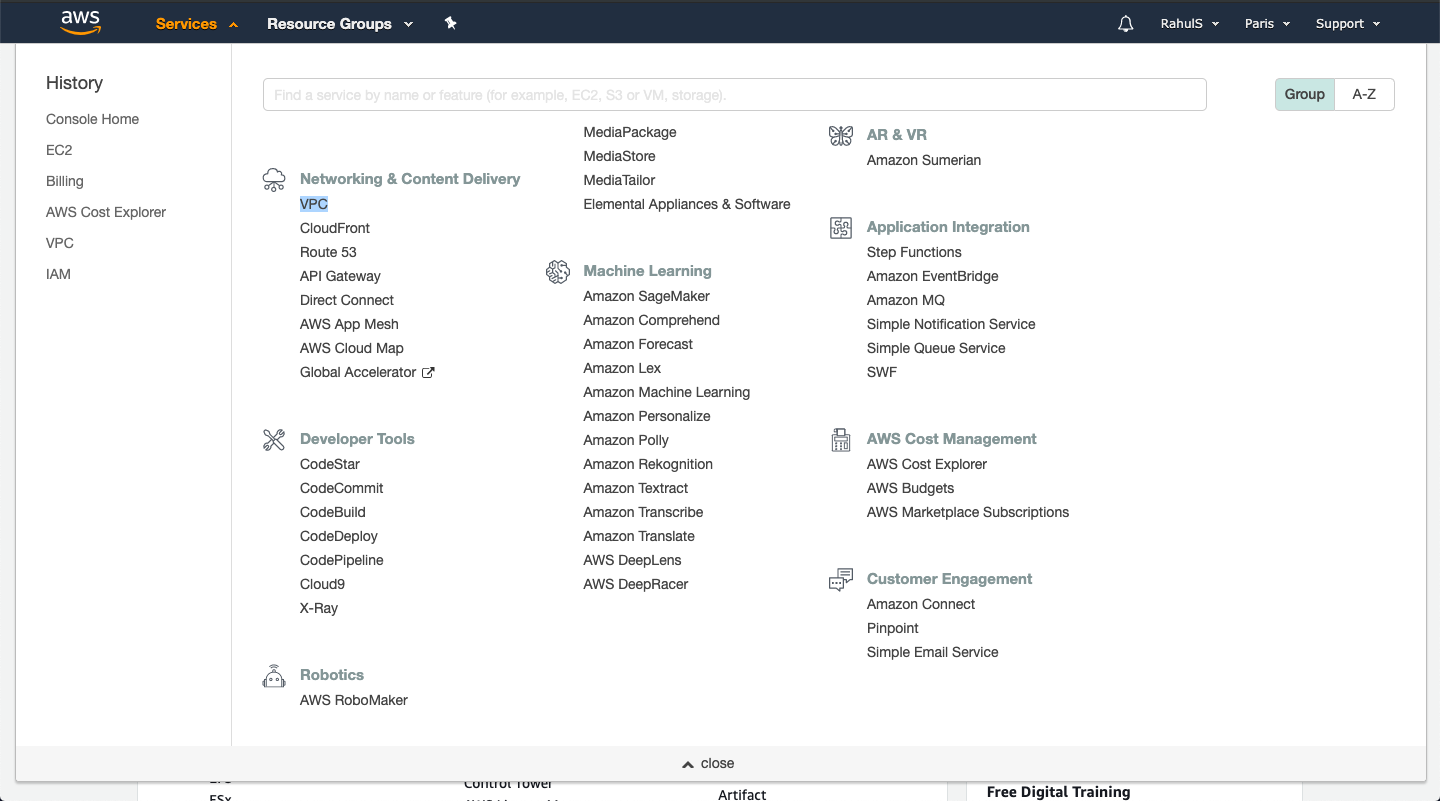
Now, once you are at the main console, scroll down and click on “VPC” under “Networking and Content Delivery” to go to VPC Dashboard
Click on “Launch VPC Wizard”. This Wizard will help us create a VPC in just a few clicks.

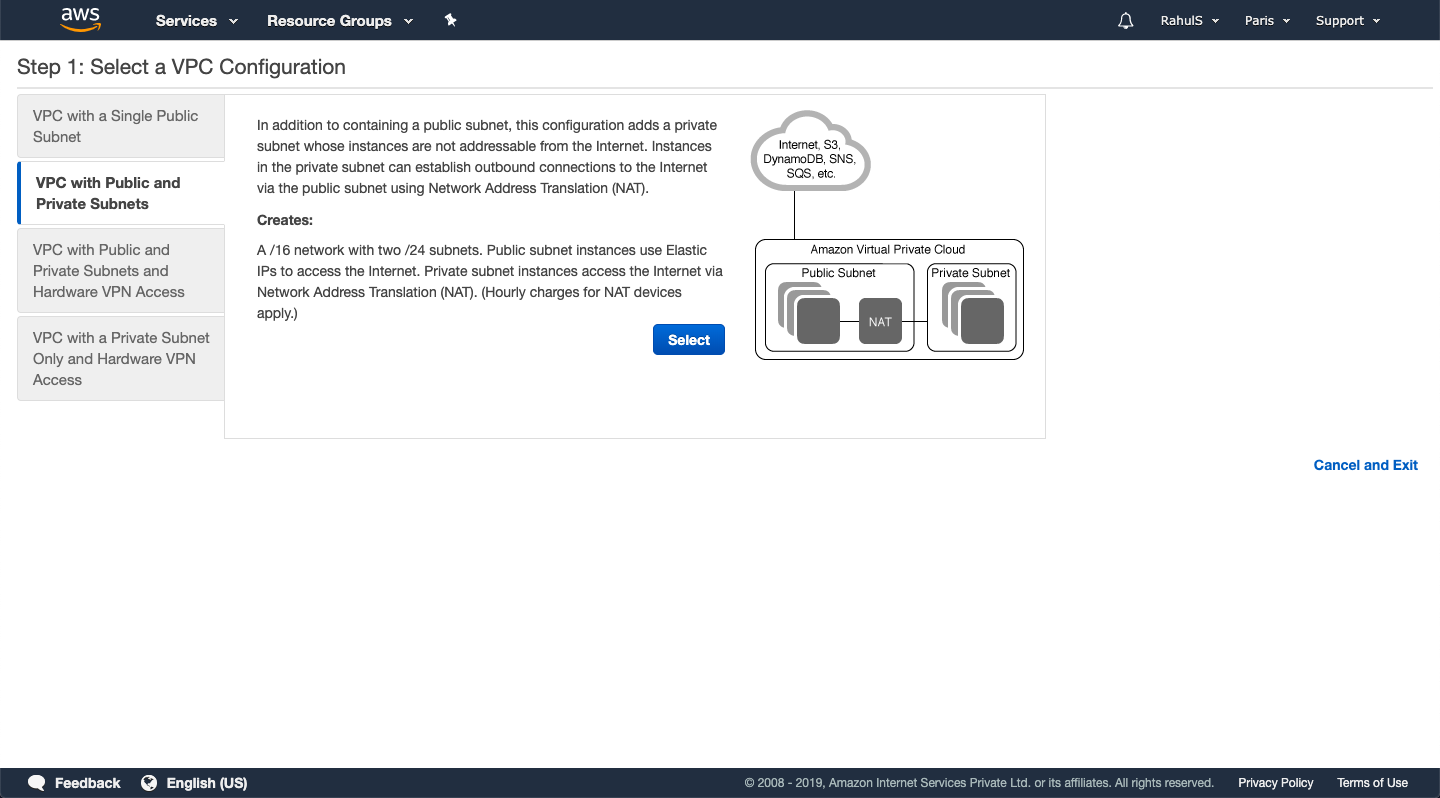
Here, we have 4 options available to create a VPC.
- VPC with a Single Public Subnet.
- VPC with Public and Private Subnets.
- VPC with Public and Private Subnets and Hardware VPN Access and
- VPC with a Private Subnet Only and Hardware VPN Access.
In this article, we will see how to create a VPC with Public and Private Subnets.
To create a VPC with a Public and Private Subnet, select the second option from the left panel.
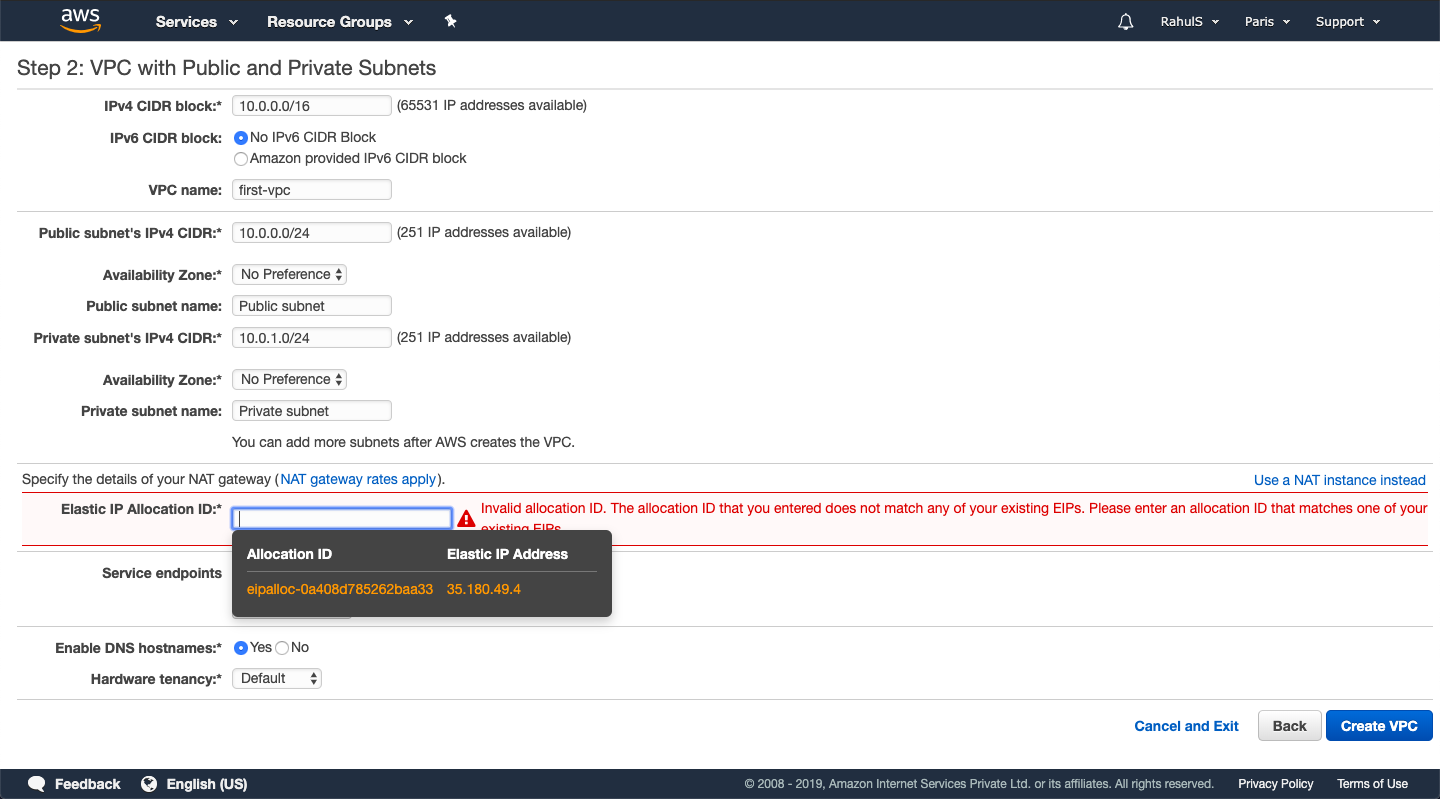
Here, you can specify the CIDR block, which means the IP range of the Public and Private Subnet. Both these networks will have different IP range . Both these subnets will be a subset of the main VPC CIDR.
Let’s understand this.
Here, VPC CIDR 10.10. 0.0/16 means, it will have IP in range of 10.10.*.* i.e. it will have 32-16=16, 2 ^ 16= 65536 IPs
Public Subnet 10.10.0.24 means, 10.10.0.* i.e. it will have 32-24=8, 2 ^ 8 = 256 IPs and
Private Subnet 10.10.1.24 means, 10.10.1.* i.e. it will have 32-24=8, 2 ^ 8 = 256 IPs.
Give the desired name for a Public & Private Subnet.
To assign an Elastic IP (Public IP) to a NAT Gateway, you need to have it first.
An Elastic IP is an IP that is reachable from the Internet.

To create an Elastic IP, open the duplicate window and click on “Elastic IPs new” in the left panel. This will help us create an Elastic IP that can be associated with the NAt Gateway.

Click on “Allocate Elastic IP address”.
To understand more about Elastic IP click here to see the AWS official documentation.

Click on “Allocate”. Now, this IP can be assigned to NAT gateway.

Now, select the Elastic(Public) IP that we have just created and click on “Create VPC”. This will take some time. Wait till the time VPC is created.

Now, you can check that the VPC has been created with the required configuration. This has created a VPC with 1 public and 1 private subnet.
An instance that if launched in a Private subnet will not be reachable from the internet but the instances, if created in the public subnet, will have access from the Internet.

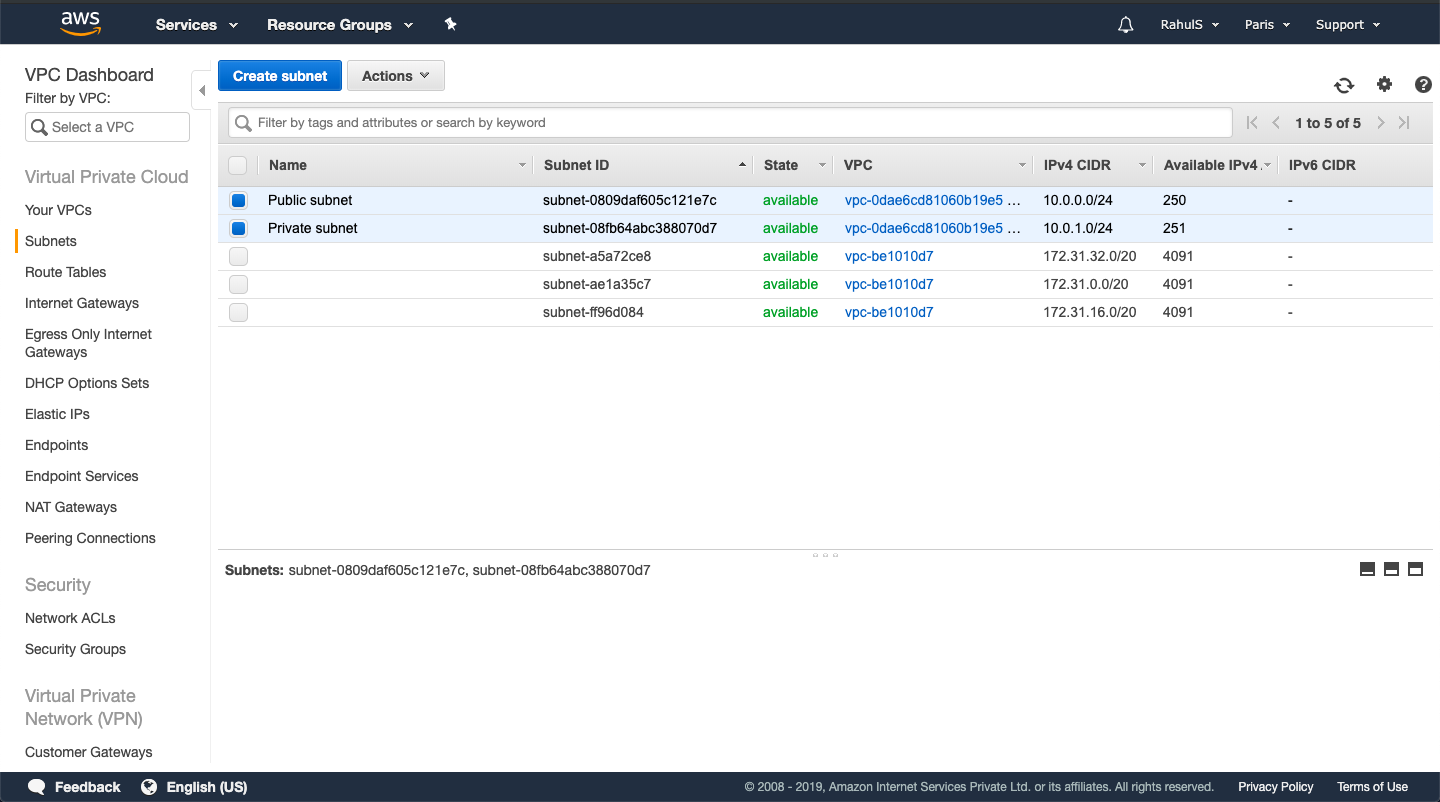
To check the subnets, click on “Subnets” in the left panel. Now we have two subnets, “Public subnet” and “Private subnet”.
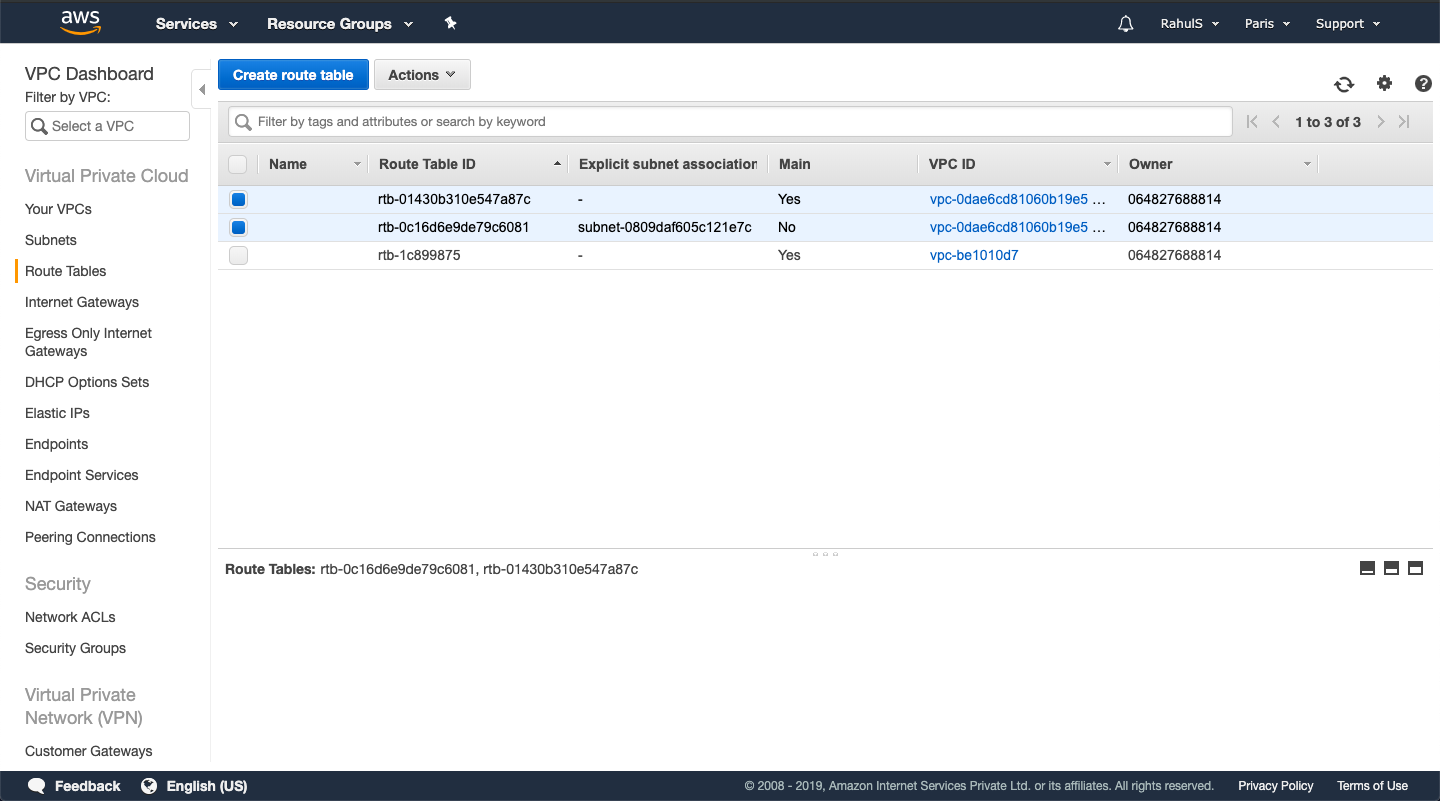
To check the Route Tables, click on “Route Tables” in the left panel. You can see, we have 2 route tables, 1 for the public subnet and the other for the private subnet.
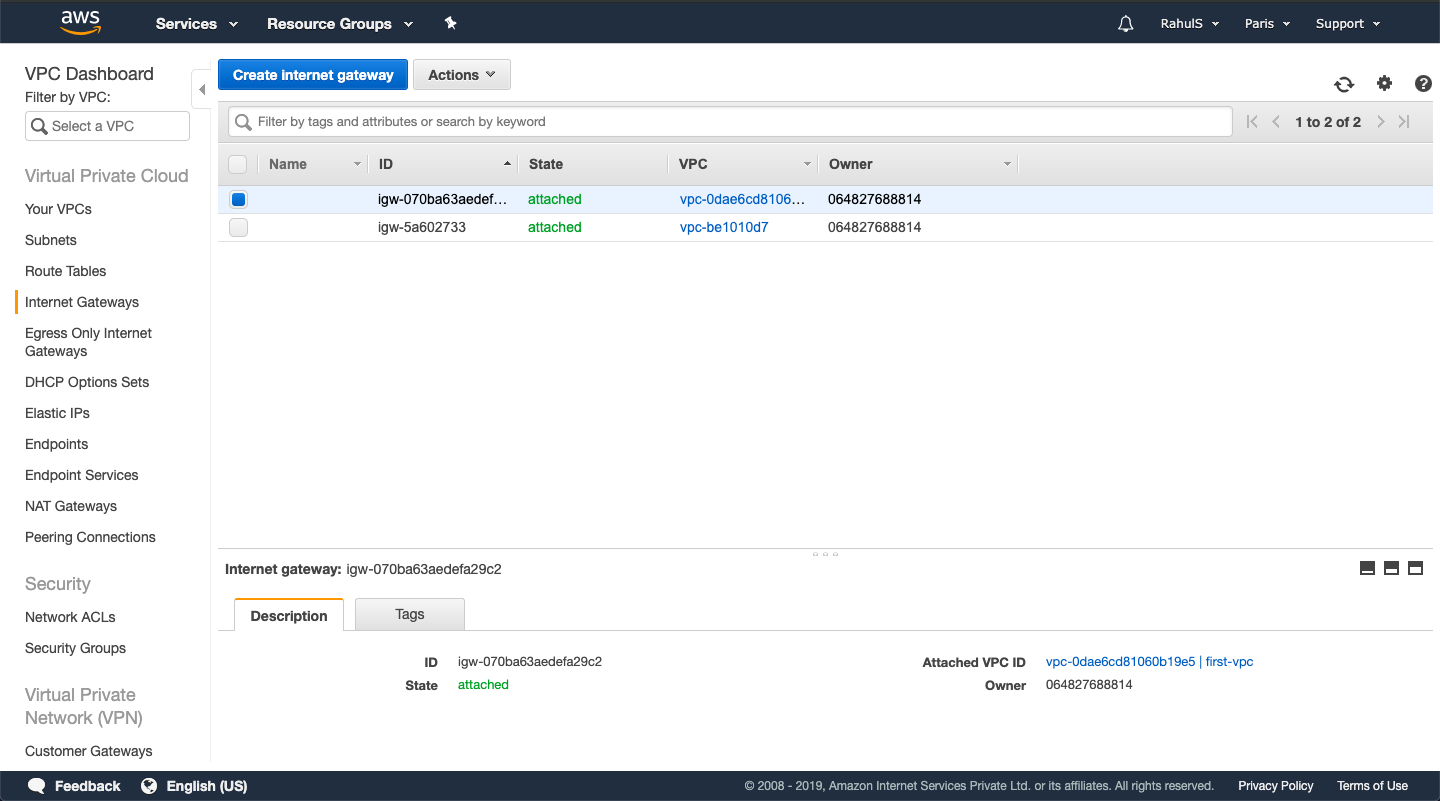
To check the Internet Gateway, click on “Internet Gateway” in the left panel.
The Internet gateway will be responsible to allow the connection to the Internet. Every VPC can have only one Internet Gateway attached to it.
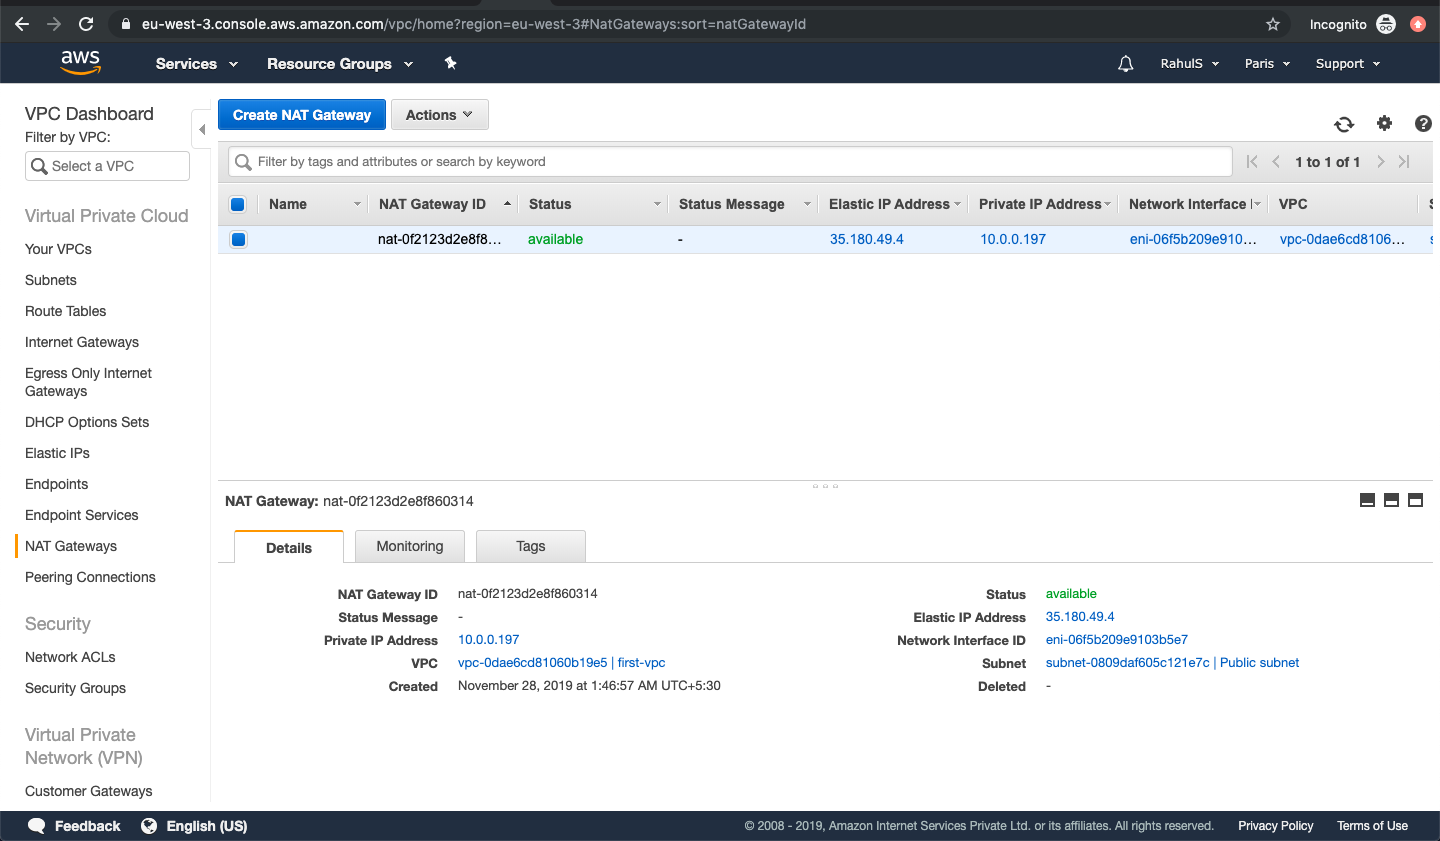
To check the NAt Gateway, click on “NAT Gateway” in the left panel. This NAT gateway is attached to the Public Subnet.
This ends with the creation of VPC with a Private and Public Subnet.
Delete the VPC
Deleting a VPC is very.
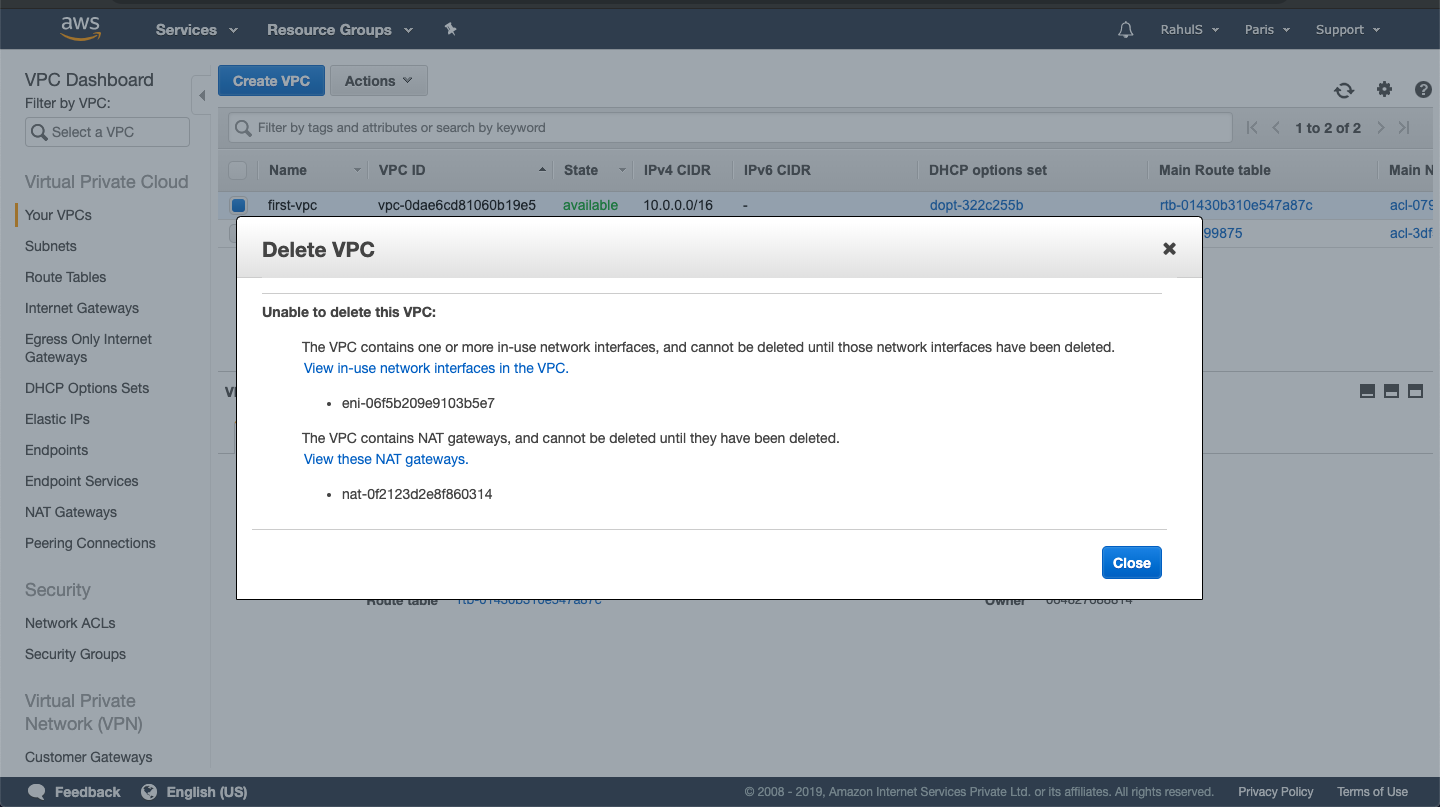
To delete the VPC that we created in the previous steps, select the VPC and click on “Actions” and click on “Delete VPC”.

Before we delete the VPC, we need to delete the NAT Gateway. Click on “View these NAT gateways” to open it in a new window.
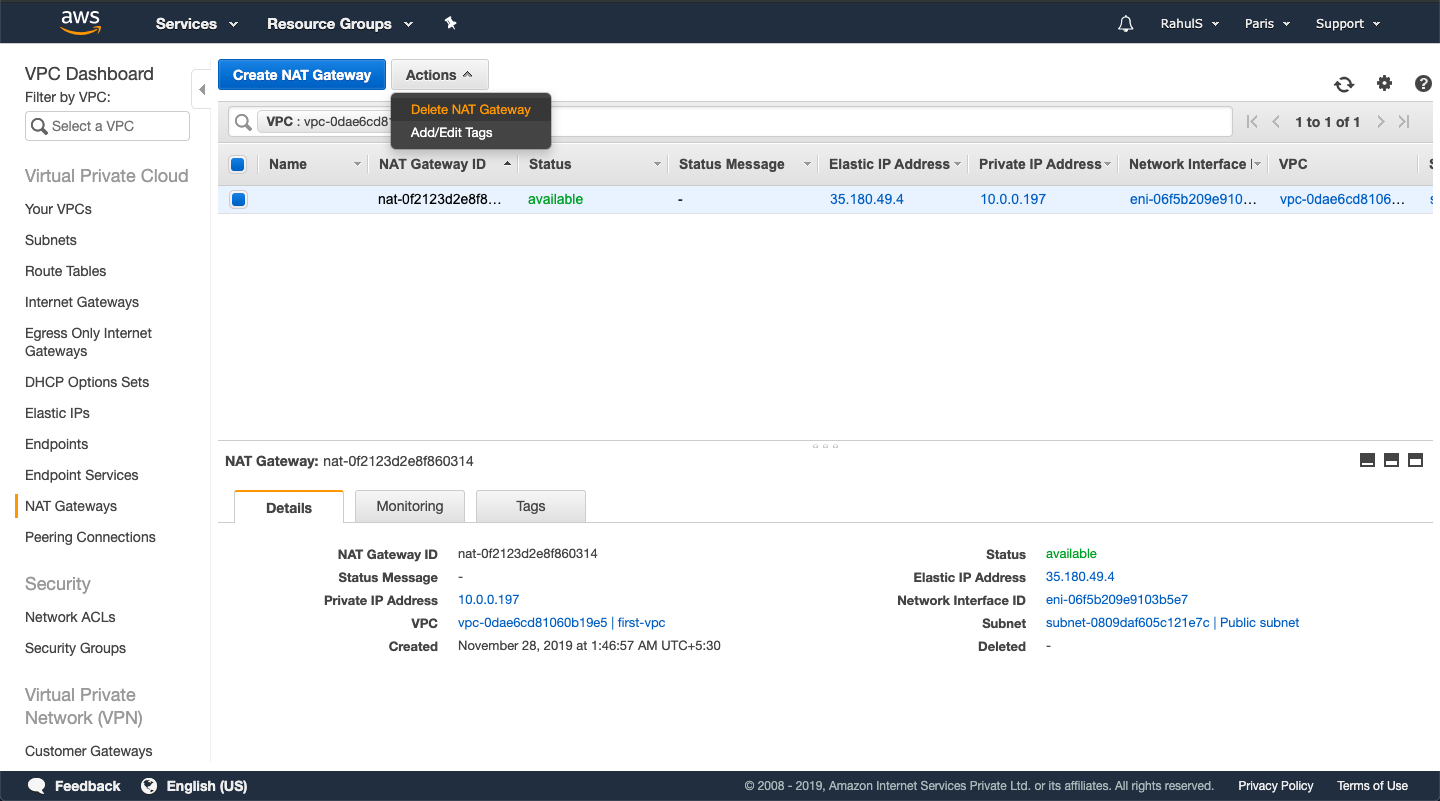
Select the NAT gateway, click on “Actions” and click on “Delete NAT gateway”
We also need to dissociate the Elastic IP. Click on “Elastic IPs” in the left window, select the Elastic IP, click on Actions and click on “Dissociate address”. This will release the Elastic IP.

Now to delete the VPC come back to the previous screen and click on “Delete VPC”. This will now delete the VPC along with the Subnets, route table and other components created.

Conclusion:
In this article, we have created a VPC using the Wizard having a public and private subnet. We have also seen the steps to delete the VPC.

