How to Install phpMyAdmin with Nginx and Let's Encrypt SSL on Ubuntu 20.04 LTS
This tutorial exists for these OS versions
- Ubuntu 22.04 (Jammy Jellyfish)
- Ubuntu 20.04 (Focal Fossa)
- Ubuntu 18.04 (Bionic Beaver)
- Ubuntu 11.04 (Natty Narwhal)
On this page
phpMyAdmin is a free and open-source application that can be used to manage MySQL and MariaDB database through a web-based interface. With phpMyAdmin, you can perform several tasks including, manage user accounts and privileges, import and export data, execute SQL-statements, and much more. It comes with a wide range of documentation that helps you to perform various operations.
In this tutorial, we will explain how to install phpMyAdmin with Nginx on Ubuntu 20.04 and secure it with a free Let's Encrypt SSL Certificate.
Prerequisites
- A server running Ubuntu 20.04.
- A valid domain name pointed with your server.
- A root password is configured on your server.
Install Nginx, MariaDB and PHP
First, you will need to install the Nginx web server, MariaDB, PHP and other required PHP extensions in your server. You can install all of them with the following command:
apt-get install nginx mariadb-server php php-cli php-mysql php-mbstring php-zip php-gd php-json php-curl php-fpm -y
Once all the packages are installed, you can proceed to the next step.
Install phpMyAdmin
By default, phpMyAdmin package is available in the Ubuntu 20.04 default repository. You can install it by just running the following command:
apt-get install phpmyadmin -y
During the installation, you will be asked to select the web server as shown below:
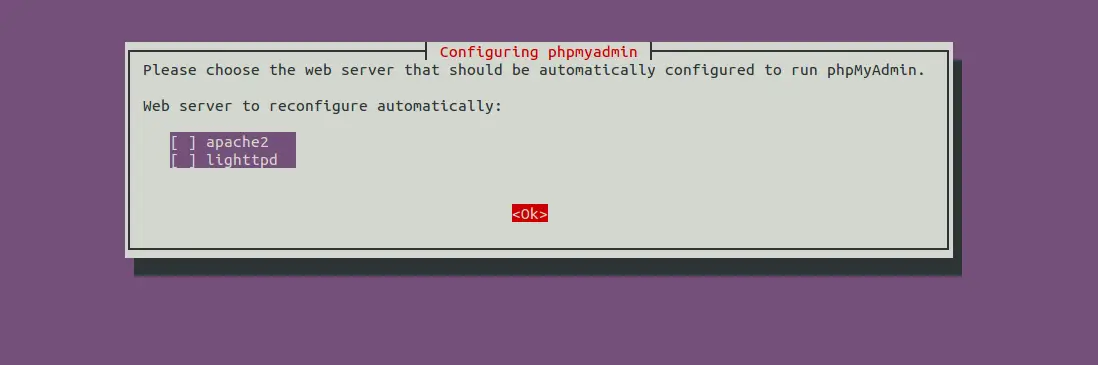
Since we are using the Nginx web server, you can just hit TAB, and then ENTER to bypass this prompt. You will be asked to configure a database for phpMyAdmin to use.
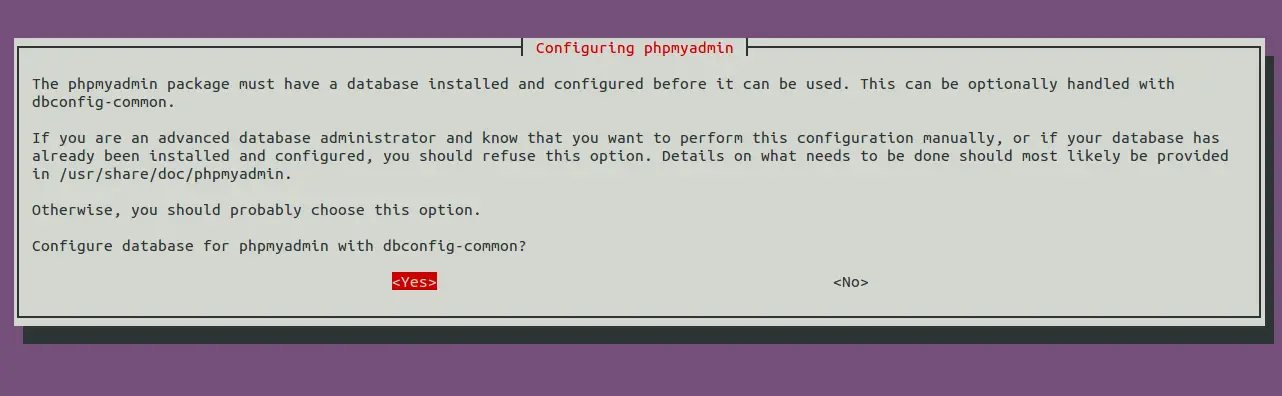
Select Yes and hit Enter to continue. You will be asked to choose and confirm a password for the phpMyAdmin application as shown below:
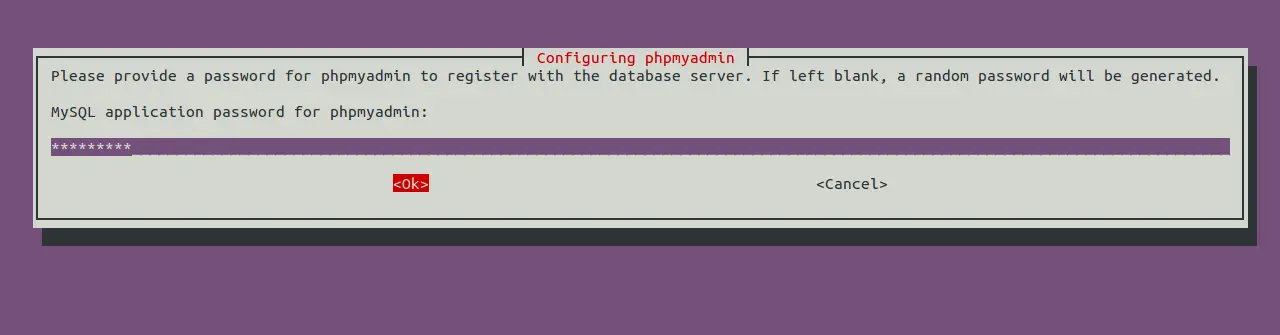
Provide your desired password and hit Enter to finish the installation.
Configure MariaDB Database
By default, the MariaDB is not secured. So secure the MariaDB and set the MariaDB root password with the following command:
mysql_secure_installation
Answer all the questions as shown below:
Enter current password for root (enter for none):
Set root password? [Y/n] Y
New password:
Re-enter new password:
Remove anonymous users? [Y/n] Y
Disallow root login remotely? [Y/n] Y
Remove test database and access to it? [Y/n] Y
Reload privilege tables now? [Y/n] Y
After securing the MariaDB, it is recommended to create a separate user to connect the phpMyAdmin and manage the database.
To do so, log in to the MariaDB shell with the following command:
mysql -u root -p
Provide your root password when prompt then create a new user with the following command:
MariaDB [(none)]> create user admin@localhost identified by 'password';
Next, grant all the privileges to the user with the following command:
MariaDB [(none)]> grant all privileges on *.* to admin@localhost with grant option;
Next, flush the privileges and exit from the MariaDB shell using the following command:
MariaDB [(none)]> flush privileges;
MariaDB [(none)]> exit;
Once you are finished, you can proceed to the next step.
Configure Nginx for phpMyAdmin
You can create a new Nginx virtual host configuration file for phpMyAdmin using the following command:
nano /etc/nginx/sites-available/phpmyadmin
Add the following lines:
server {
  listen 80;
  listen [::]:80;
  server_name phpmyadmin.linuxbuz.com;
  root /usr/share/phpmyadmin/;
  index index.php index.html index.htm index.nginx-debian.html;

  access_log /var/log/nginx/phpmyadmin_access.log;
  error_log /var/log/nginx/phpmyadmin_error.log;

  location / {
    try_files $uri $uri/ /index.php;
  }

  location ~ ^/(doc|sql|setup)/ {
    deny all;
  }

  location ~ \.php$ {
    fastcgi_pass unix:/run/php/php7.4-fpm.sock;
    fastcgi_param SCRIPT_FILENAME $document_root$fastcgi_script_name;
    include fastcgi_params;
    include snippets/fastcgi-php.conf;
  }

  location ~ /\.ht {
    deny all;
  }
}
Save and close the file when you are finished. Then, create a symbolic link to the /etc/nginx/sites-enabled/ directory:
ln -s /etc/nginx/sites-available/phpmyadmin /etc/nginx/sites-enabled/
Next, set the hash_bucket_size in Nginx default configuration file:
nano /etc/nginx/nginx.conf
Add the following line below the line "http {":
server_names_hash_bucket_size 64;
Save and close the file. Then, check the Nginx for any syntax error with the following command:
nginx -t
You should get the following output:
nginx: the configuration file /etc/nginx/nginx.conf syntax is ok
nginx: configuration file /etc/nginx/nginx.conf test is successful
Finally, restart the Nginx service to apply the changes:
systemctl restart nginx
You can also check the status of the Nginx service with the following command:
systemctl status nginx
You should see the following output:
? nginx.service - A high performance web server and a reverse proxy server
     Loaded: loaded (/lib/systemd/system/nginx.service; enabled; vendor preset: enabled)
     Active: active (running) since Fri 2020-05-15 06:24:03 UTC; 2s ago
       Docs: man:nginx(8)
    Process: 107736 ExecStartPre=/usr/sbin/nginx -t -q -g daemon on; master_process on; (code=exited, status=0/SUCCESS)
    Process: 107737 ExecStart=/usr/sbin/nginx -g daemon on; master_process on; (code=exited, status=0/SUCCESS)
   Main PID: 107738 (nginx)
      Tasks: 3 (limit: 2282)
     Memory: 3.7M
     CGroup: /system.slice/nginx.service
             ??107738 nginx: master process /usr/sbin/nginx -g daemon on; master_process on;
             ??107739 nginx: worker process
             ??107740 nginx: worker process

May 15 06:24:03 ubuntu2004 systemd[1]: Starting A high performance web server and a reverse proxy server...
May 15 06:24:03 ubuntu2004 systemd[1]: Started A high performance web server and a reverse proxy server.
Secure phpMyAdmin with Let's Encrypt SSL
Before starting, you will need to install the Certbot client to download and install Let's Encrypt SSL.
First, add the Certbot repository with the following command:
add-apt-repository ppa:ahasenack/certbot-tlssni01-1875471
Next, update the repository and install the Certbot client using the following command:
apt-get update -y
apt-get install certbot python3-certbot-nginx -y
Once the Certbot has been installed, run the following command to download and install the Let's Encrypt SSL for your domain:
certbot --nginx -d phpmyadmin.linuxbuz.com
You will be asked to provide your email and accept the term of service as shown below:
Saving debug log to /var/log/letsencrypt/letsencrypt.log
Plugins selected: Authenticator nginx, Installer nginx
Enter email address (used for urgent renewal and security notices) (Enter 'c' to
cancel): [email protected]

- - - - - - - - - - - - - - - - - - - - - - - - - - - - - - - - - - - - - - - -
Please read the Terms of Service at
https://letsencrypt.org/documents/LE-SA-v1.2-November-15-2017.pdf. You must
agree in order to register with the ACME server at
https://acme-v02.api.letsencrypt.org/directory
- - - - - - - - - - - - - - - - - - - - - - - - - - - - - - - - - - - - - - - -
(A)gree/(C)ancel: A

- - - - - - - - - - - - - - - - - - - - - - - - - - - - - - - - - - - - - - - -
Would you be willing to share your email address with the Electronic Frontier
Foundation, a founding partner of the Let's Encrypt project and the non-profit
organization that develops Certbot? We'd like to send you email about our work
encrypting the web, EFF news, campaigns, and ways to support digital freedom.
- - - - - - - - - - - - - - - - - - - - - - - - - - - - - - - - - - - - - - - -
(Y)es/(N)o: Y

Obtaining a new certificate
Performing the following challenges:
http-01 challenge for phpmyadmin.linuxbuz.com
Waiting for verification...
Cleaning up challenges
Deploying Certificate to VirtualHost /etc/nginx/sites-enabled/phpmyadmin
Next, select whether or not to redirect HTTP traffic to HTTPS:
Please choose whether or not to redirect HTTP traffic to HTTPS, removing HTTP access.
- - - - - - - - - - - - - - - - - - - - - - - - - - - - - - - - - - - - - - - -
1: No redirect - Make no further changes to the webserver configuration.
2: Redirect - Make all requests redirect to secure HTTPS access. Choose this for
new sites, or if you're confident your site works on HTTPS. You can undo this
change by editing your web server's configuration.
- - - - - - - - - - - - - - - - - - - - - - - - - - - - - - - - - - - - - - - -
Select the appropriate number [1-2] then [enter] (press 'c' to cancel): 2
Type 2 and hit Enter to finish the installation.
Redirecting all traffic on port 80 to ssl in /etc/nginx/sites-enabled/phpmyadmin

- - - - - - - - - - - - - - - - - - - - - - - - - - - - - - - - - - - - - - - -
Congratulations! You have successfully enabled https://phpmyadmin.linuxbuz.com

You should test your configuration at:
https://www.ssllabs.com/ssltest/analyze.html?d=phpmyadmin.linuxbuz.com
- - - - - - - - - - - - - - - - - - - - - - - - - - - - - - - - - - - - - - - -

IMPORTANT NOTES:
 - Congratulations! Your certificate and chain have been saved at:
   /etc/letsencrypt/live/phpmyadmin.linuxbuz.com/fullchain.pem
   Your key file has been saved at:
   /etc/letsencrypt/live/phpmyadmin.linuxbuz.com/privkey.pem
   Your cert will expire on 2020-08-12. To obtain a new or tweaked
   version of this certificate in the future, simply run certbot again
   with the "certonly" option. To non-interactively renew *all* of
   your certificates, run "certbot renew"
 - If you like Certbot, please consider supporting our work by:

   Donating to ISRG / Let's Encrypt:   https://letsencrypt.org/donate
   Donating to EFF:                    https://eff.org/donate-le
Access phpMyAdmin
Now, open your web browser and type the URL https://phpmyadmin.linuxbuz.com. You will be redirected to the phpMyAdmin login page:
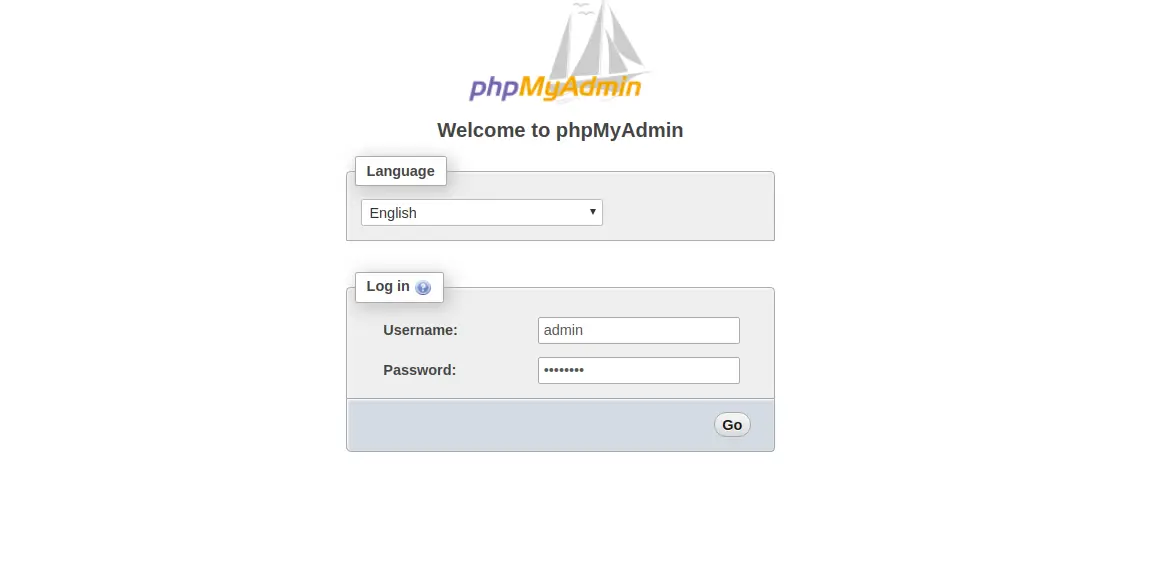
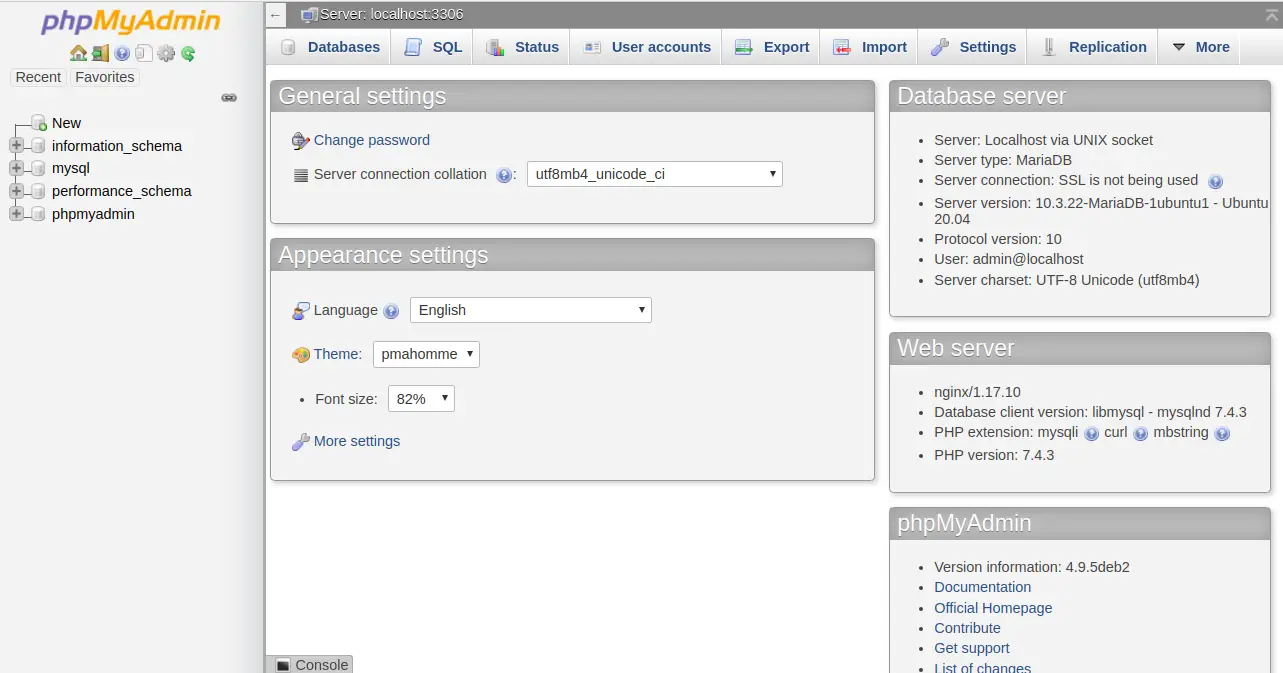
Provide your admin username, password, and click on the Go button. You should see the phpMyAdmin default dashboard in the following page:
Conclusion
Congratulations! you have successfully installed phpMyAdmin and secure it with Let's Encrypt SSL on Ubuntu 20.04. You can now interact with MariaDB and perform several tasks through the web browser.

