Use Node Affinity in Kubernetes
On this page
Node affinity is a set of rules. It is used by the scheduler to decide where a pod can be placed in the cluster. The rules are defined using labels on nodes and label selectors specified in pods definition. Node affinity allows a pod to specify an affinity towards a group of nodes it can be scheduled on. We can limit a Pod to only be able to run on a particular Node(s).
nodeSelector is the simplest form of node selection constraint. nodeSelector is a property of PodSpec. For the pod to be eligible to run on a node, the node must have each of the indicated labels.
Node affinity is conceptually similar to nodeSelector -- it allows us to limit which nodes our pod is eligible to be scheduled on, based on labels on the node.
There are currently two types of node affinity,
- requiredDuringSchedulingIgnoredDuringExecution and
- preferredDuringSchedulingIgnoredDuringExecution.
What is DuringScheduling
- Here, the pod is not yet created and going to be created for the first time.
- Usually when the pod is created the affinity rules will be applied.
What is DuringExecution
- Here, the pod has been running and the change is made in the environment that affects nodeAffinity.
To know Node Affinity in detail, visit kubernete.io the official documentation of Kubernetes.
In this article, we will see how to assign a Kubernetes Pod to a particular node using "requiredDuringSchedulingIgnoredDuringExecution" Node Affinity in a Kubernetes cluster.
Pre-requisites
- Kubernetes Cluster with at least 1 worker node.
If you want to learn to create a Kubernetes Cluster, click here. This guide will help you create a Kubernetes cluster with 1 Master and 2 Nodes on AWS Ubuntu EC2 Instances.
What will we do?
- Configure Node-Affinity
Configure Node-Affinity
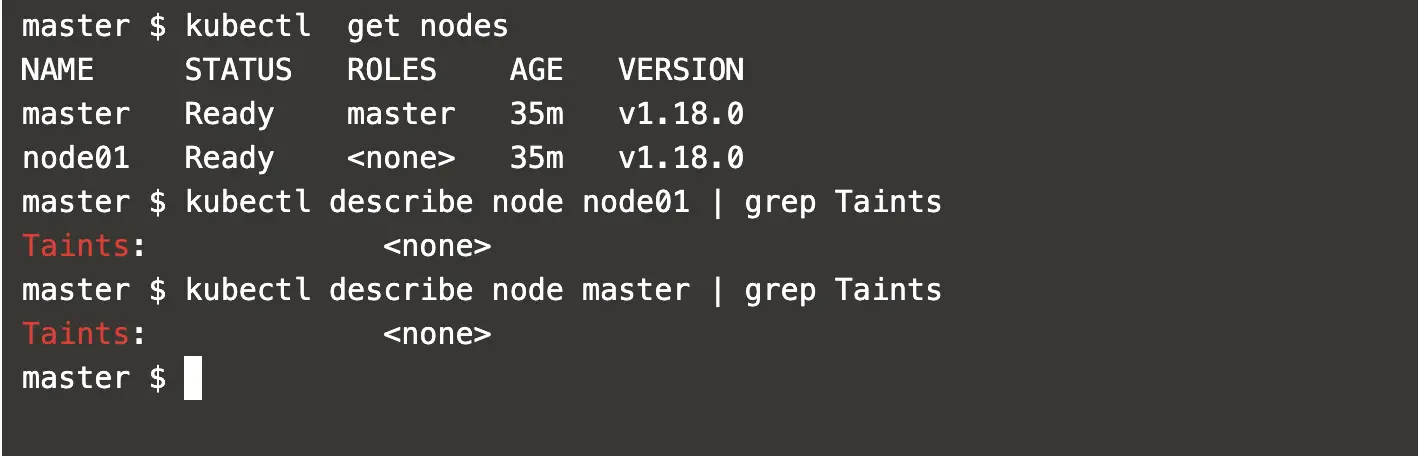
First of all, let's get a list of nodes available in the cluster.
kubectl get nodes #Get all the nodes in the cluster
Check if nodes have Taints on them.
kubectl describe node node01 | grep Taints #Describe the node node01 and grep Taints
kubectl describe node master | grep Taints #Describe the node master and grep Taints
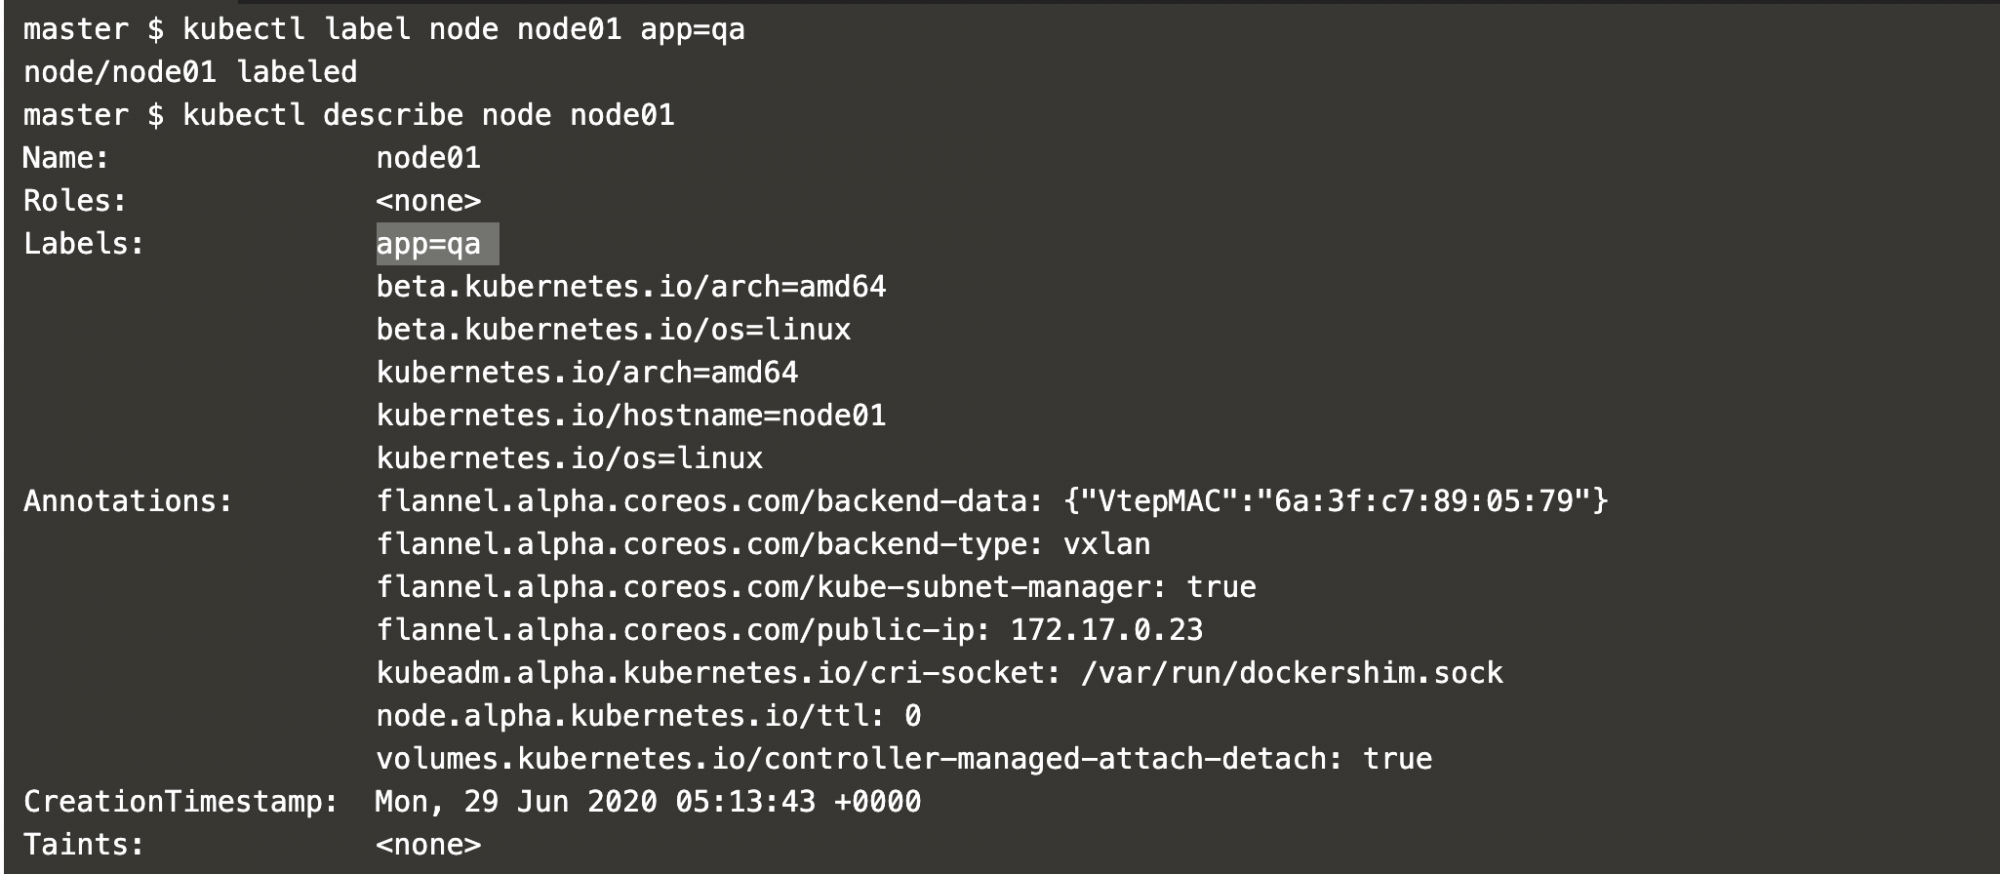
Add a label to a worker node node01.
kubectl label node node01 app=qa #Add a label
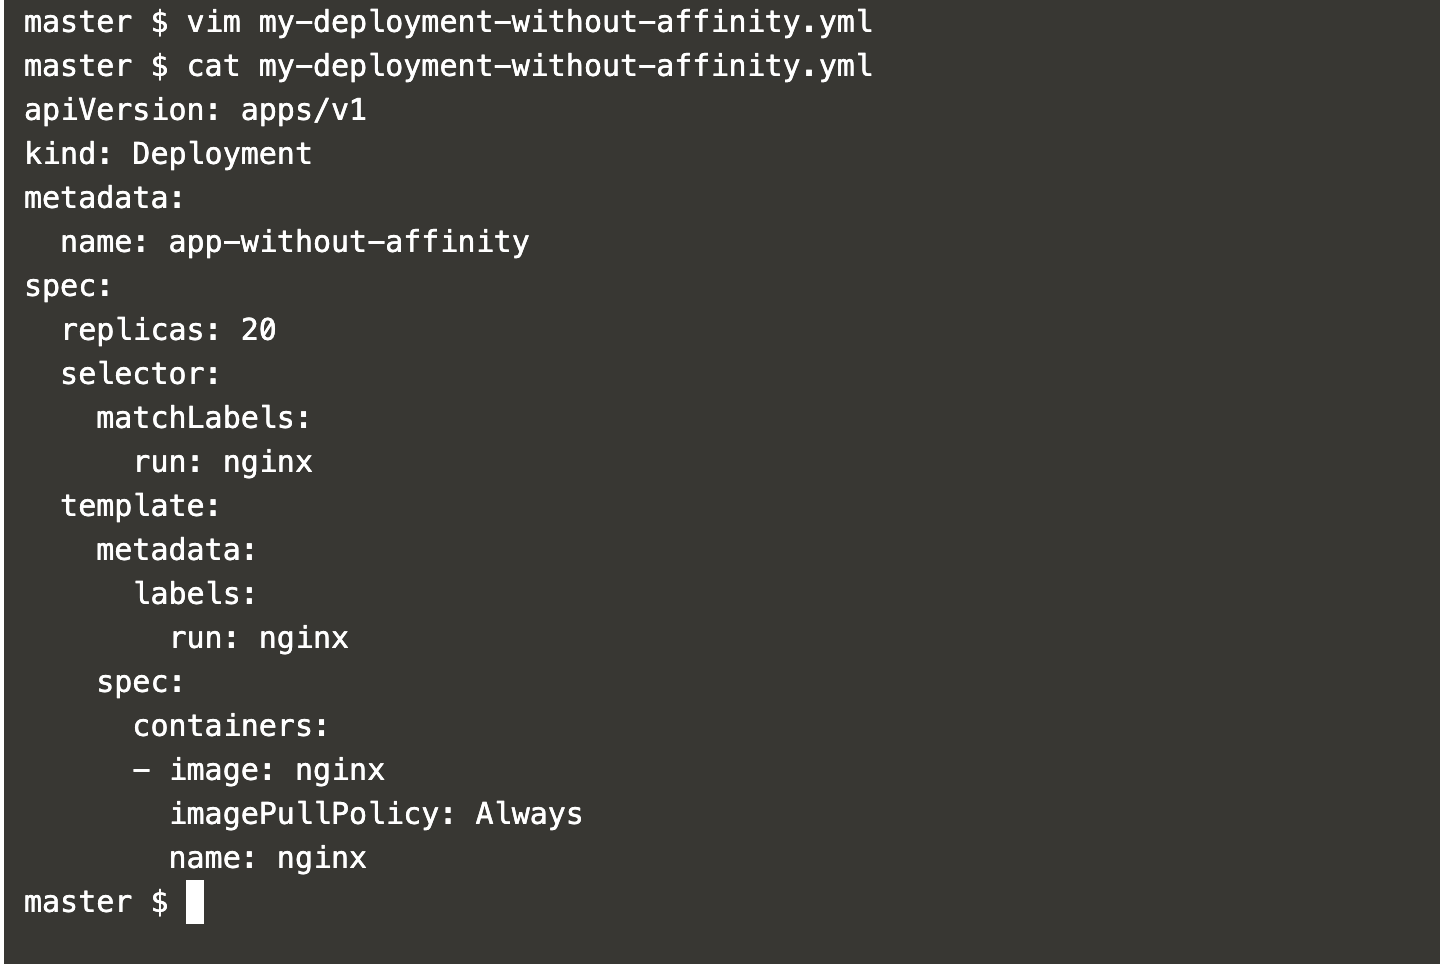
Create a deployment definition file and add the following definition in it.
vim my-deployment-without-affinity.yml
apiVersion: apps/v1
kind: Deployment
metadata:
  name: app-without-affinity
spec:
  replicas: 20
  selector:
    matchLabels:
      run: nginx
  template:
    metadata:
      labels:
        run: nginx
    spec:
      containers:
      - image: nginx
        imagePullPolicy: Always
        name: nginx
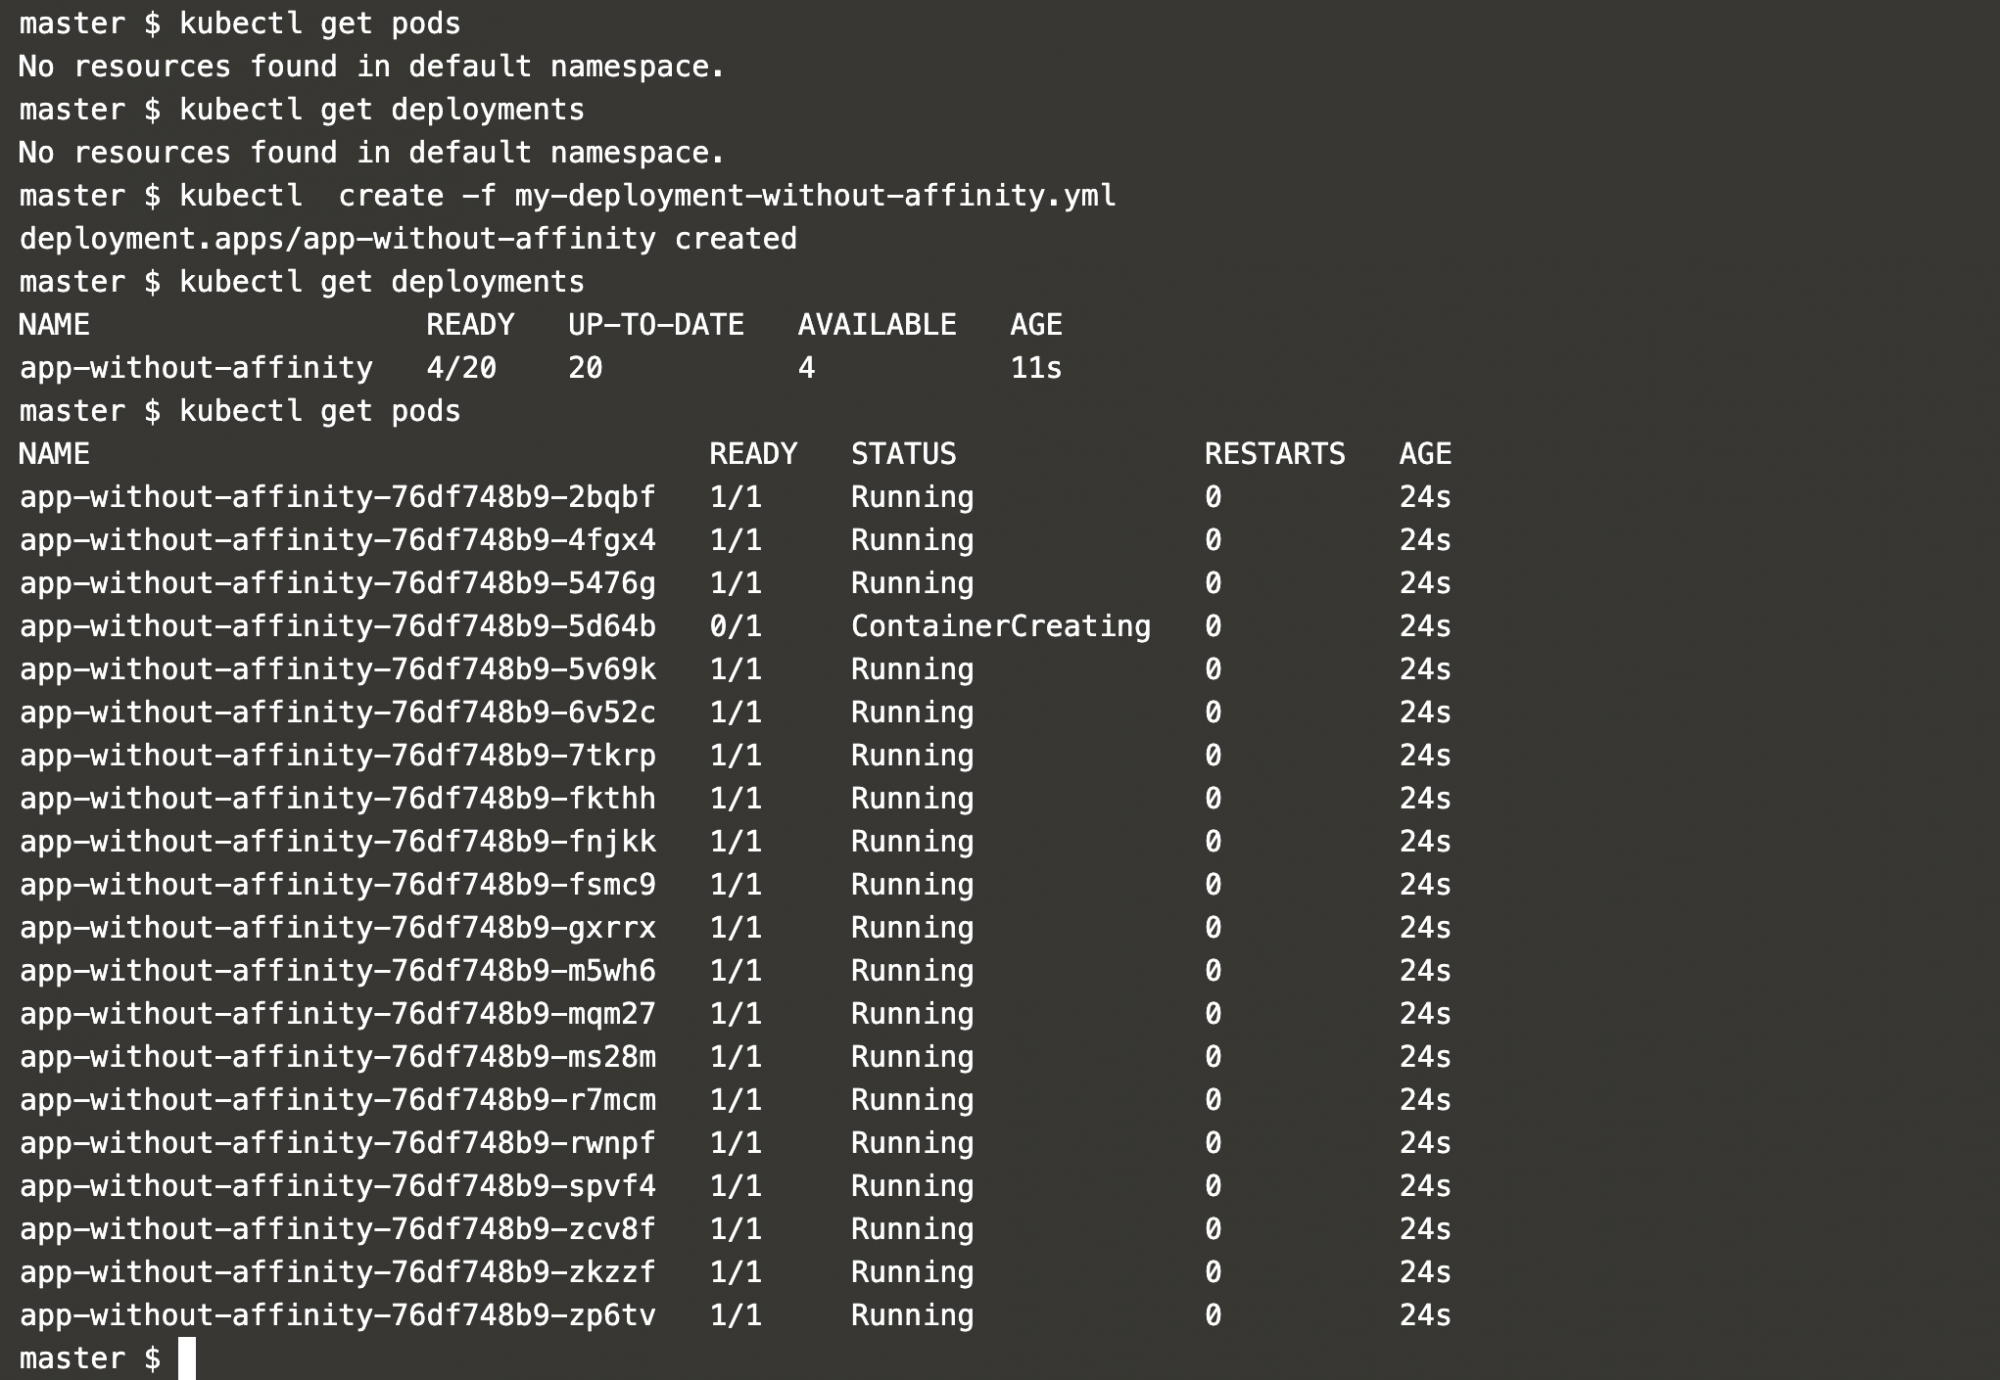
Get a list of Pods and Deployments.
kubectl get pods #Get pods in the default namespace
kubectl get deployment #Get deployments in the default namespace
Create a deployment from the definition we created.
kubectl create -f my-deployment-without-affinity.yml #Create a deployment object
kubectl get deployment #Get deployments in the default namespace
kubectl get pods #Get pods in the default namespace
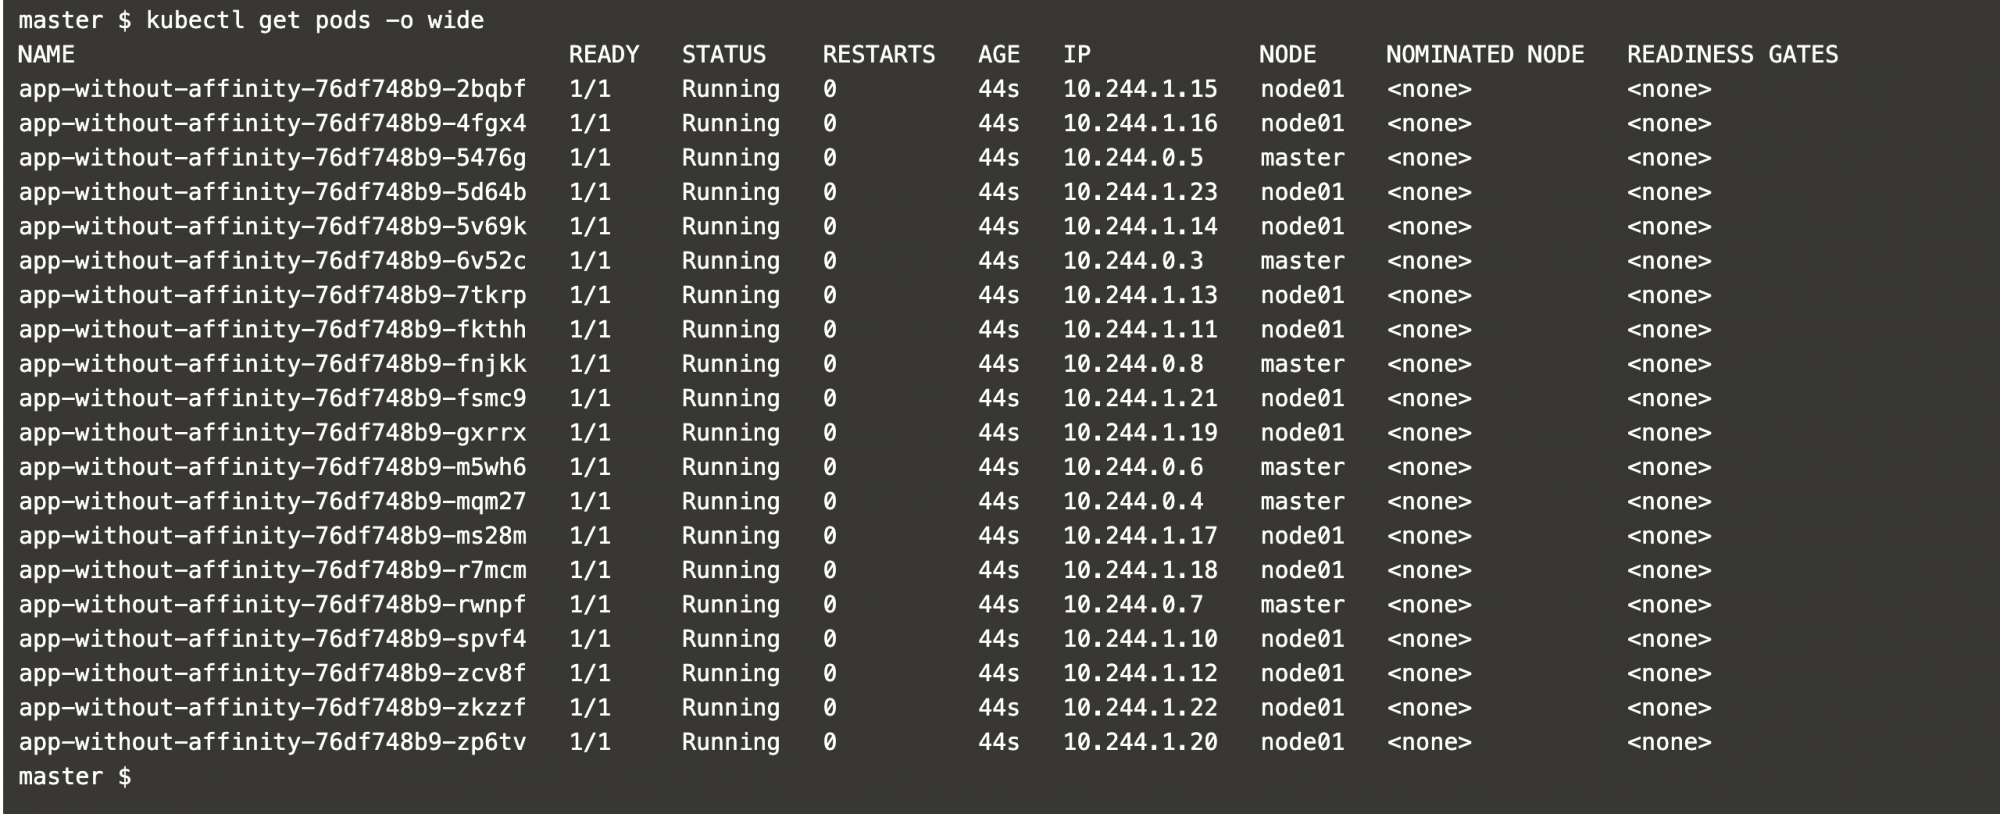
Get details of the Pods created by the deployment.
Here it can be seen that the Pods are getting places in the master node also. The reason for this is that the nodes have no Taints on them so pods can get places on any of the available nodes.
kubectl get pods -o wide #Get pods in the default namespace with more information about them using -o wide
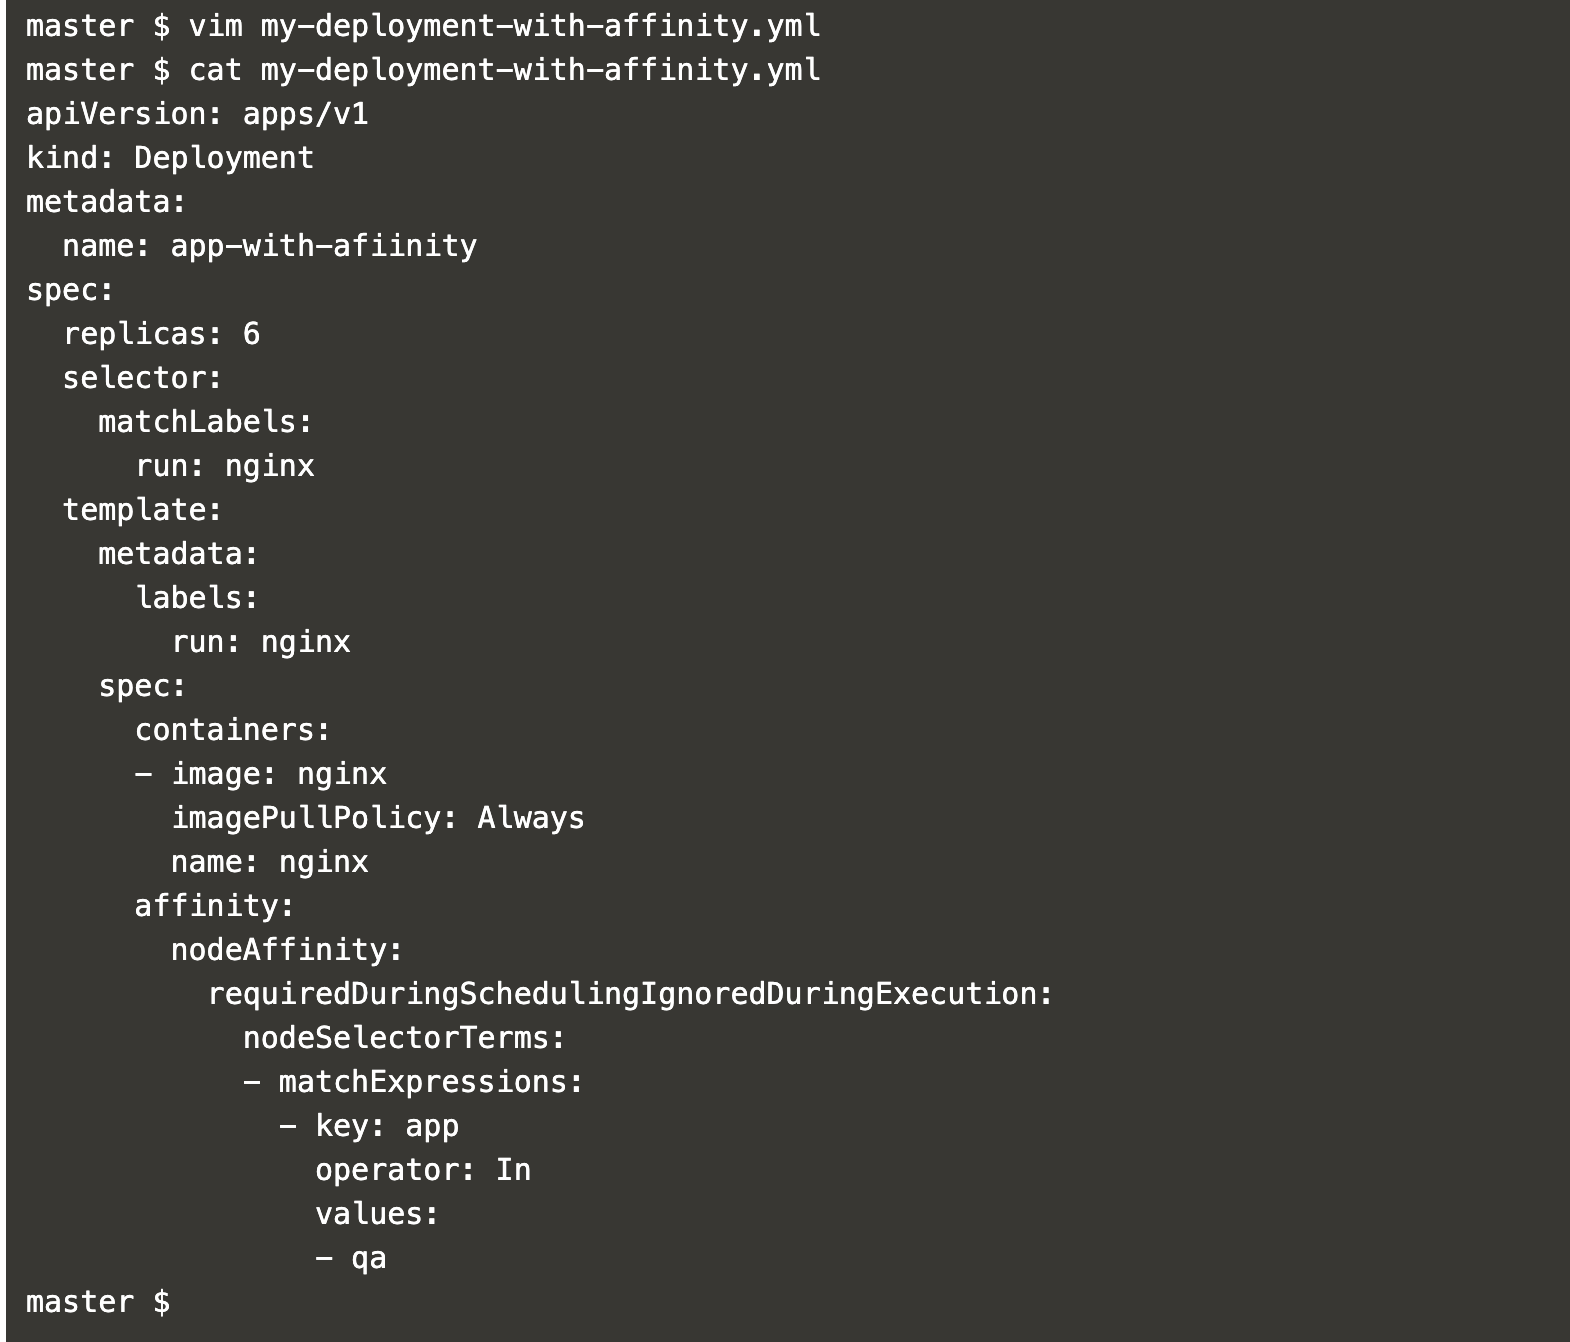
Now, create a deployment definition with node affinity defined it.
vim my-deployment-with-affinity.yml
apiVersion: apps/v1
kind: Deployment
metadata:
  name: app-with-afiinity
spec:
  replicas: 6
  selector:
    matchLabels:
      run: nginx
  template:
    metadata:
      labels:
        run: nginx
    spec:
      containers:
      - image: nginx
        imagePullPolicy: Always
        name: nginx
      affinity:
        nodeAffinity:
          requiredDuringSchedulingIgnoredDuringExecution:
            nodeSelectorTerms:
            - matchExpressions:
              - key: app
                operator: In
                values:
                - qa
Get a list of existing deployments and create a new deployment with affinity in the default namespace using the file created in the above step.
kubectl get deployments #Get deployments in the default namespace
kubectl create -f my-deployment-with-affinity.yml #Create a deployment object
kubectl get deployments #Get deployments in the default namespace
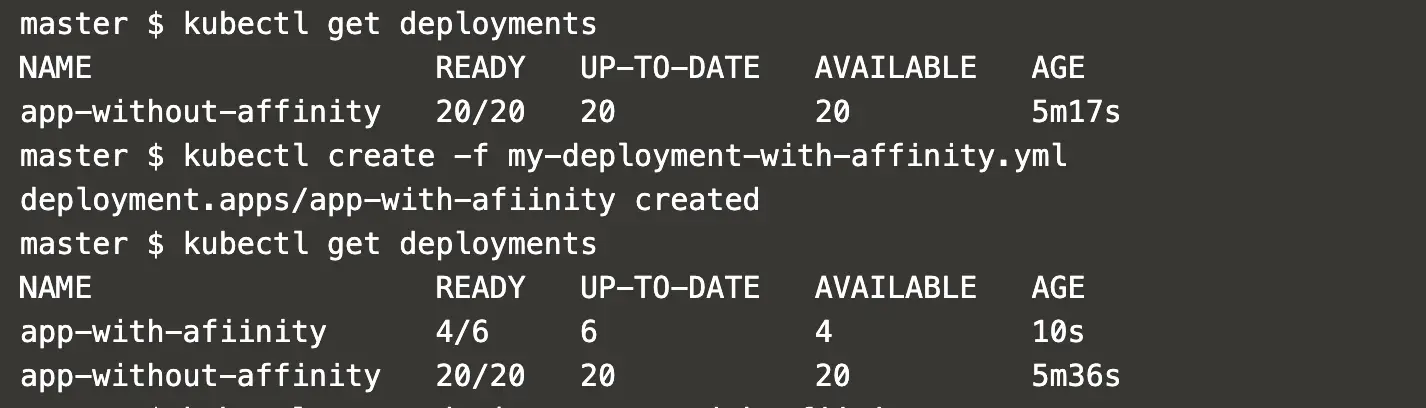
Now, it can be seen that the Pods this time got placed on worker node node01 only. The reason for this is that we defined a node affinity in the deployment definition which makes sure that the pods get deployed on the nodes matching the defined condition/label.
kubectl get pods -o wide | grep app-with-afiinity #Get pods in the default namespace with more information about them using -o wide and grep app-with-afiinity

Conclusion
In this article, we learned to add labels to nodes and saw how pods can be restricted to get scheduled on the required nodes using Node Affinity. We also saw that the pods can even get deployed on the master node if it does not have any Taint on it.

