Install Varnish Cache 6 for Apache/Nginx on CentOS 8
Varnish Cache is a powerful reverse HTTP proxy used to speed up web applications that is available as Open-Source software. Varnish caches both static and dynamic content. It handles all inbound requests before they land on your web server backend. It sits between a web browser and Apache or Nginx web server. Varnish cache stores all incoming page requests in memory so web servers don't have to create the same web page over and over again.
In this post, we will show you how to install Varnish cache with Apache and Nginx on CentOS 8.
Prerequisites
- A server running CentOS 8.
- A root password is configured on your server.
Getting Started
Before starting, it is recommended to update your system packages to the latest version. You can update them by running the following command:
dnf update -y
Once all the packages are updated, you can proceed to the next step.
Install Varnish
By default, the Varnish package is included in the CentOS 8 default repo. You can install it by running the following command:
dnf install varnish -y
After installing Varnish, edit the Varnish default configuration file and define the Nginx or Apache webserver backed address.
nano /etc/varnish/default.vcl
Change the following lines:
backend default {
    .host = "127.0.0.1";
    .port = "8080";
}
Save and close the file when you are finished.
Configure Varnish
By default, Varnish listens on port 6081. So you will need to configure Varnish to listen on port 80. You can configure it by editing varnish.service file:
nano /lib/systemd/system/varnish.service
Find the following line:
ExecStart=/usr/sbin/varnishd -a :6081 -f /etc/varnish/default.vcl -s malloc,256m
Replaced it with the following line:
ExecStart=/usr/sbin/varnishd -a :80 -f /etc/varnish/default.vcl -s malloc,256m
Save and close the file then reload the systemd daemon to apply the changes:
systemctl daemon-reload
Next, start the Varnish service and enable it to start at system reboot with the following command:
systemctl start varnish
systemctl enable varnish
You can also check the status of the Varnish with the following command:
systemctl status varnish
You should get the following output:
? varnish.service - Varnish Cache, a high-performance HTTP accelerator
   Loaded: loaded (/usr/lib/systemd/system/varnish.service; disabled; vendor preset: disabled)
   Active: active (running) since Fri 2021-03-12 04:17:32 EST; 4s ago
  Process: 6391 ExecStart=/usr/sbin/varnishd -a :80 -f /etc/varnish/default.vcl -s malloc,256m (code=exited, status=0/SUCCESS)
 Main PID: 6392 (varnishd)
    Tasks: 217
   Memory: 99.5M
   CGroup: /system.slice/varnish.service
           ??6392 /usr/sbin/varnishd -a :80 -f /etc/varnish/default.vcl -s malloc,256m
           ??6402 /usr/sbin/varnishd -a :80 -f /etc/varnish/default.vcl -s malloc,256m

Mar 12 04:17:32 masternode systemd[1]: Starting Varnish Cache, a high-performance HTTP accelerator...
Mar 12 04:17:32 masternode varnishd[6391]: Debug: Version: varnish-6.0.6 revision 29a1a8243dbef3d973aec28dc90403188c1dc8e7
Mar 12 04:17:32 masternode varnishd[6391]: Debug: Platform: Linux,4.18.0-193.6.3.el8_2.x86_64,x86_64,-junix,-smalloc,-sdefault,-hcritbit
Mar 12 04:17:32 masternode varnishd[6392]: Version: varnish-6.0.6 revision 29a1a8243dbef3d973aec28dc90403188c1dc8e7
Mar 12 04:17:32 masternode varnishd[6392]: Platform: Linux,4.18.0-193.6.3.el8_2.x86_64,x86_64,-junix,-smalloc,-sdefault,-hcritbit
Mar 12 04:17:32 masternode varnishd[6391]: Debug: Child (6402) Started
Mar 12 04:17:32 masternode varnishd[6392]: Child (6402) Started
Mar 12 04:17:32 masternode varnishd[6392]: Child (6402) said Child starts
Mar 12 04:17:32 masternode systemd[1]: Started Varnish Cache, a high-performance HTTP accelerator.
At this point, Varnish is started and listening on port 80. You can check it with the following command:
ss -antpl | grep varnishd
You should get the following output:
LISTEN    0         10               127.0.0.1:34977            0.0.0.0:*        users:(("varnishd",pid=1532,fd=11))
LISTEN    0         128                0.0.0.0:80               0.0.0.0:*        users:(("cache-main",pid=1542,fd=6),("varnishd",pid=1532,fd=6))
LISTEN    0         128                   [::]:80                  [::]:*        users:(("cache-main",pid=1542,fd=7),("varnishd",pid=1532,fd=7))
LISTEN    0         10                   [::1]:34909               [::]:*        users:(("varnishd",pid=1532,fd=10))
At this point, Varnish is installed and configured. You can now proceed to the next step.
Install and Configure Nginx to Work with Varnish
First, you will need to install the Nginx package to your server. You can install it with the following command:
dnf install nginx -y
Once installed, you will need to change the Nginx listening port from 80 to 8080. You can do it by editing the Nginx default configuration file:
nano /etc/nginx/nginx.conf
Change the following lines:
        listen       8080 default_server;
        listen       [::]:8080 default_server;
Save and close the file then verify the Nginx for any syntax error using the following command:
nginx -t
You should get the following output:
nginx: the configuration file /etc/nginx/nginx.conf syntax is ok
nginx: configuration file /etc/nginx/nginx.conf test is successful
Next, start the Nginx service and enable it to start at system reboot:
systemctl start nginx
systemctl enable nginx
You can also verify the Nginx listening port with the following command:
ss -antpl | grep 8080
You should get the following output:
LISTEN    0         128                0.0.0.0:8080             0.0.0.0:*        users:(("nginx",pid=5569,fd=8),("nginx",pid=5568,fd=8))
LISTEN    0         128                   [::]:8080                [::]:*        users:(("nginx",pid=5569,fd=9),("nginx",pid=5568,fd=9))
At this point, the Varnish cache is installed and configured to forward all requests coming on port 80 to the Nginx web server which is listening on port 8080.
You can verify whether the Varnish cache is working or not with the following command:
curl -I http://localhost
You should get the following output:
HTTP/1.1 200 OK
Server: nginx/1.14.1
Date: Fri, 12 Mar 2021 09:18:32 GMT
Content-Type: text/html
Content-Length: 4057
Last-Modified: Mon, 07 Oct 2019 21:16:24 GMT
ETag: "5d9bab28-fd9"
X-Varnish: 2
Age: 0
Via: 1.1 varnish (Varnish/6.0)
Accept-Ranges: bytes
Connection: keep-alive
Install and Configure Apache to Work with Varnish
First, you will need to install the Apache webserver package to your system. You can install it with the following command:
dnf install httpd -y
After installing Apache, edit the Apache default configuration file and change the listening port from 80 to 8080.
nano /etc/httpd/conf/httpd.conf
Change the following line:
Listen 8080
Save and close the file then start the Apache service and enable it to start at system reboot with the following command:
systemctl start httpd
systemctl enable httpd
You can also verify the Apache listening port with the following command:
ss -antpl | grep httpd
You should get the following output:
LISTEN 0 128 *:8080 *:* users:(("httpd",pid=7556,fd=4),("httpd",pid=7555,fd=4),("httpd",pid=7554,fd=4),("httpd",pid=7552,fd=4))
At this point, the Varnish cache is installed and configured to forward all requests coming on port 80 to the Apache web server which is listening on port 8080.
You can verify whether the Varnish cache is working or not with the following command:
curl -I http://localhost
You should get the following output:
Date: Fri, 12 Mar 2021 09:21:14 GMT
Server: Apache/2.4.37 (centos)
Content-Location: index.html.zh-CN
Vary: negotiate,accept-language
TCN: choice
Last-Modified: Fri, 14 Jun 2019 03:37:43 GMT
ETag: "fa6-58b405e7d6fc0;5bd5365602e05"
Accept-Ranges: bytes
Content-Length: 4006
Content-Type: text/html; charset=UTF-8
Content-Language: zh-cn
X-Varnish: 2
Age: 0
Via: 1.1 varnish (Varnish/6.0)
Connection: keep-alive
Working with Varnish Command Line
Varnish comes with several useful utilities that help you to monitor and control Varnish.
varnishadm is a command-line utility used to list configured backends.
varnishadm
You should see the following output:
200
-----------------------------
Varnish Cache CLI 1.0
-----------------------------
Linux,4.18.0-193.6.3.el8_2.x86_64,x86_64,-junix,-smalloc,-sdefault,-hcritbit
varnish-6.0.6 revision 29a1a8243dbef3d973aec28dc90403188c1dc8e7

Type 'help' for command list.
Type 'quit' to close CLI session.
Now, run the following command to list all backends:
varnish> backend.list
You should see the following output:
200
Backend name                   Admin      Probe                Last updated
boot.default                   probe      Healthy (no probe)   Sat, 13 Mar 2021 03:00:02 GMT
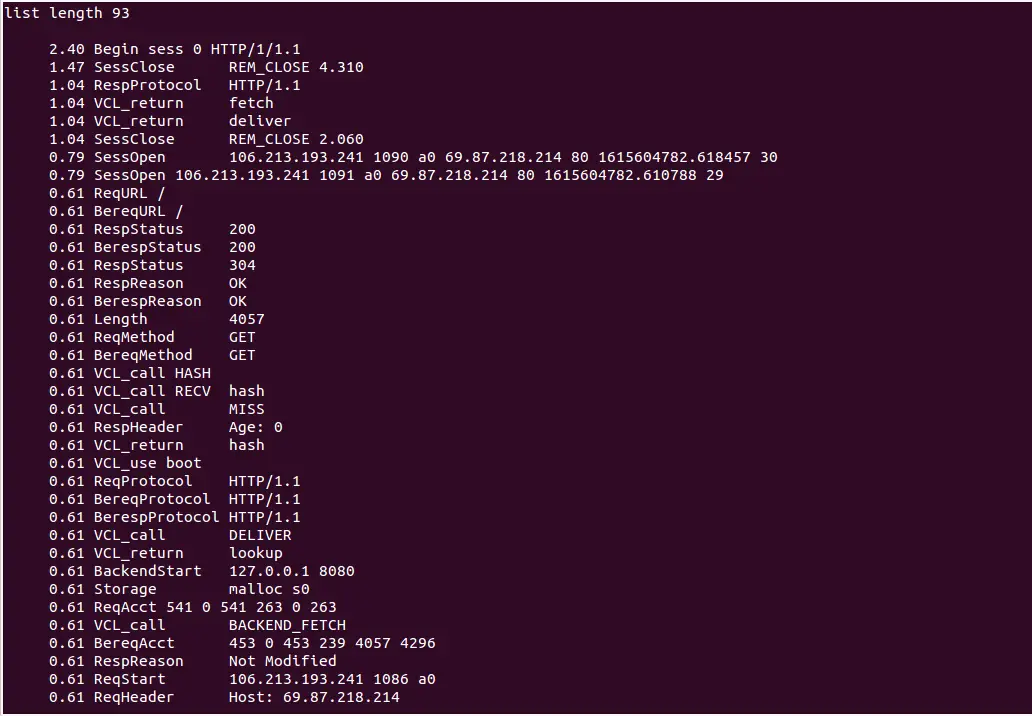
varnishlog
The varnishlog utility is used to display the logs of all user requests.
varnishlog
You should get the following output:
*   << BeReq    >> 6
-   Begin          bereq 5 fetch
-   VCL_use        boot
-   Timestamp      Start: 1615604631.507187 0.000000 0.000000
-   BereqMethod    GET
-   BereqURL       /
-   BereqProtocol  HTTP/1.1
-   BereqHeader    Host: 69.87.218.214
-   BereqHeader    Upgrade-Insecure-Requests: 1
-   BereqHeader    User-Agent: Mozilla/5.0 (X11; Linux x86_64) AppleWebKit/537.36 (KHTML, like Gecko) Chrome/87.0.4280.141 Safari/537.36
-   BereqHeader    Accept: text/html,application/xhtml+xml,application/xml;q=0.9,image/avif,image/webp,image/apng,*/*;q=0.8,application/signed-exchange;v=b3;q=0.9
-   BereqHeader    Accept-Language: en-GB,en-US;q=0.9,en;q=0.8
-   BereqHeader    X-Forwarded-For: 106.213.193.241
-   BereqHeader    Accept-Encoding: gzip
-   BereqHeader    X-Varnish: 6
-   VCL_call       BACKEND_FETCH
-   VCL_return     fetch
-   BackendOpen    31 boot.default 127.0.0.1 8080 127.0.0.1 58860
-   BackendStart   127.0.0.1 8080
-   Timestamp      Bereq: 1615604631.507458 0.000270 0.000270
-   Timestamp      Beresp: 1615604631.507844 0.000657 0.000386
-   BerespProtocol HTTP/1.1
-   BerespStatus   200
-   BerespReason   OK
-   BerespHeader   Server: nginx/1.14.1
-   BerespHeader   Date: Sat, 13 Mar 2021 03:03:51 GMT
-   BerespHeader   Content-Type: text/html
-   BerespHeader   Content-Length: 4057
-   BerespHeader   Last-Modified: Mon, 07 Oct 2019 21:16:24 GMT
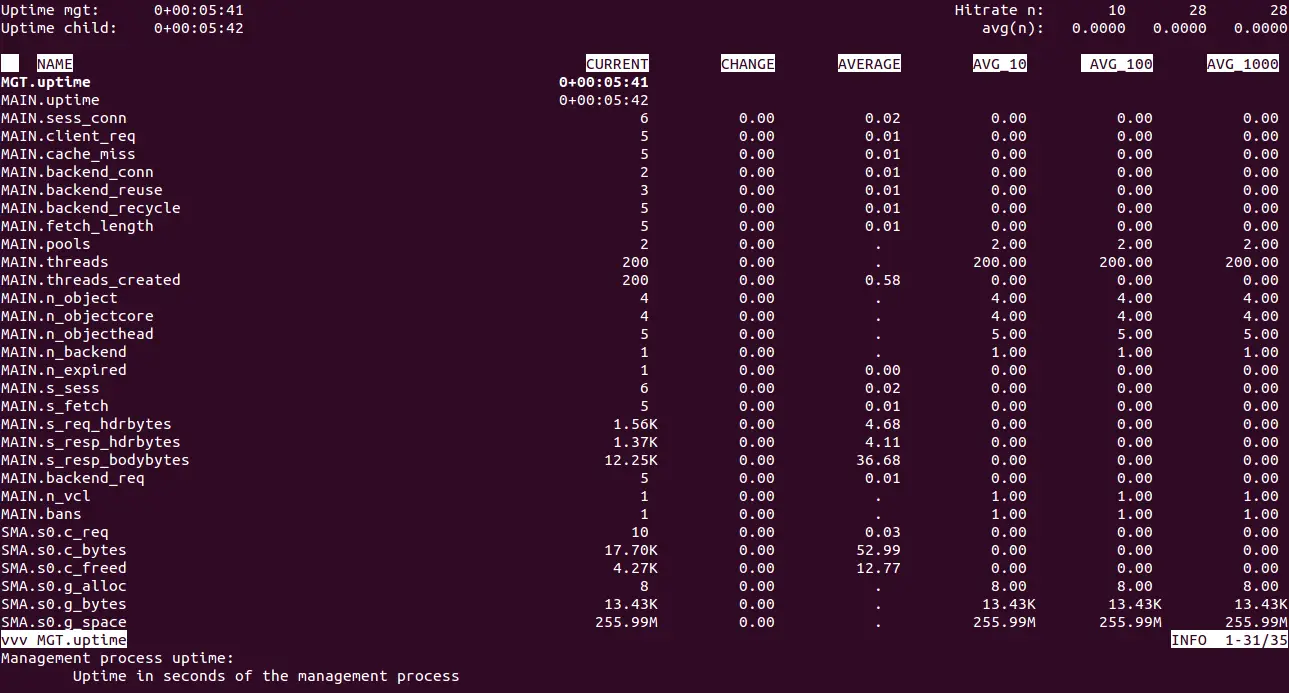
varnishstat
The varnishstat command provides you information about in-memory statistics, storage, threads created, and deleted objects.
varnishstat
You should see the following screen:
varnishtop
The varnishtop command reads varnishd shared memory logs and presents a continuously updated list of the most commonly occurring log entries.
varnishtop
You should see the following screen:
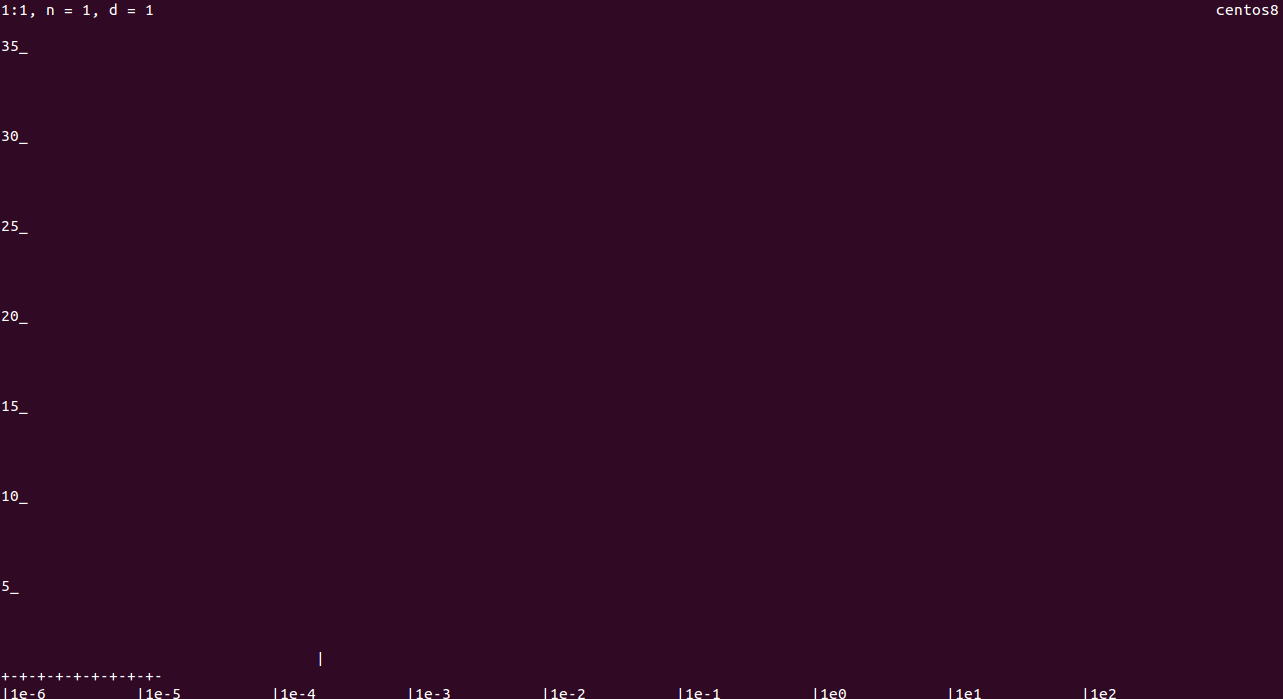
varnishhist
Varnishhist parses the varnish logs and prints the last n requests by their processing.
varnishhist
You should see the following screen:
Conclusion
In the above guide, you learned how to install and configure Varnish cache with Apache and Nginx web server. You can now implement Varnish cache in the production environment and speed your website performance. Feel free to ask me if you have any questions.

