How to create an SNS Topic and a Subscriber on AWS
Amazon Simple Notification Service (SNS) is a web service that coordinates and manages the delivery of messages. It is a highly available, durable, secure, fully managed pub/sub messaging service. It uses cross availability zone message storage to provide high message durability. Amazon SNS also ensures that data is encrypted in transit. It is used to broadcast the messages of a message-producer system.
To receive messages published to an SNS topic, we must subscribe to an endpoint. We can have endpoints such as AWS Lambda, Amazon SQS, HTTP/S, or an email address to the topic we create. When we subscribe to an endpoint to a topic and confirm the subscription, the endpoint begins to receive messages published to the associated topic.
To understand the billing of SNS Topic, click here.
In this article, we will create an SNS Topic and subscribe to an Email Endpoint.
Pre-requisites
- AWS Account (Create if you don’t have one).
What will we do?
- Login to AWS.
- Create an SNS Topic
- Create a Subscription in the SNS Topic
Login to AWS
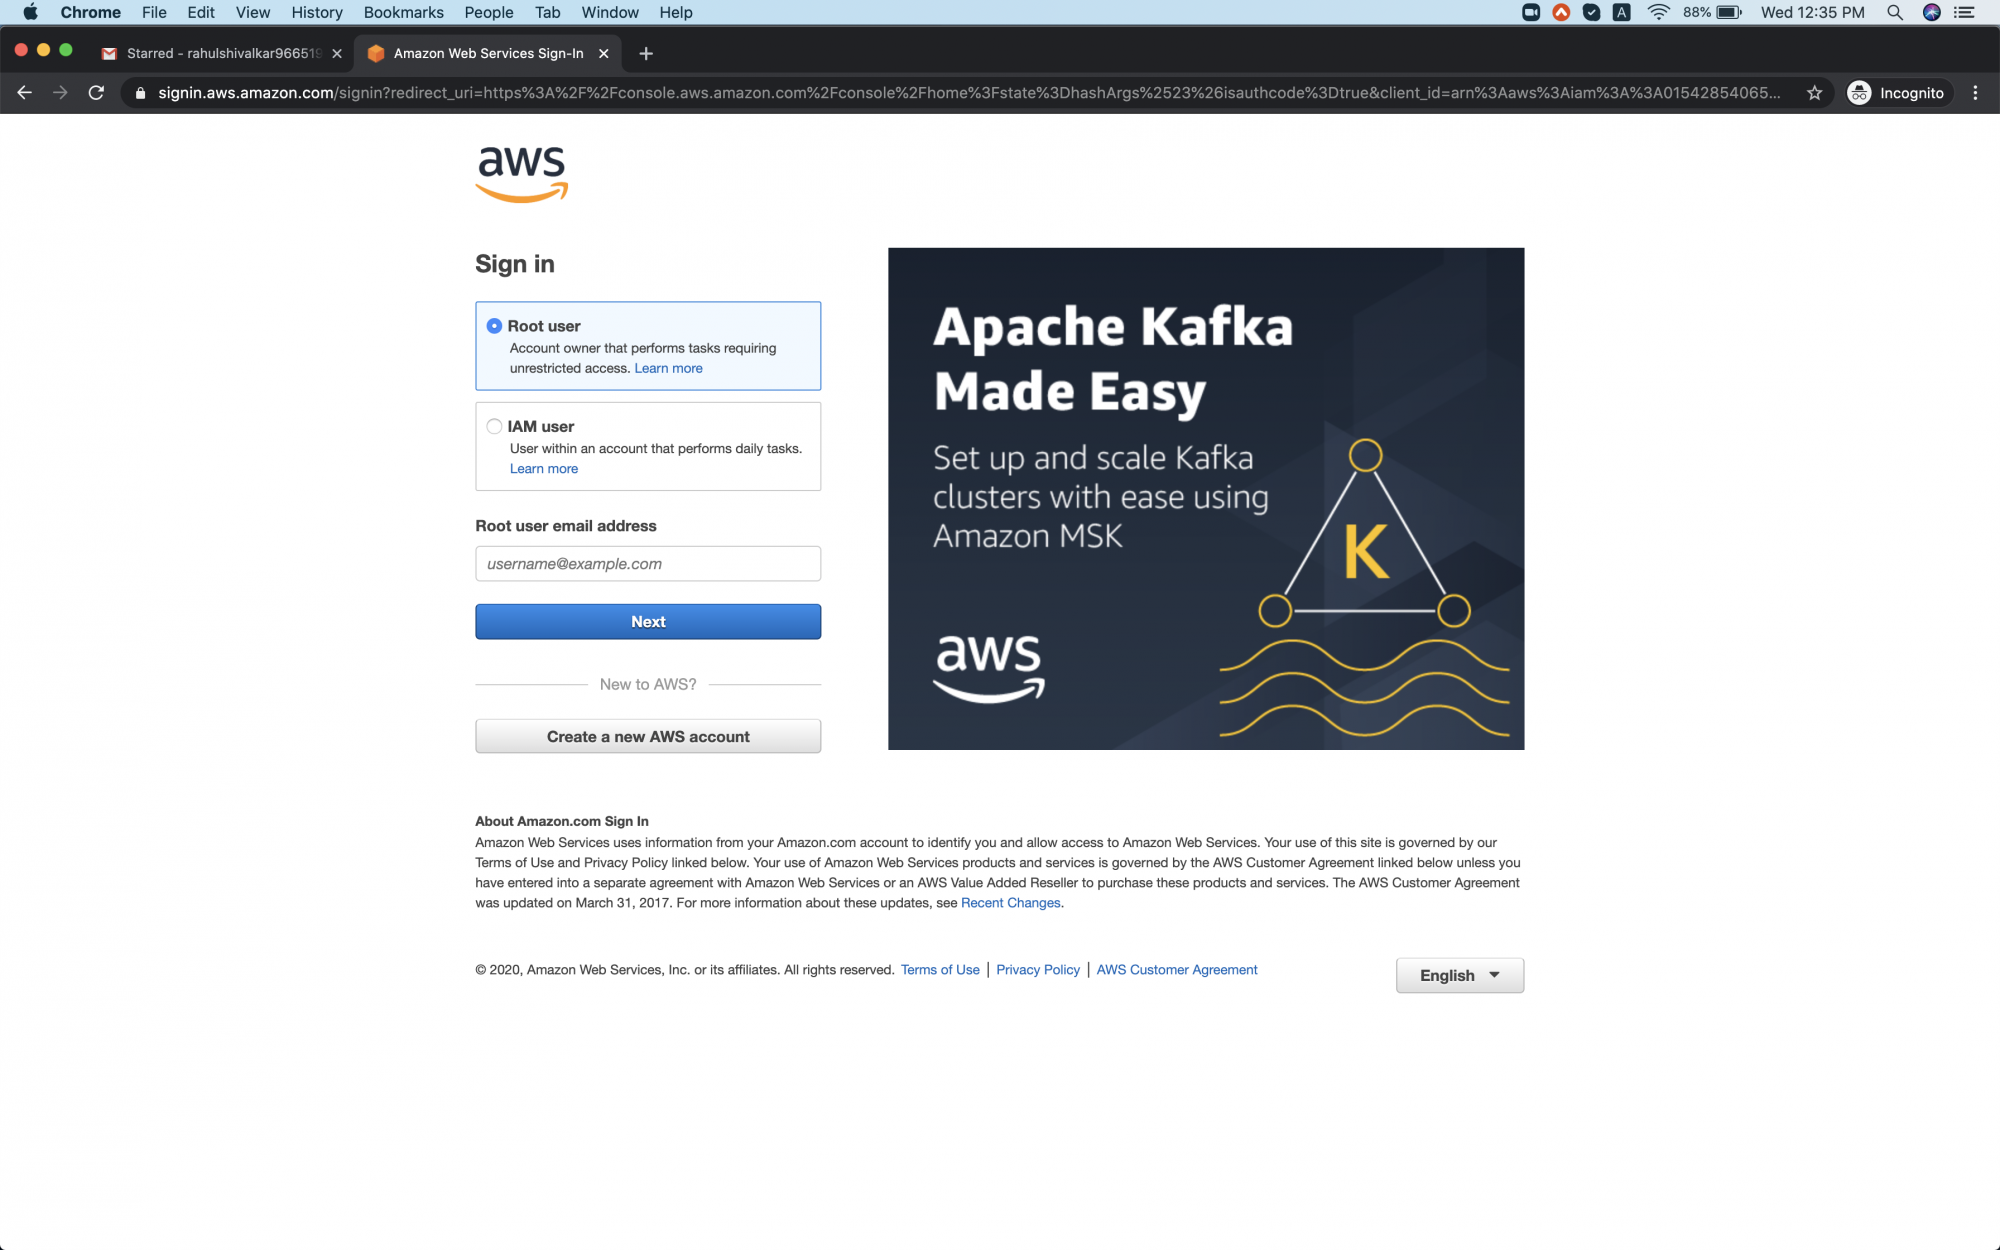
Click here to go to AWS Login Page.
When we hit the above link, we will see a web page as follows where we are required to login using our login details.
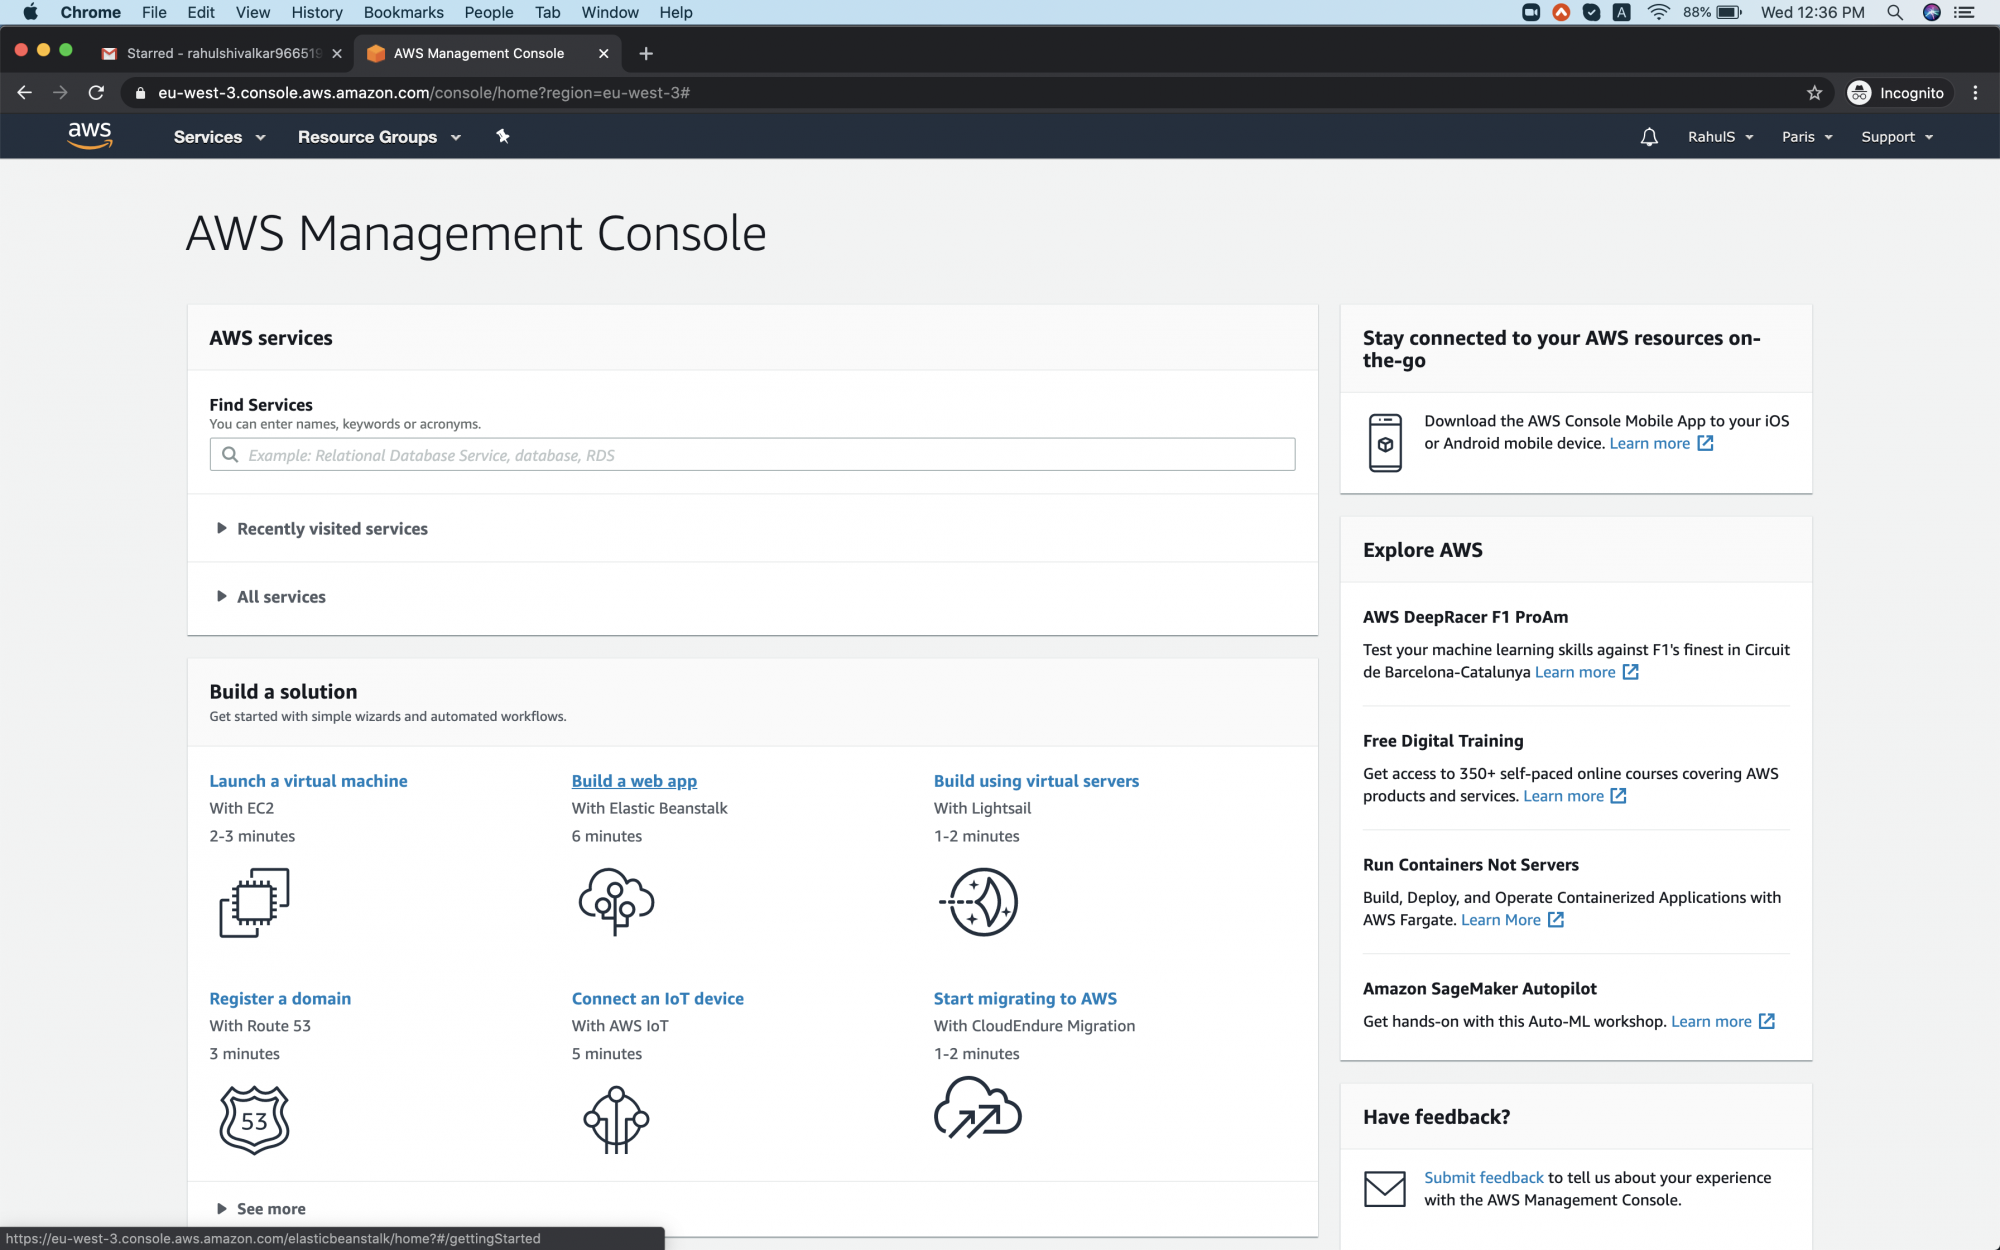
Once you log in, you see the screen as follows.
Create an SNS Topic
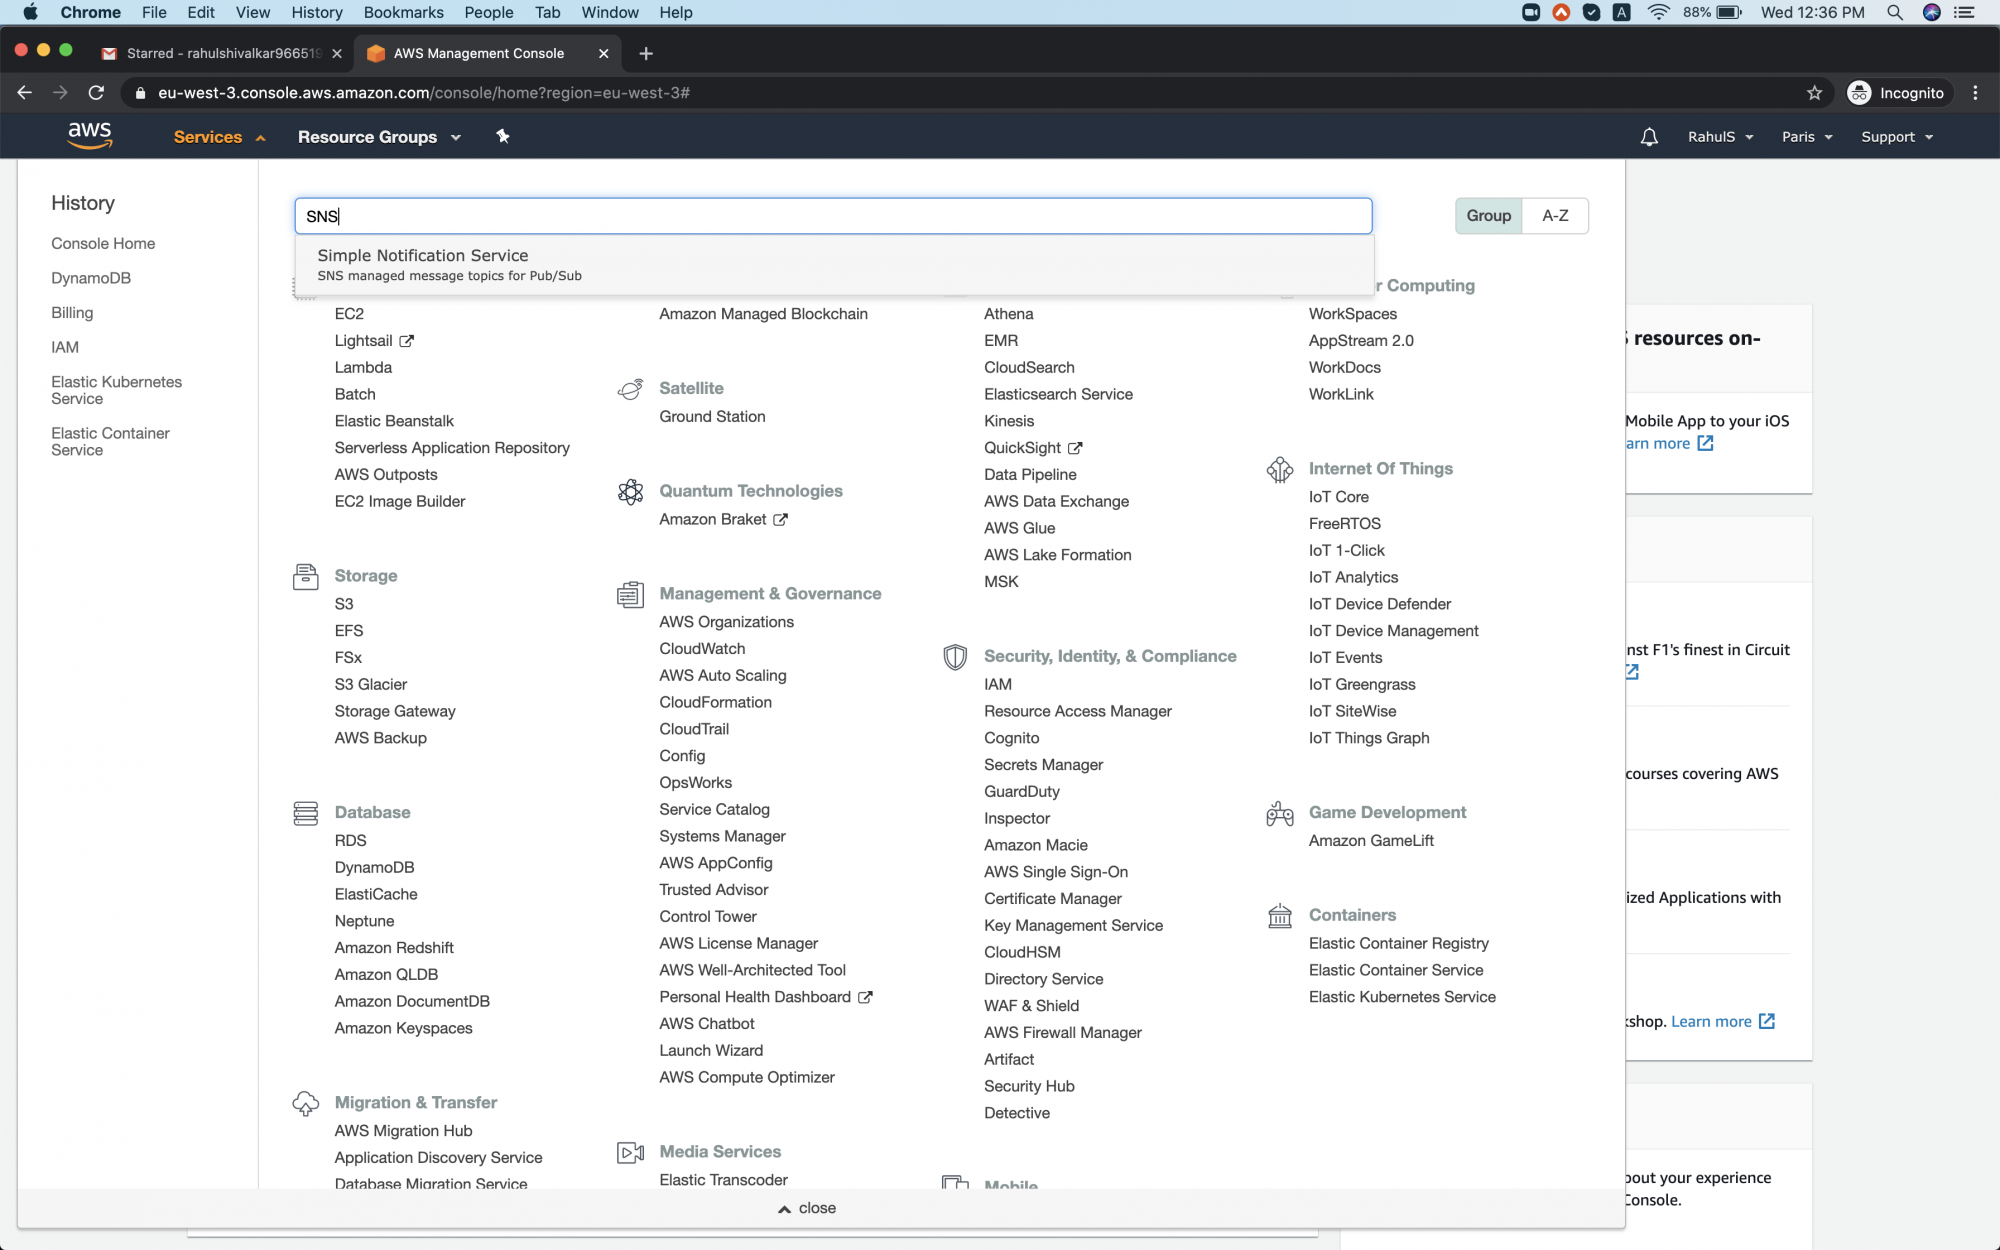
To create an SNS Topic, click on Services in the top left, search for SNS and open it.
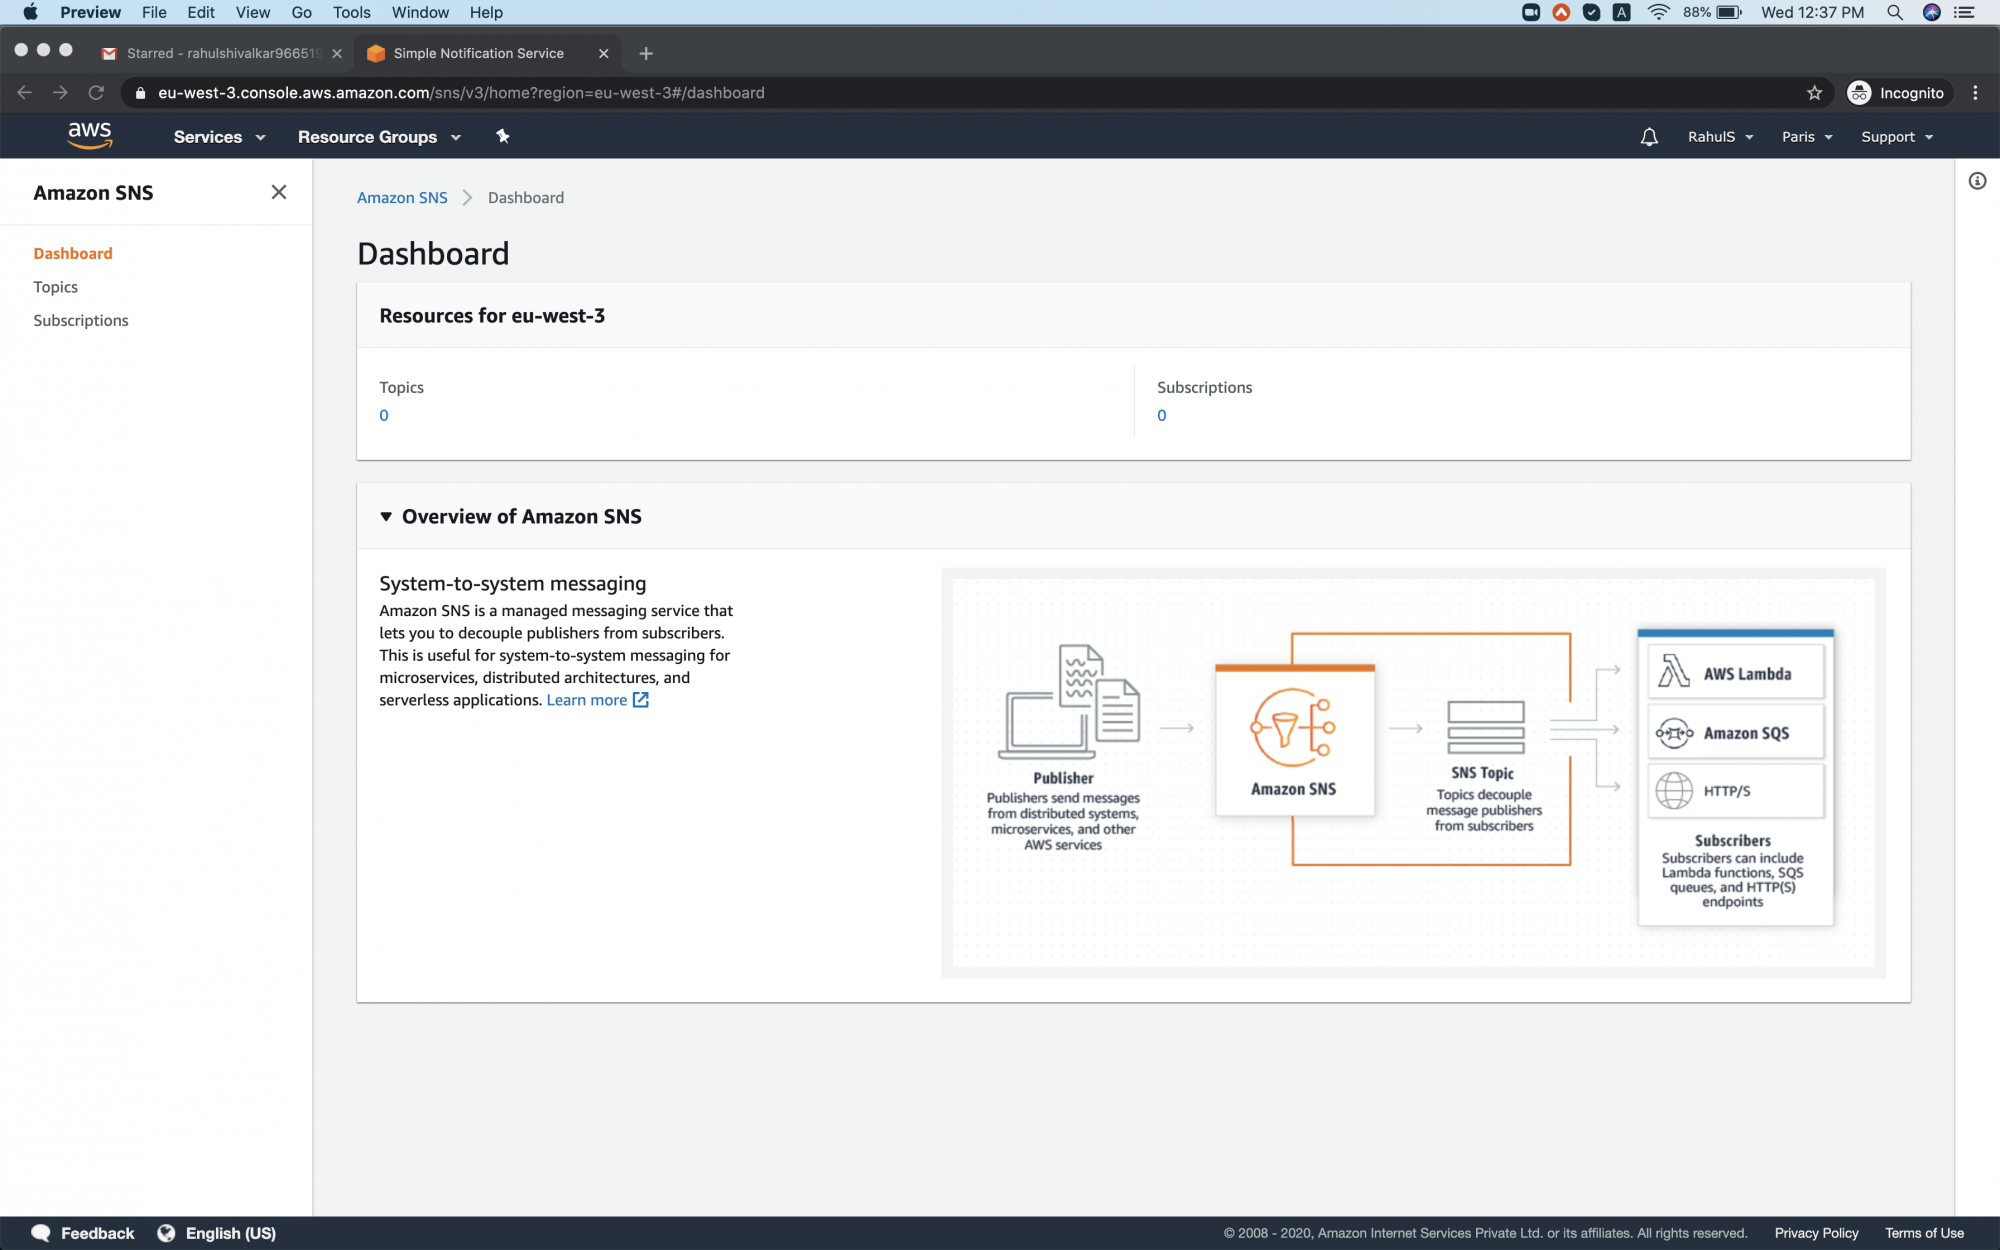
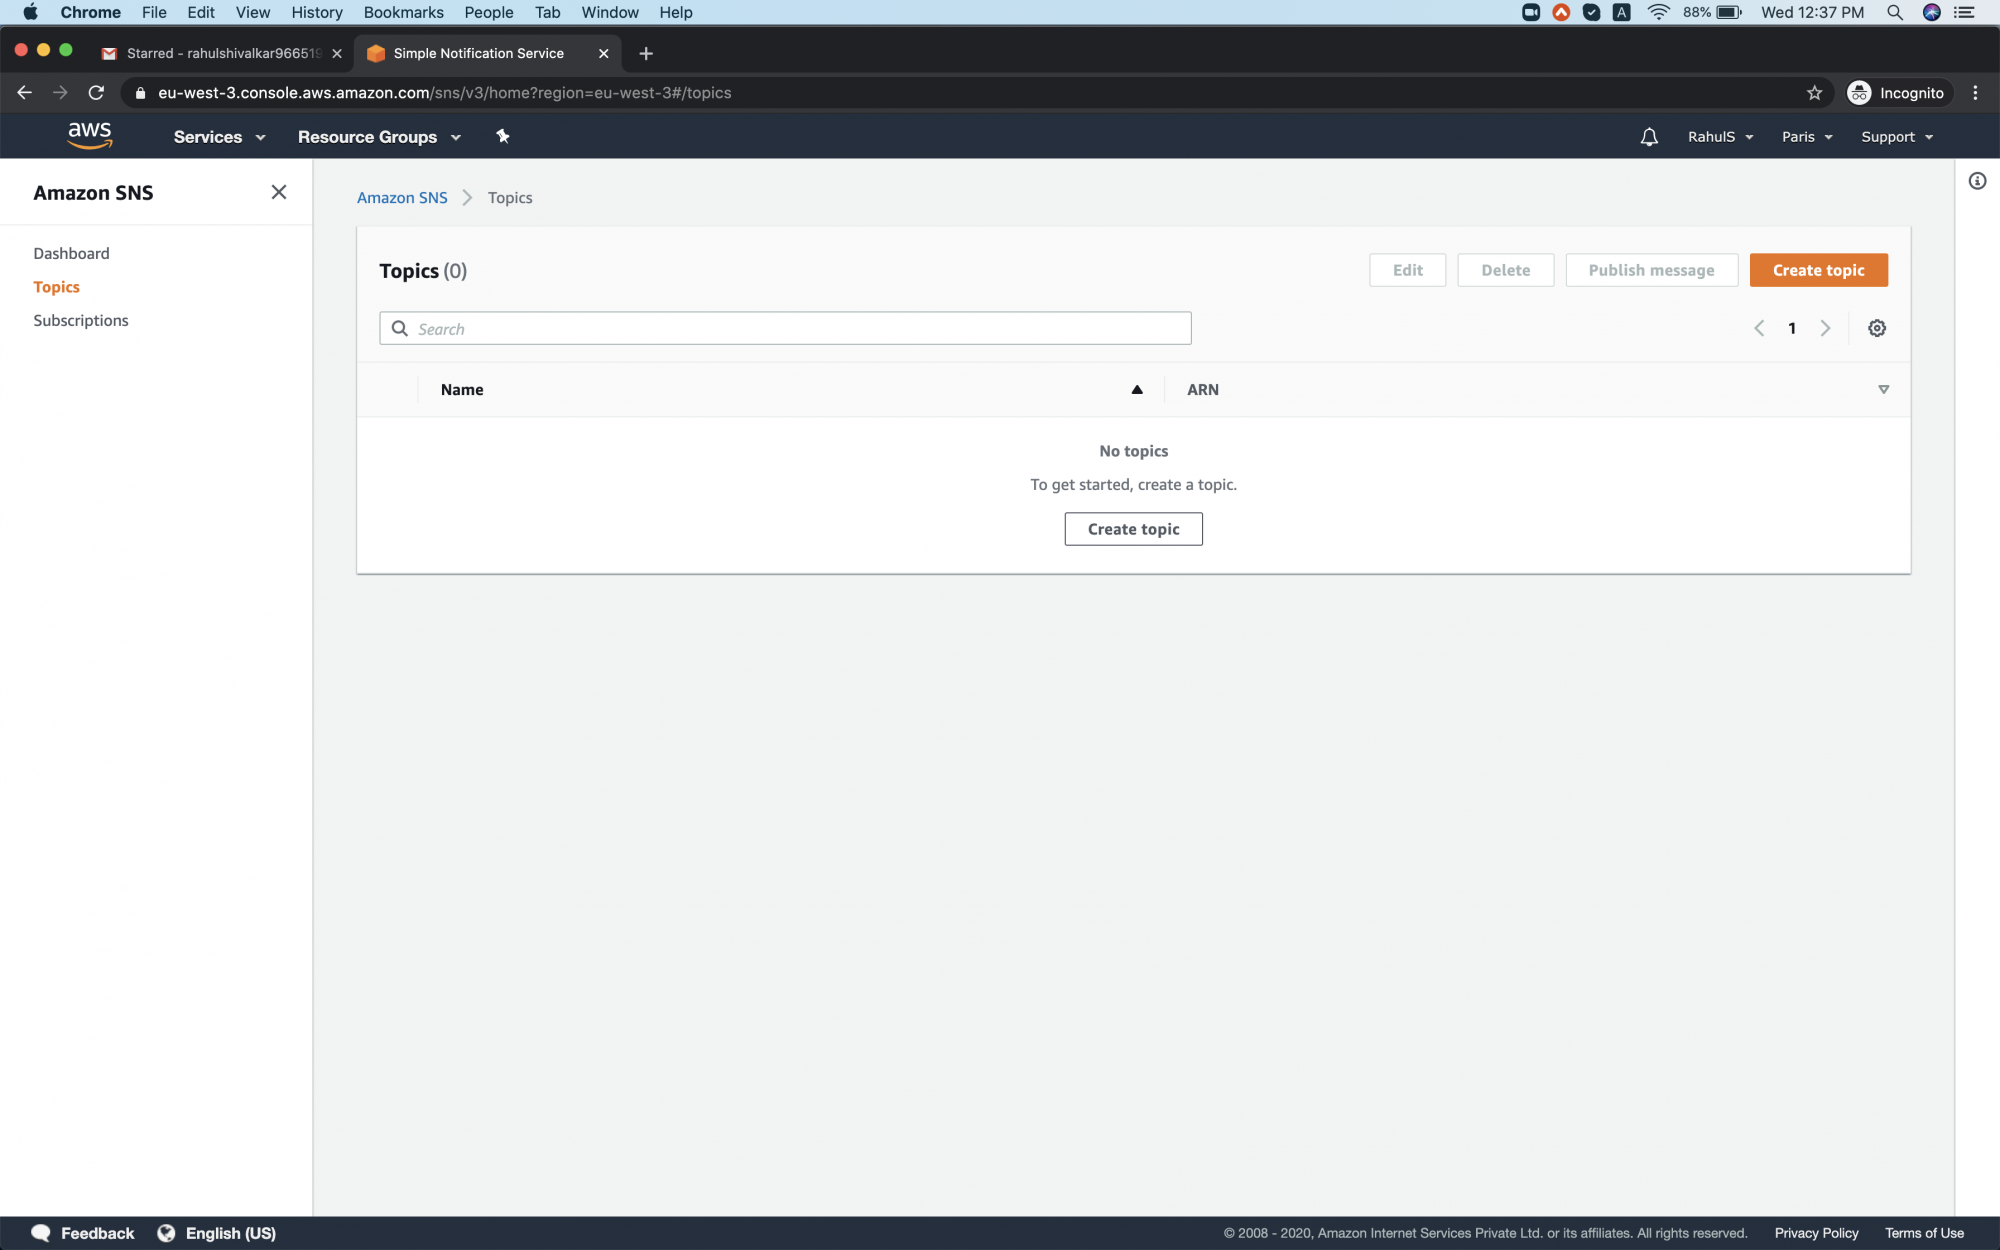
You will see the main dashboard of the SNS Service. Here, click on Topics in the left Panel.
On this page, click on the "Create topic" button to create your first SNS Topic
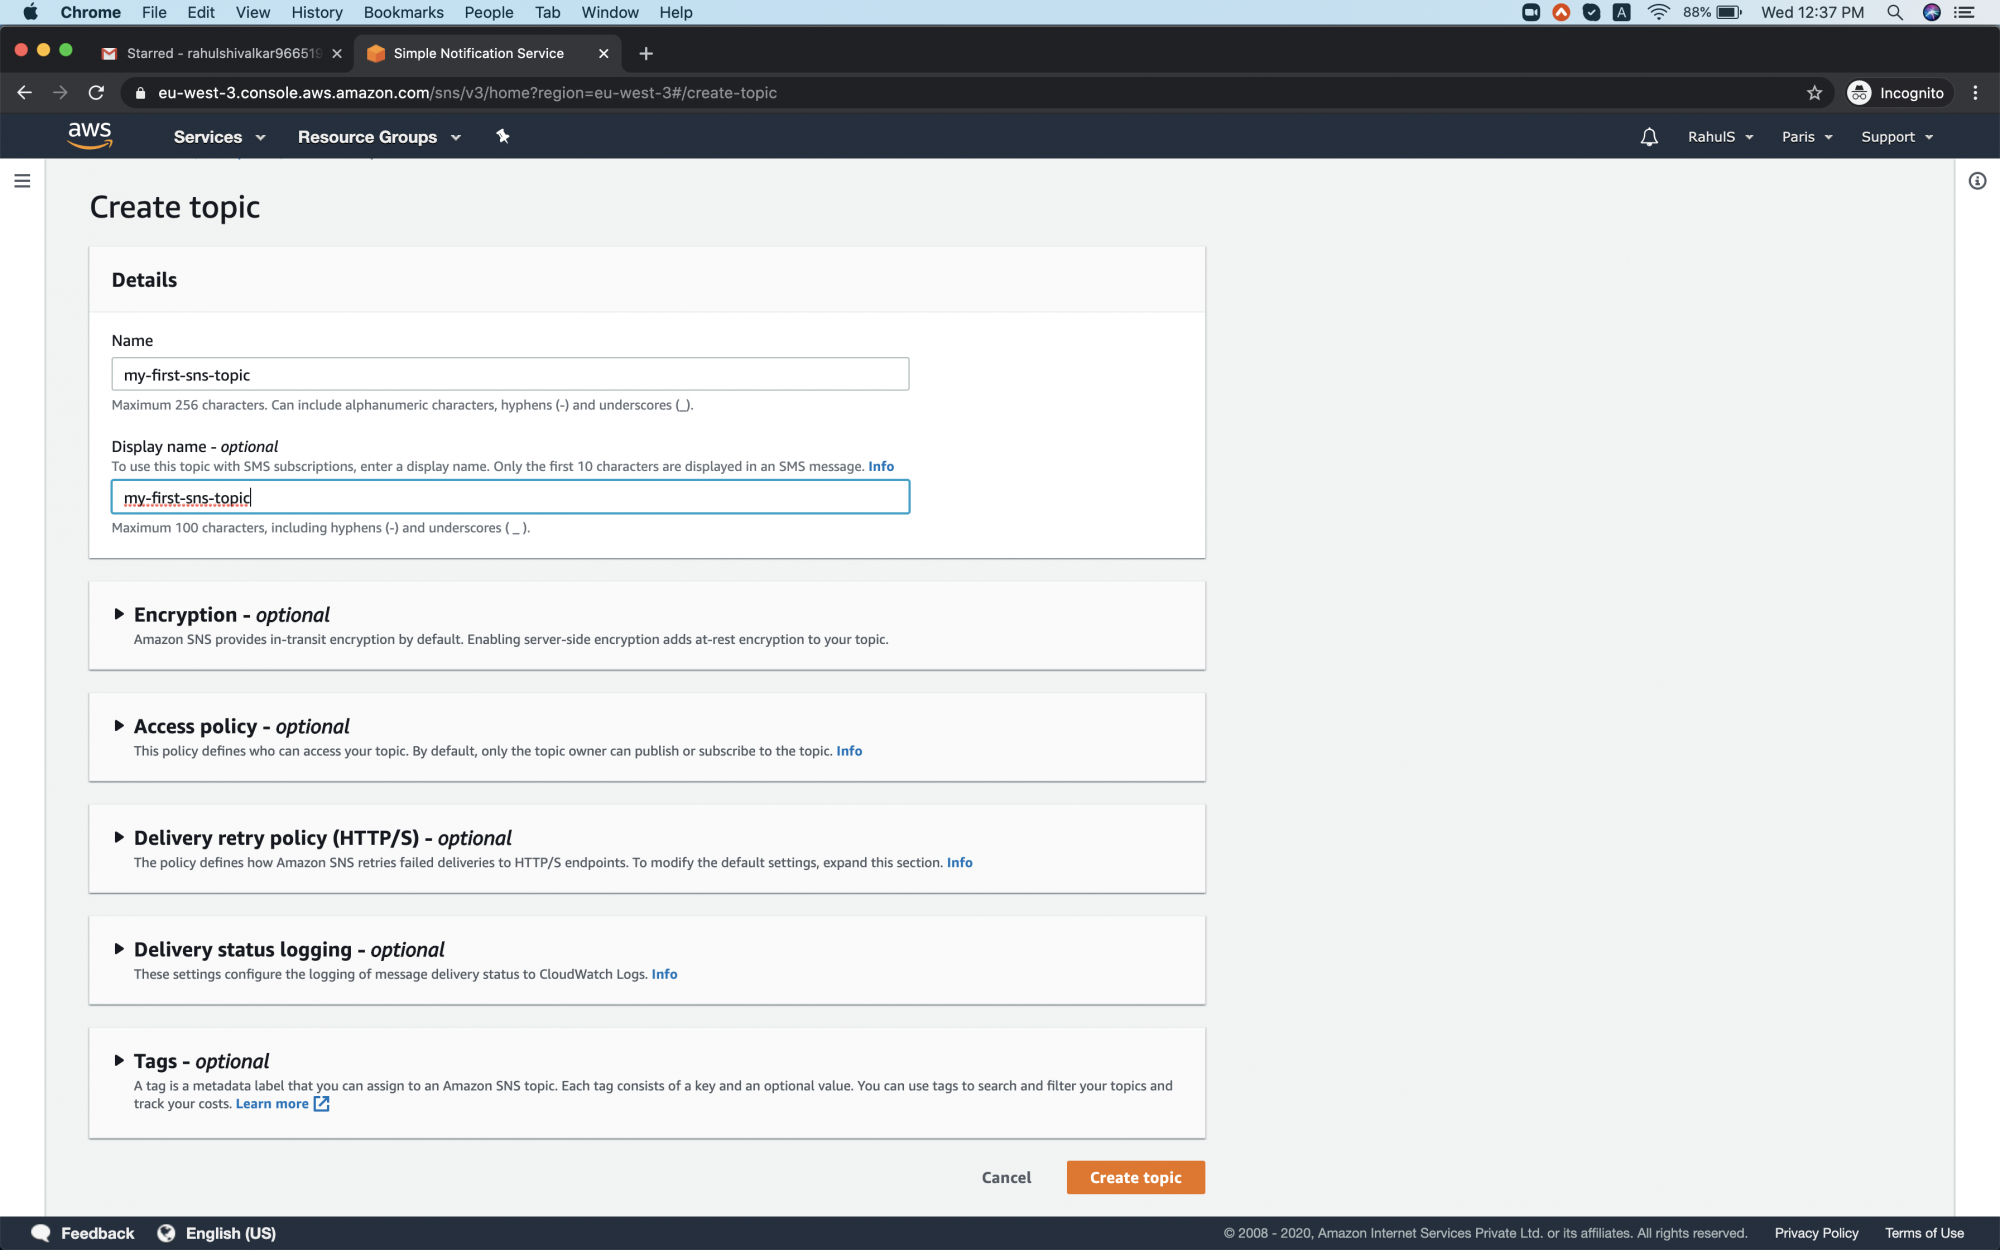
Give a name to the topic and click on "Create topic". You can skip other fields.
Create a Subscription in the SNS Topic
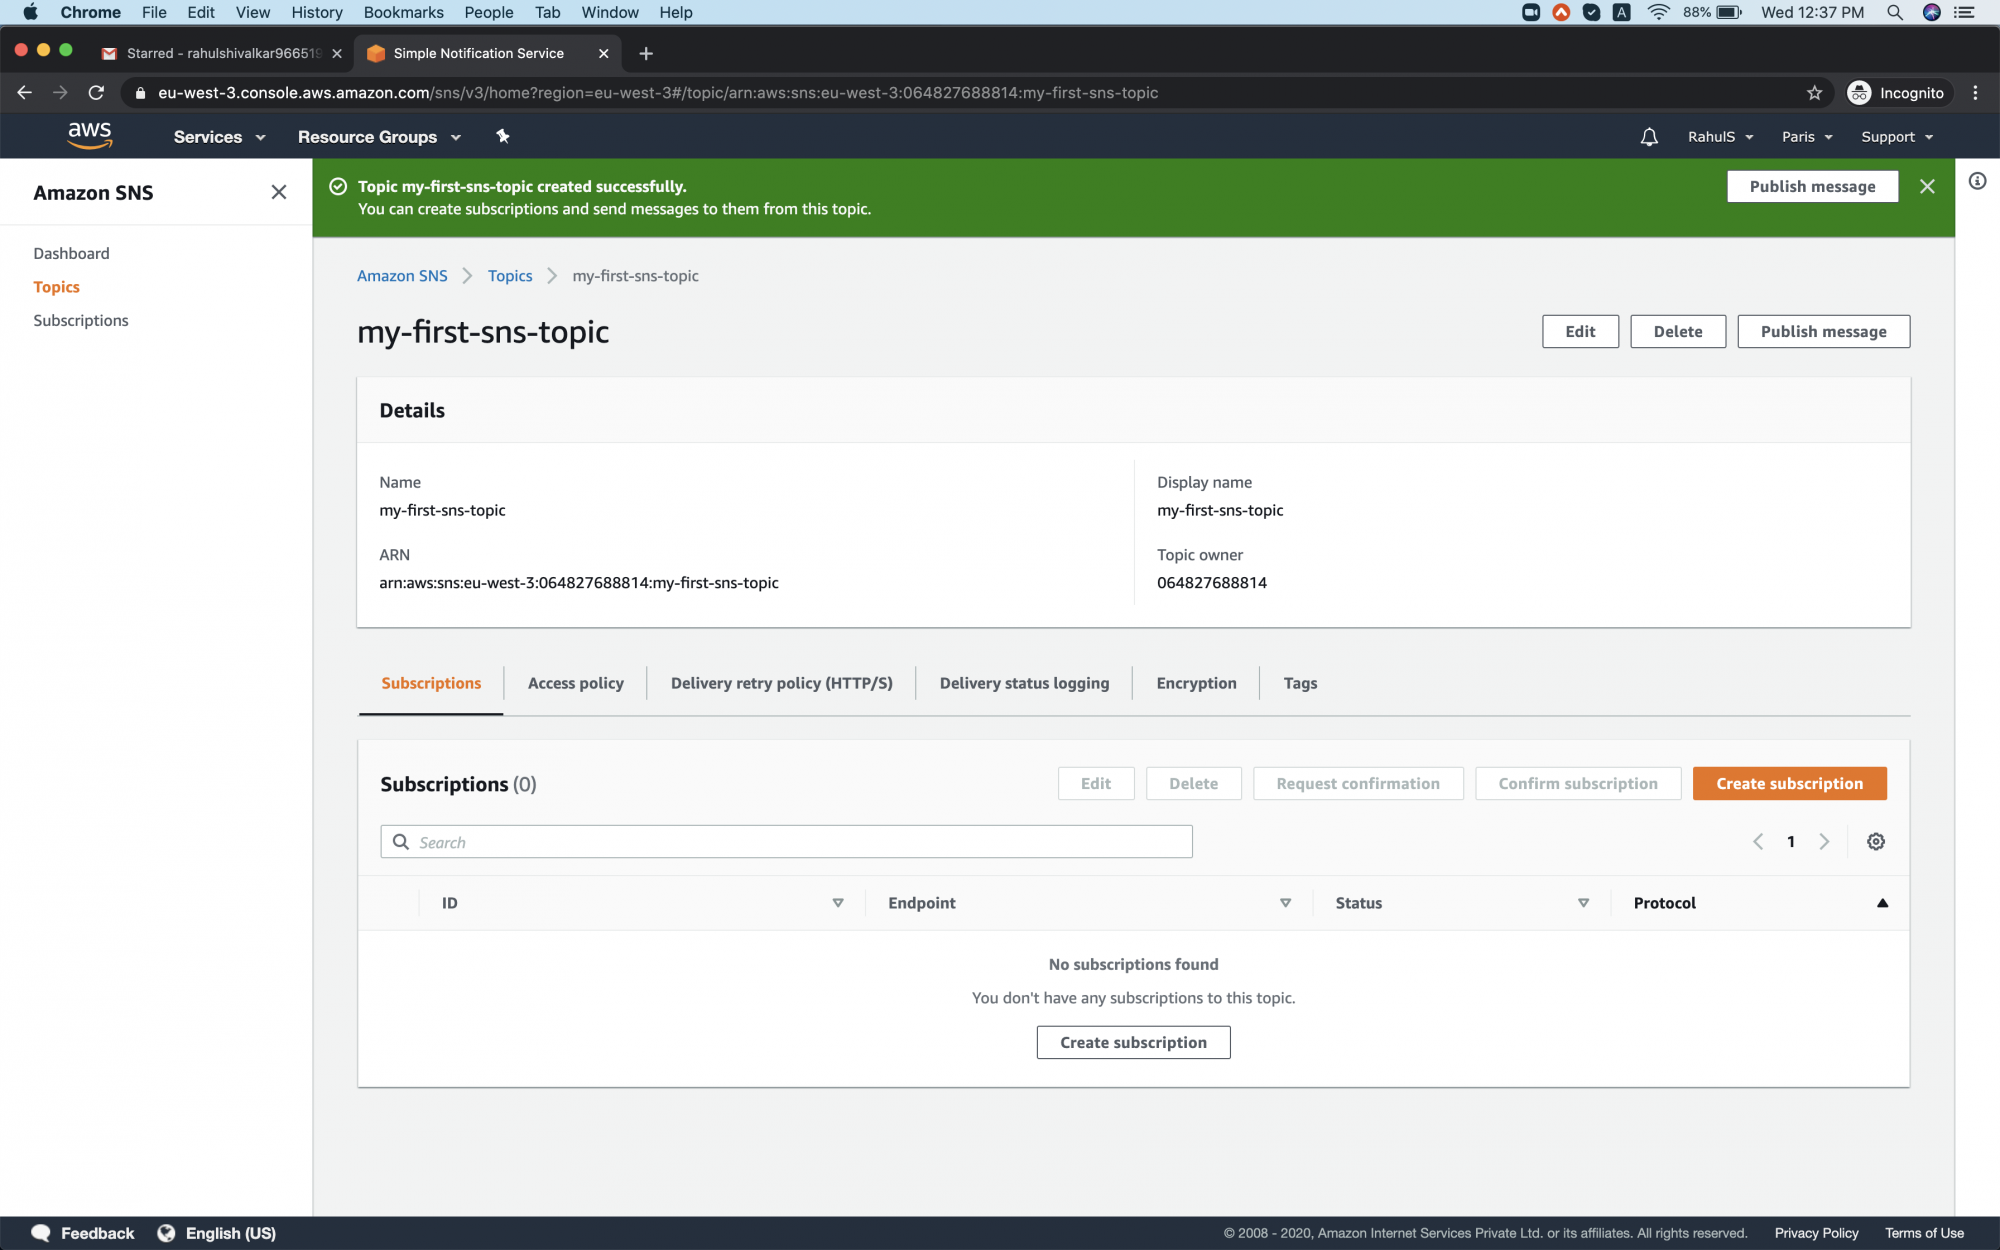
Once you have an SNS Topic, it's time to create a Subscription. Open the topic we just created and you will see the page as follows.
Under the Subscriptions tab, click on "Create subscriptions".
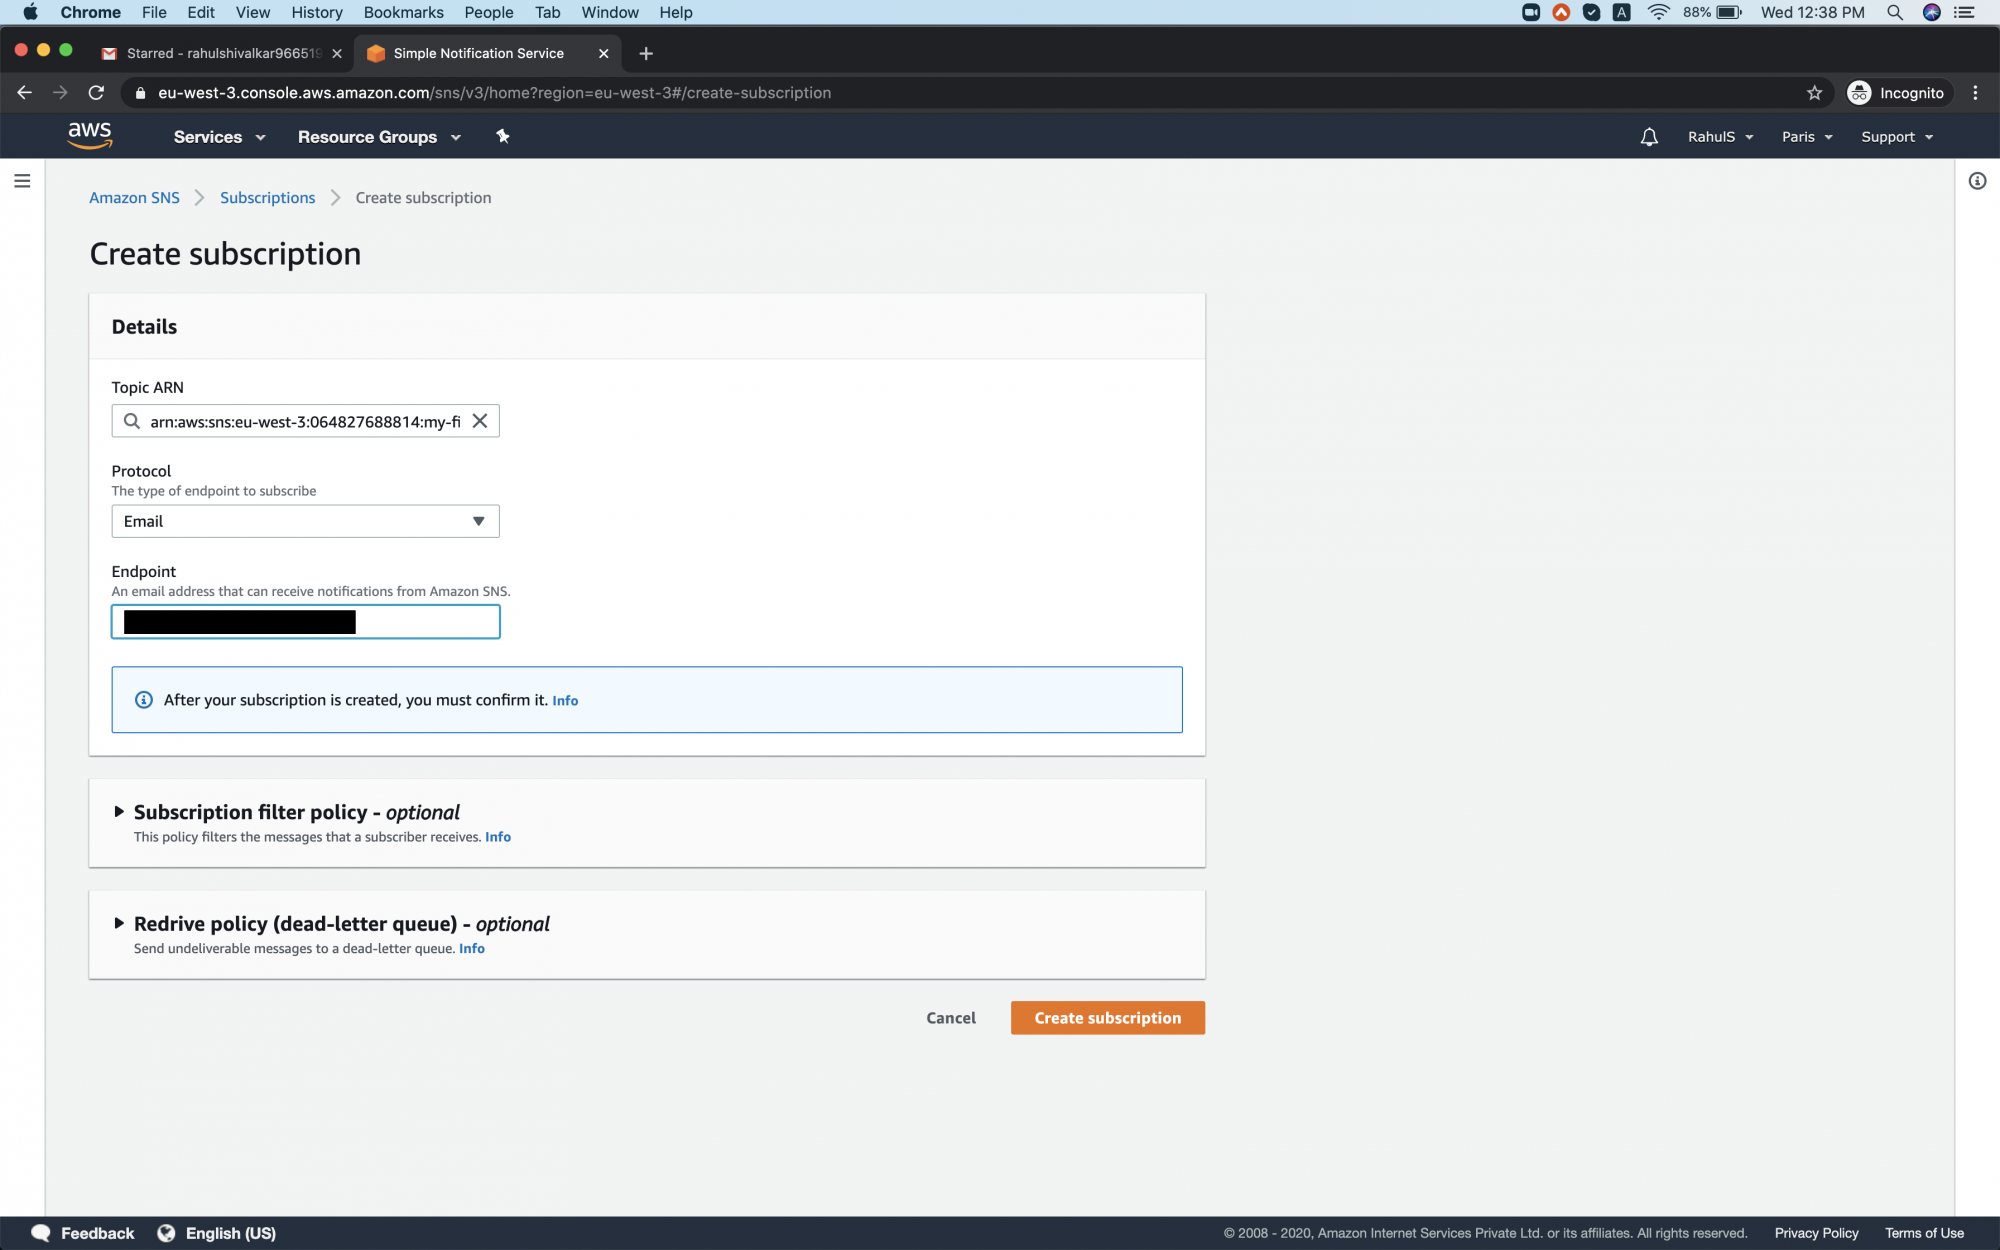
Choose the protocol as Email, specify your email address and click on "Create Subscriptions".
Just creating a subscription is not enough. We need to confirm the subscription.
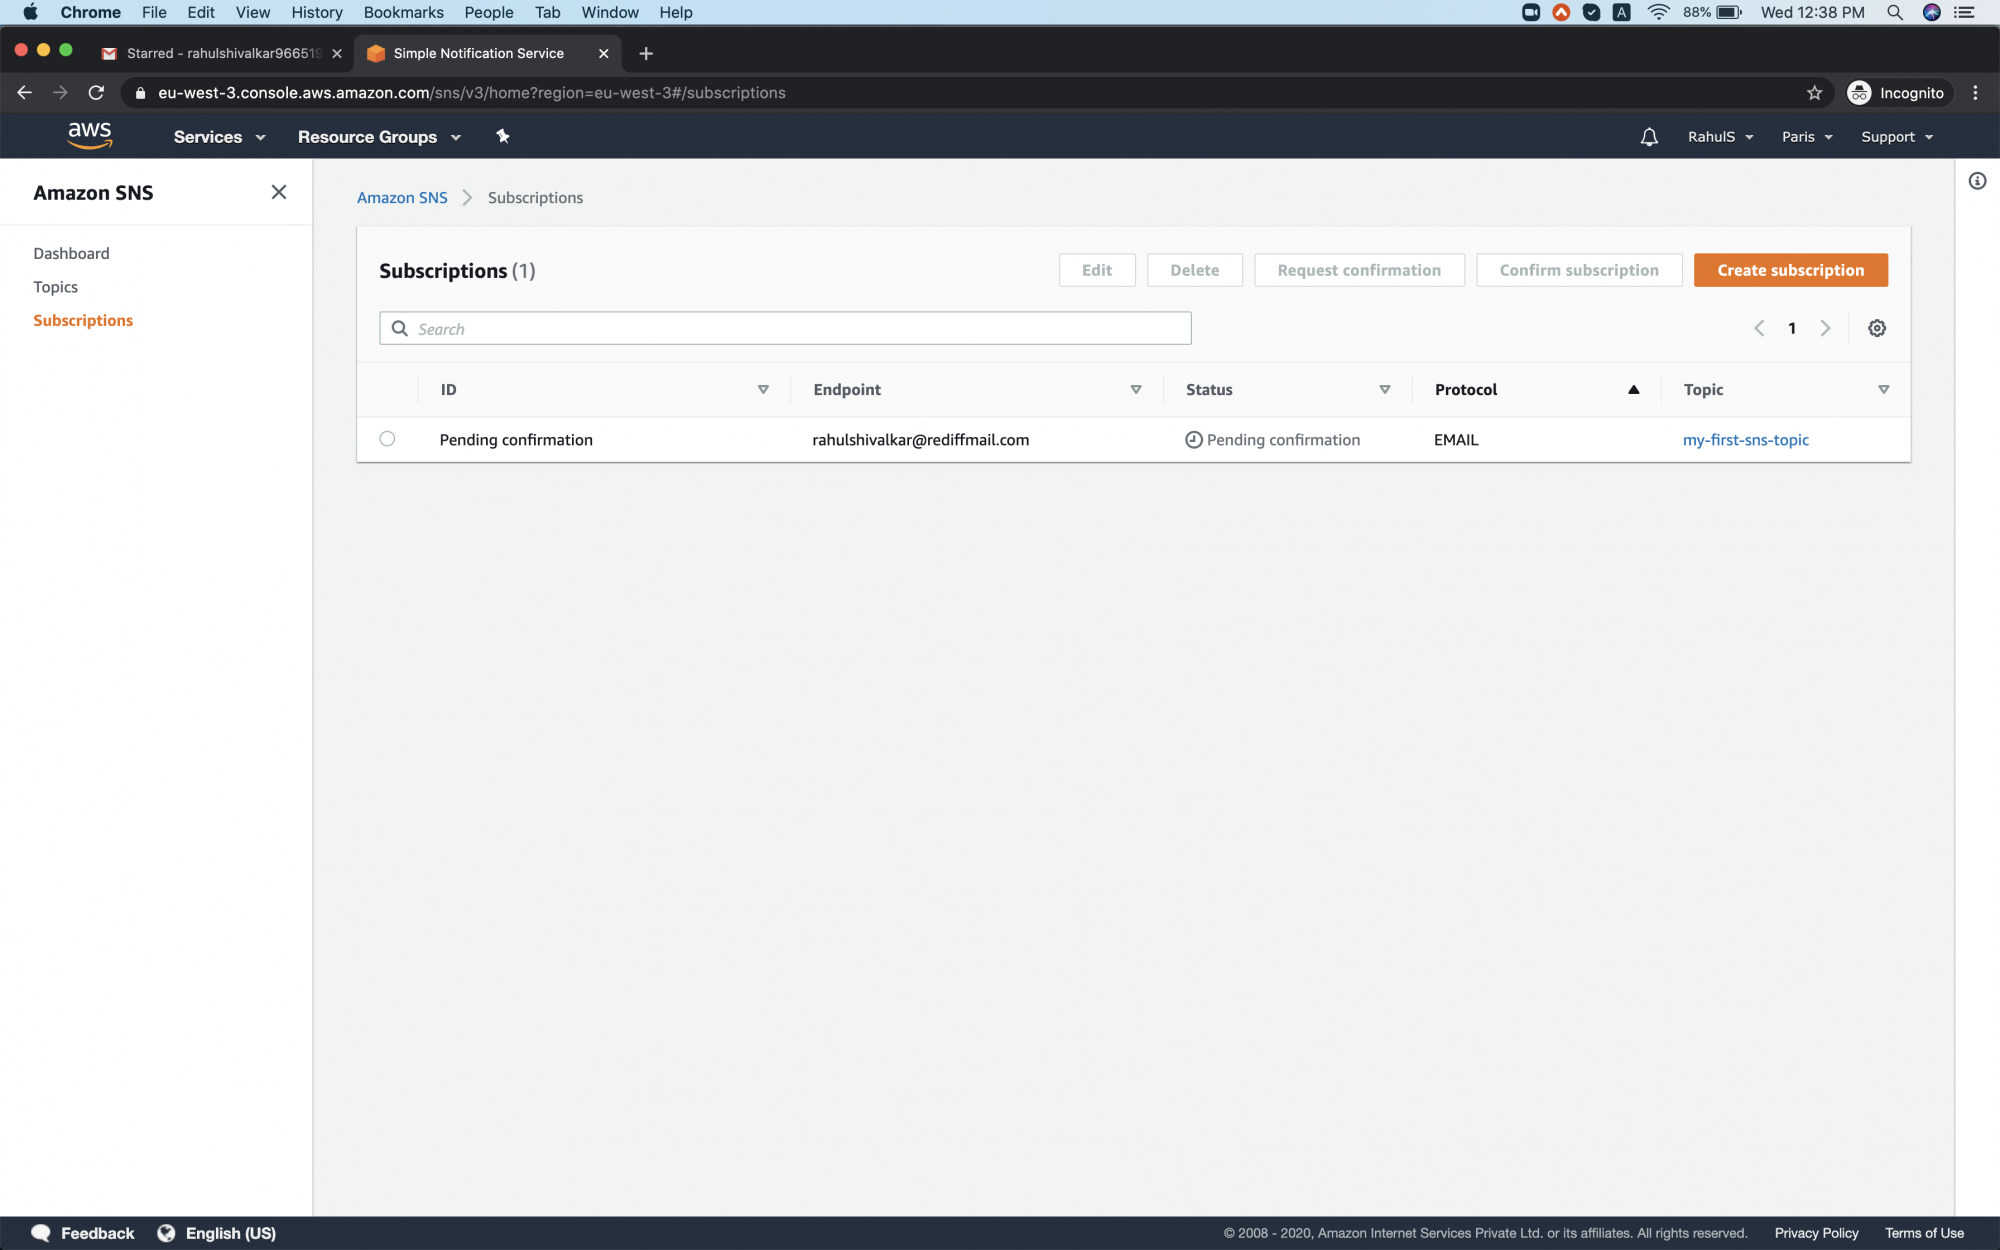
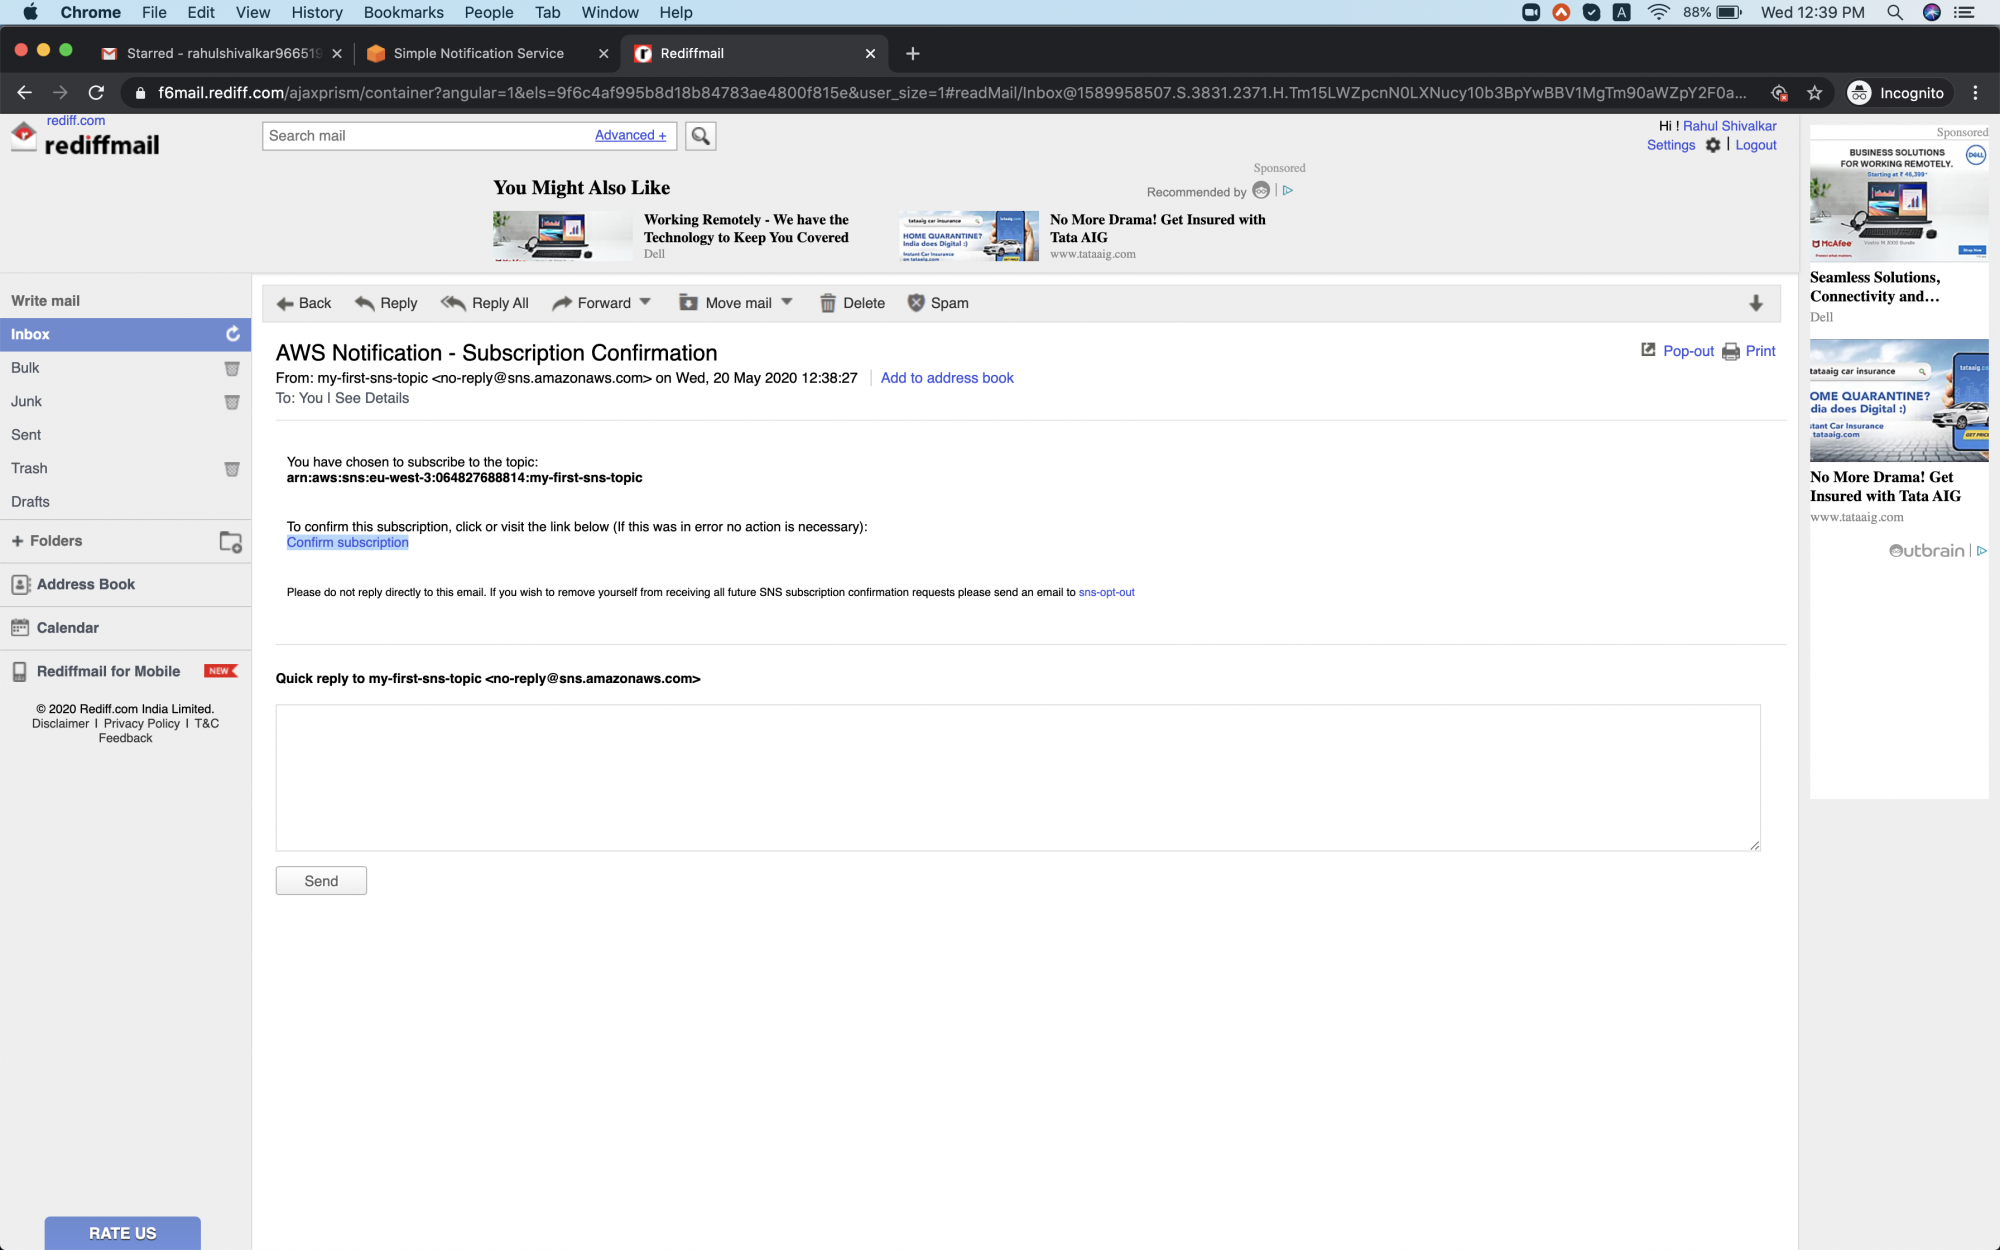
Check your email inbox, you must have received a Subscription email.
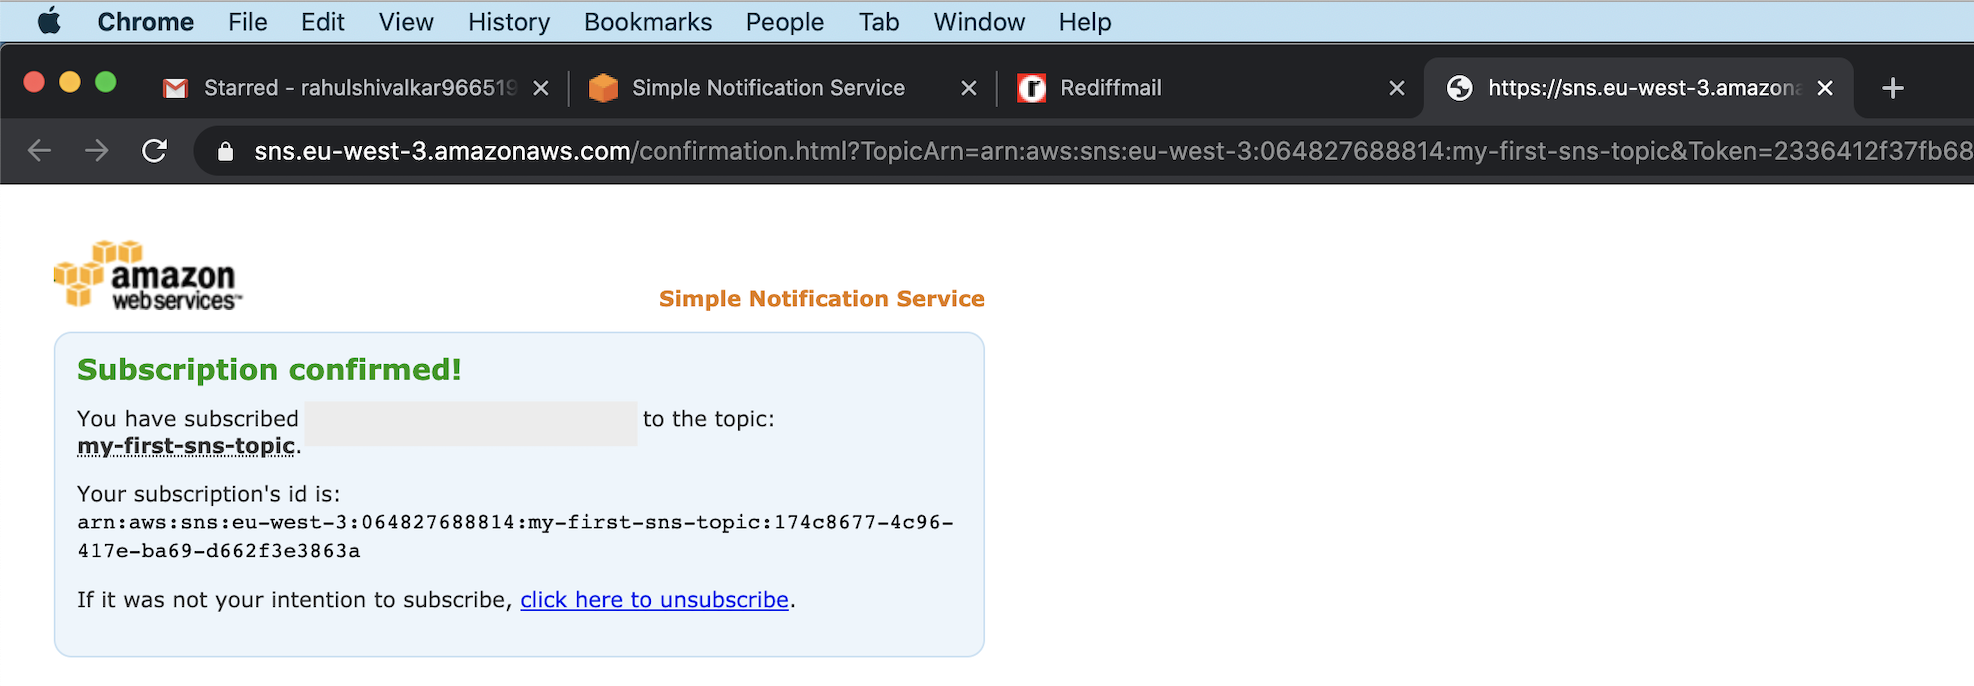
Click on "Confirm subscription" to confirm the subscription.
You will see the confirmation screen as follows.
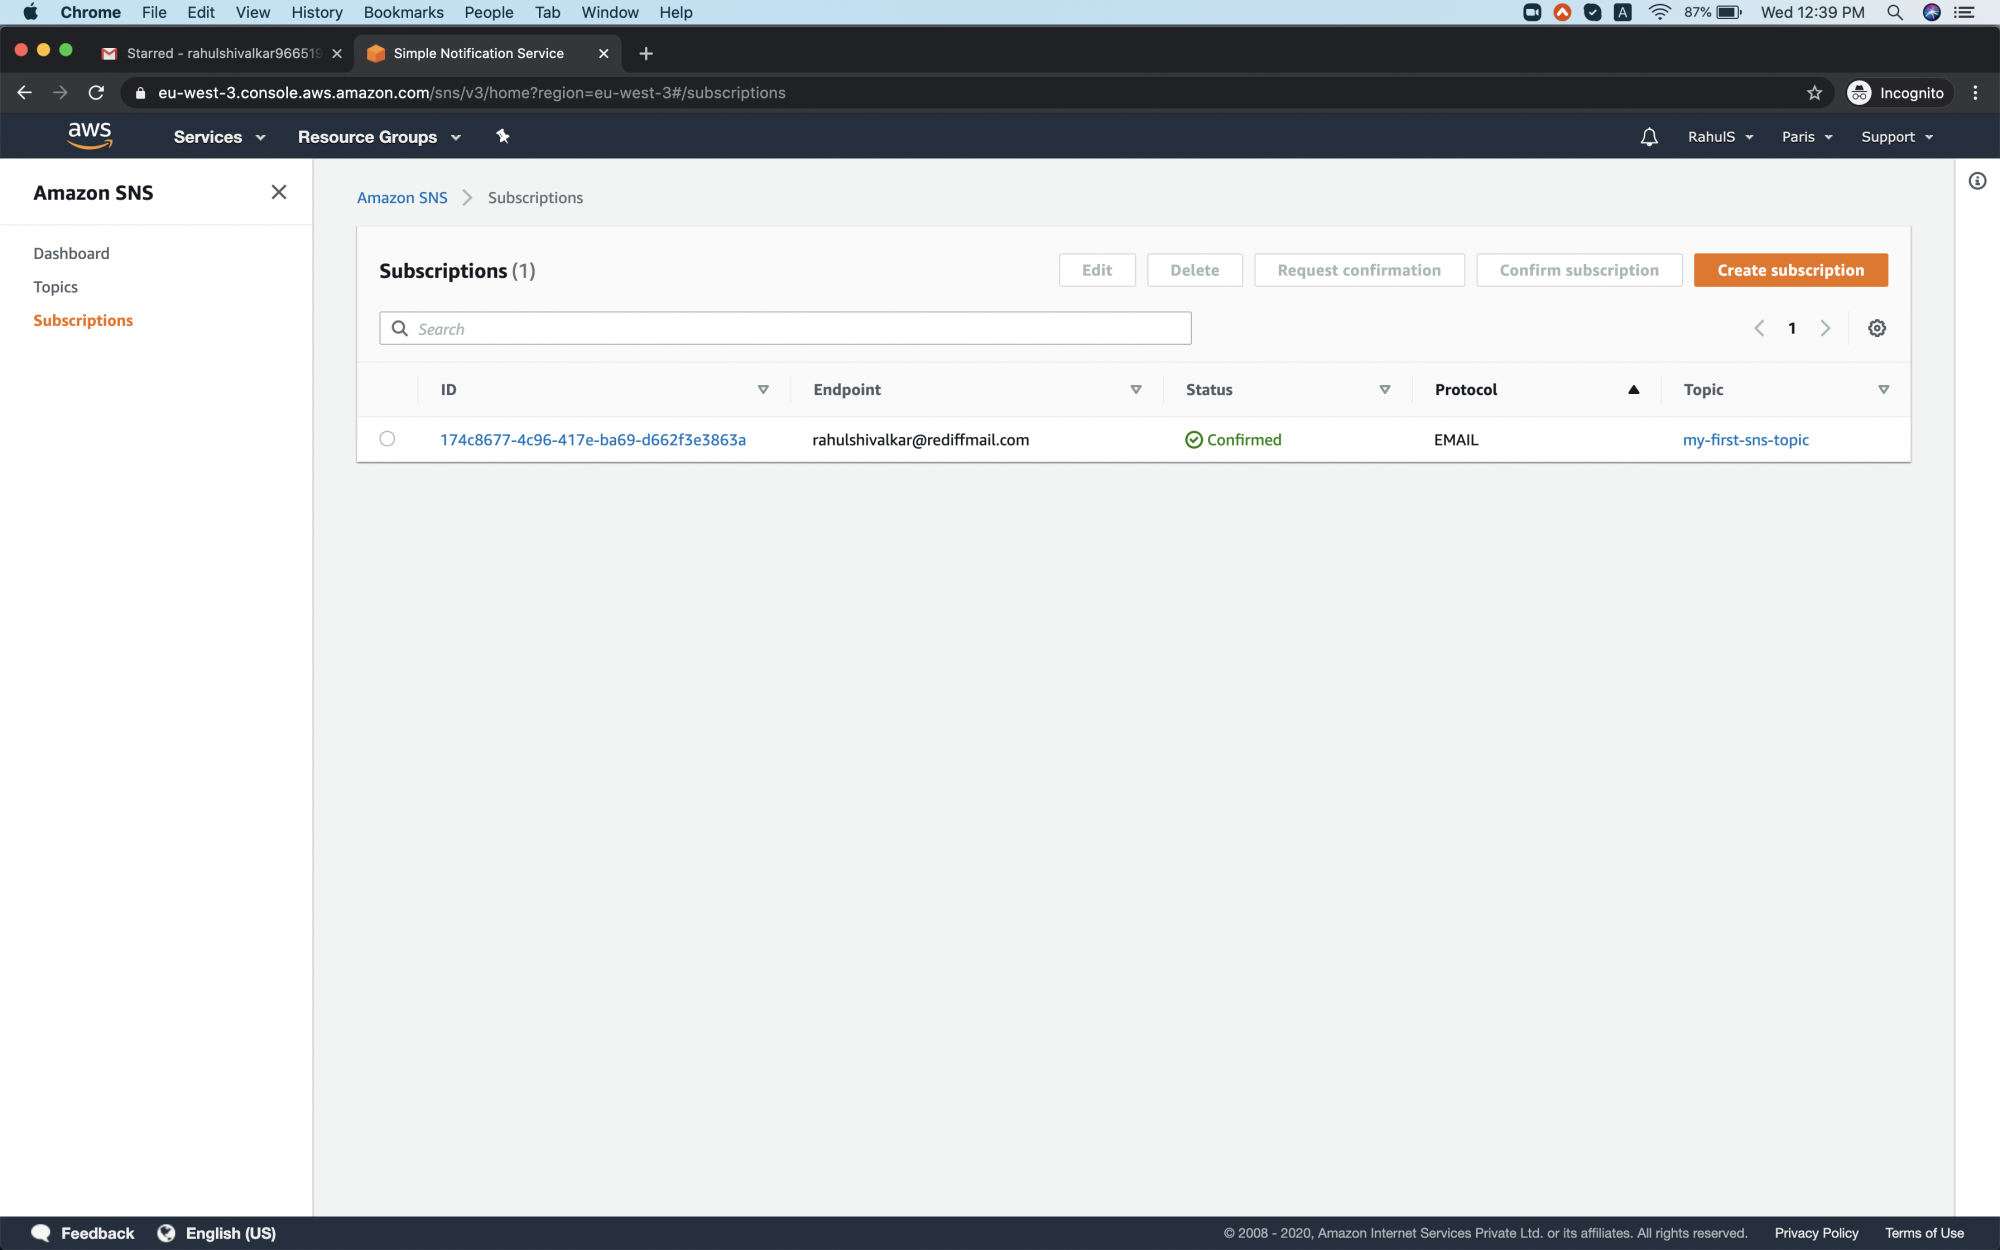
And now if you go to the Subscription screen, you can see that the Status has changed to "Confirmed" from "Pending confirmation".
Conclusion
In this article, we saw the steps to create an SNS Topic, create an Email Subscription and subscribe to it.
You can use the same steps to choose a different protocol for the subscription you want to create.

