
Many CentOS users were dissatisfied when Red Hat announced that it would transition CentOS Linux from a stable Red Hat Enterprise Linux (RHEL) clone to CentOS Stream – a rolling release Linux distro.
As a result, starting February 1, 2021, Red Hat has made RHEL available at no cost for small-production workloads, with “small” defined as up to 16 systems, to appease some of those users.
In other words, even though RHEL is a commercial Linux distro, you can download and use RHEL 8 free of charge via a no-cost Red Hat Enterprise Linux developer subscription.
And yes, this means production use, free, self-supported RHEL. It can be used for both desktop and server installation types.
However, just like the paid edition, you must renew your subscription once a year. It should be noted that this is also completely free.
So without further ado, let’s see how we can download and install Red Hat Enterprise Linux 8 for free.
Step 1: Register to Red Hat Customer Portal
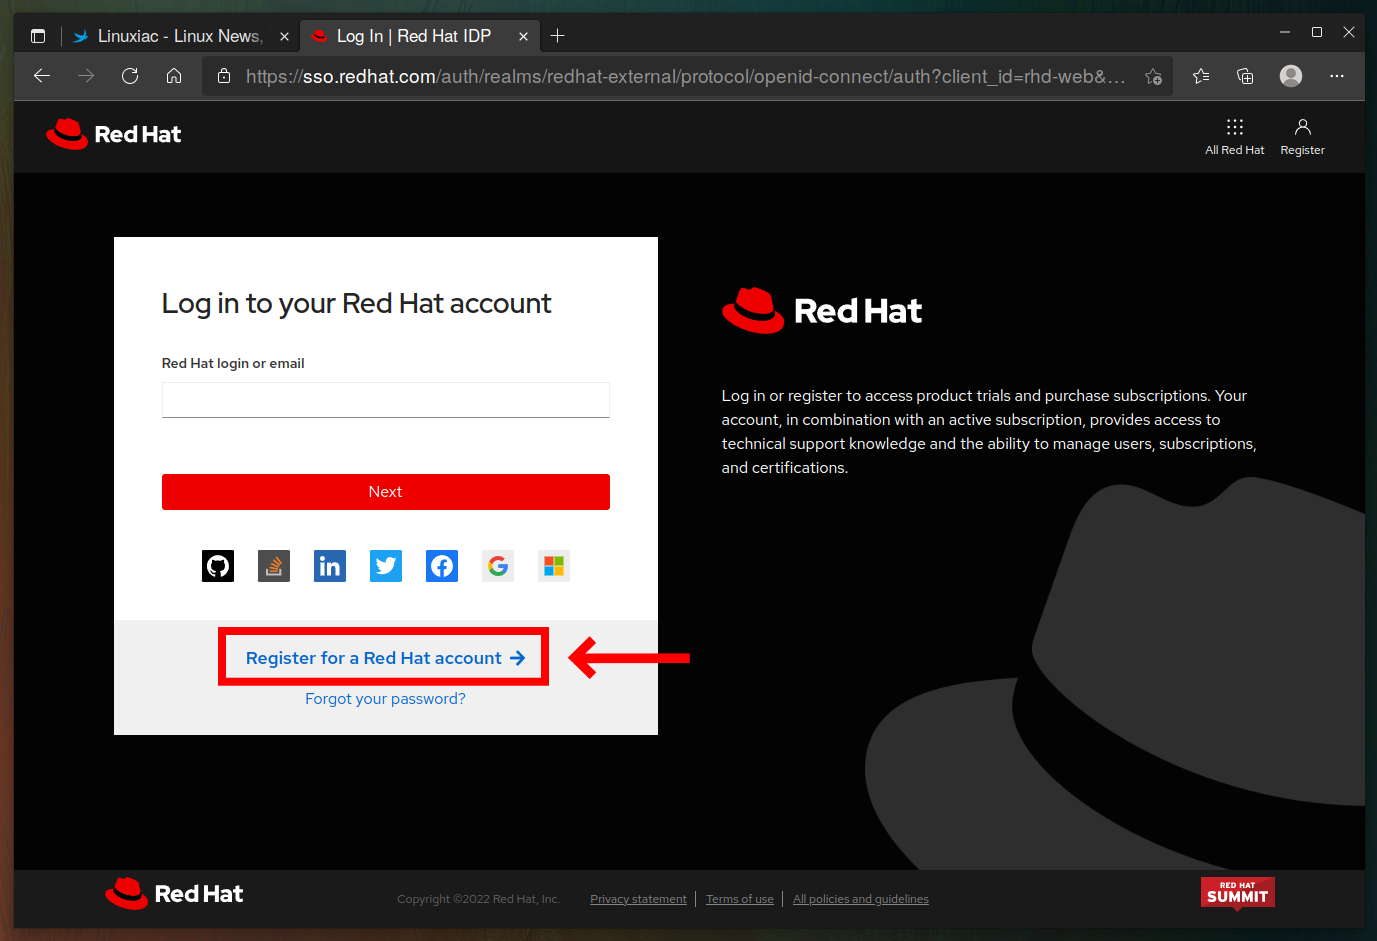
You must have an active Red Hat account to download, install, and use RHEL 8. So the first thing we need to do is register and get one.
Open https://developers.redhat.com/login in your preferred browser and click on the “Register for a Red Hat account” link.
You will be redirected to the registration form. Next, fill in the fields with the requested information and confirm the creation of your account by clicking on the “CREATE MY ACCOUNT” button.

An e-mail will be sent to your registered e-mail address with instructions on verifying your account. So, go to your inbox and click on the verification link Red Hat sent you.

After confirming your e-mail, you will be automatically logged into the system.
Step 2: Download RHEL 8 Installation ISO Image
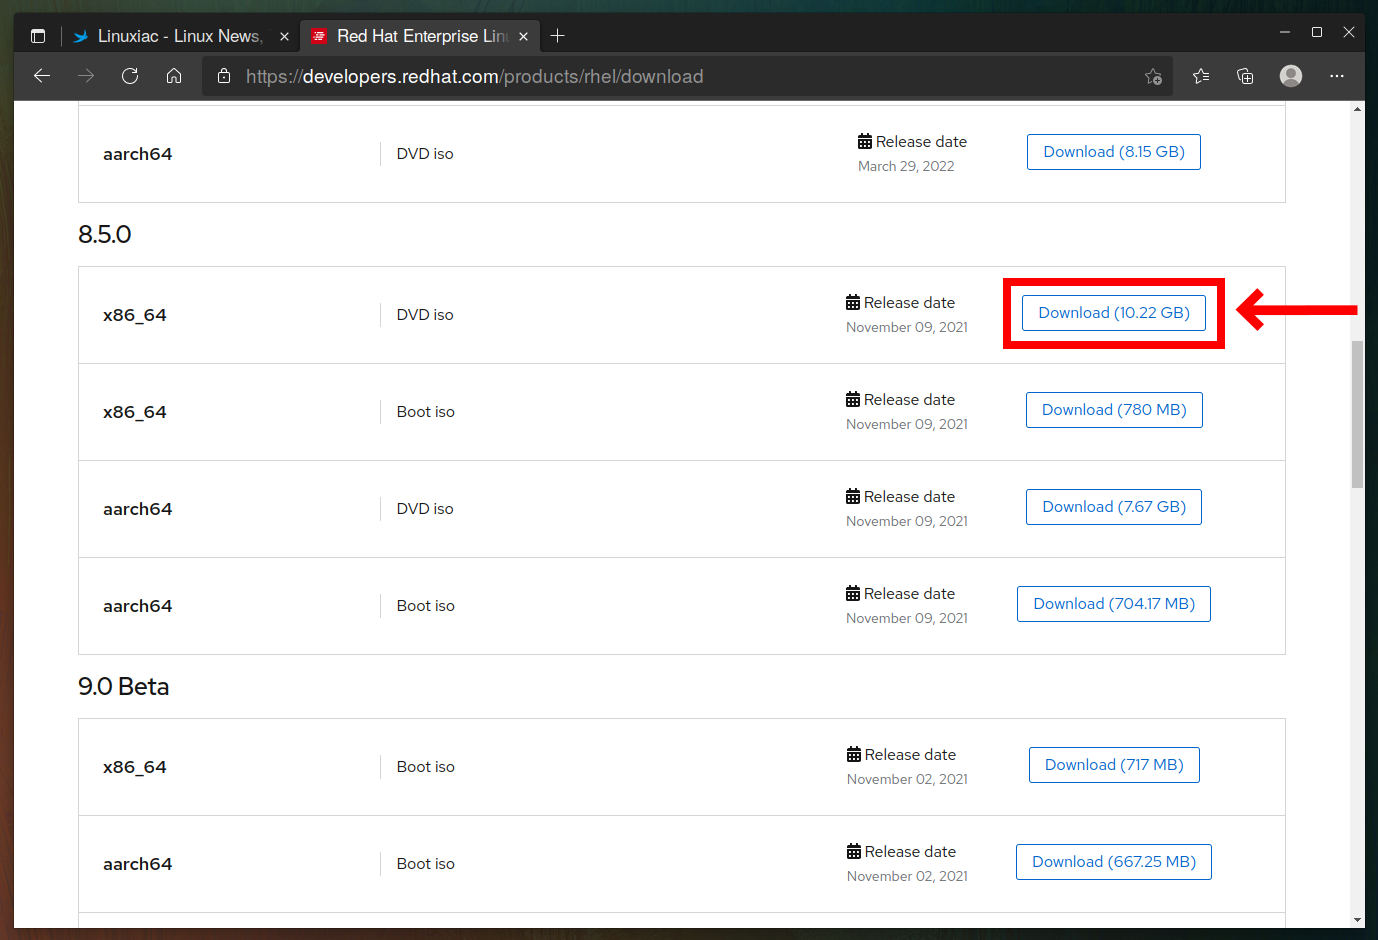
Once the account has been created and activated, go to https://developers.redhat.com/products/rhel/download and download the latest stable version of RHEL by clicking the “Download” button. At the time of writing, it is RHEL 8.5.
There are two possible download options for the x86_64 architecture:
- DVD iso: Has all packages for offline installation.
- Boot iso: Installation is over the internet.
This guide will use the “DVD iso” option for the installation image.
However, downloading the installation ISO image will not start as expected.
Instead, you will be redirected to a page where you must enter your first and last name, email address, company name, job title, phone number, and country/region.
You must complete all mandatory fields marked with a * and click the “SUBMIT” button.
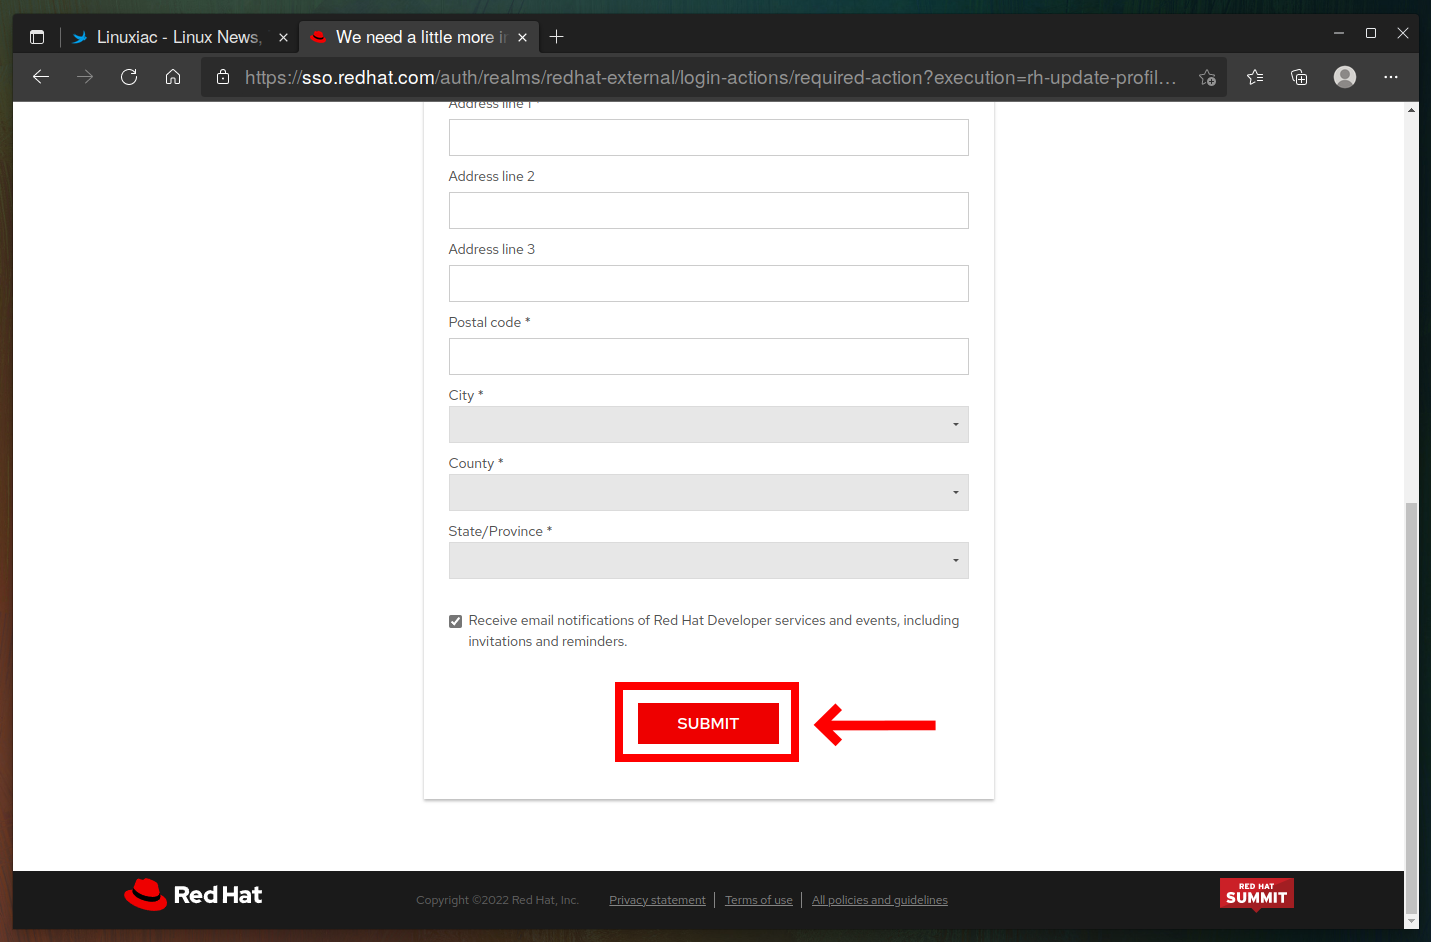
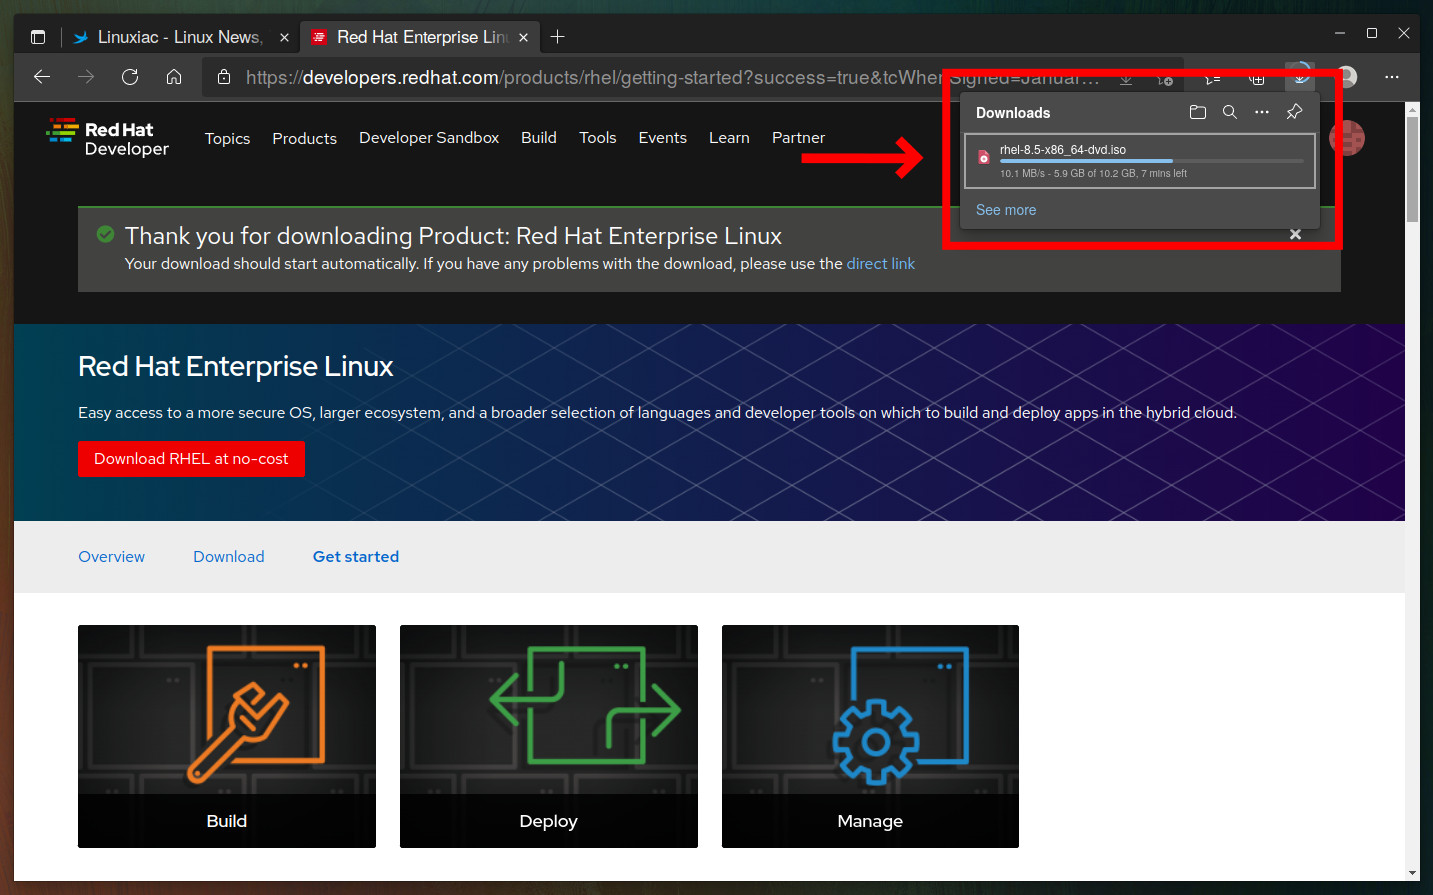
After entering the correct information and confirming with the “SUBMIT” button, the latest version of the RHEL installation ISO image will start to download.
This may take some time, depending on your internet connection speed, so be patient.
Step 3: Create RHEL 8 Bootable USB
If you’re installing RHEL 8 on a physical machine, you may need to make a bootable USB medium and boot from it.
So, after downloading the RHEL 8 ISO file, make it bootable by burning it to a USB drive.
Various bootable USB creation tools are available, but we will use the easiest option by using the dd command:
sudo dd if=rhel-8.5-x86_64-dvd.iso of=/dev/sda status=progressCode language: JavaScript (javascript)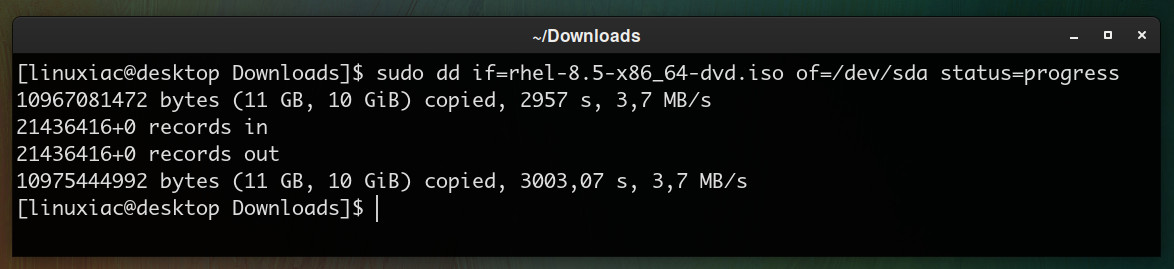
However, if you prefer to use a graphical application (GUI), here are some excellent guides we can offer you on the subject:
- How To Burn An ISO File To A USB Drive In Linux Using Etcher
- Ventoy: How to Create a Multiboot USB Drive with Multiple ISO Files
Of course, there is no need to create a bootable USB if you will install RHEL 8 into a virtual machine.
Step 4: Install Red Hat Enterprise Linux (RHEL) 8
The Anaconda installer is used by RHEL and its clones such as Alma Linux, Rocky Linux, and Oracle Linux. So, the installation steps are nearly identical if you install any of these distros.
4.1: Boot from RHEL 8 Installation Media
To start the installation process, boot from your RHEL 8 installation media. You will get the following screen:
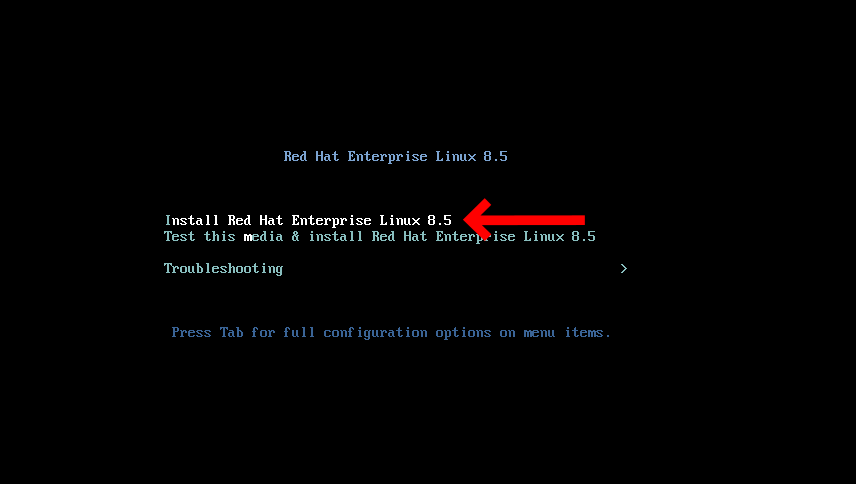
Choose “Install Red Hat Enterprise Linux 8.5” and hit enter.
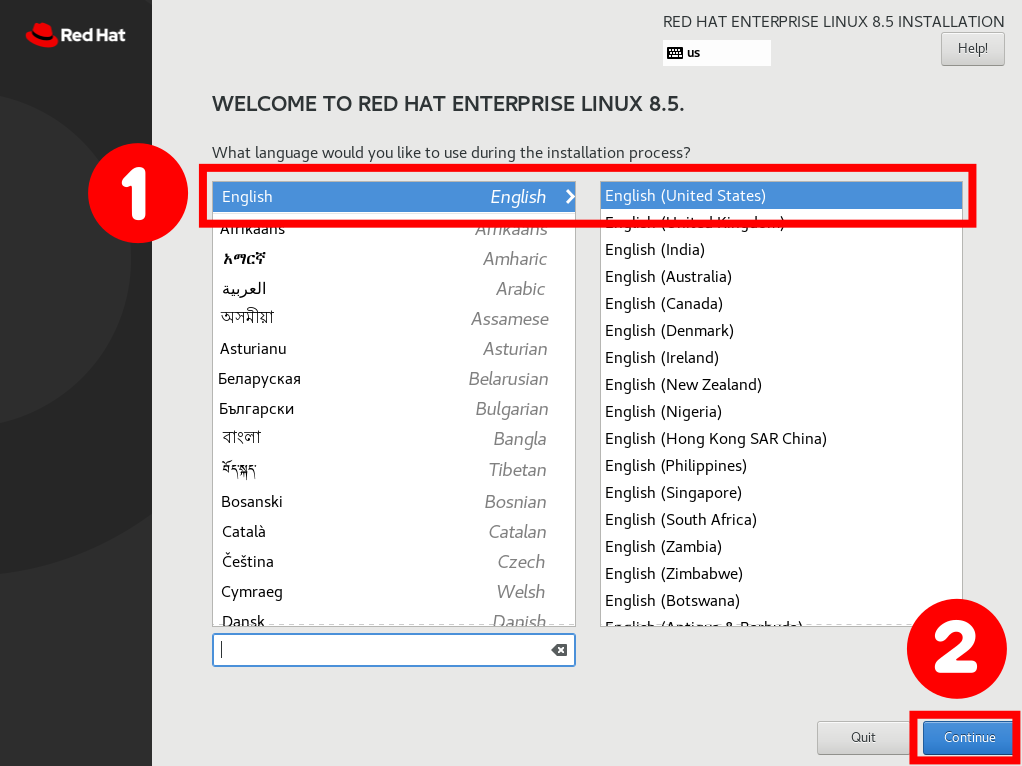
4.2: Choose Your Preferred Language
In this step, you should select a language for RHEL 8 installation, so choose the appropriate one for your setup.
4.3: Preparing RHEL 8 Installation
On the next screen, you will be greeted by 12 settings.
Since we’ll leave the default options for some of them, we’ll only focus on the ones we need to change.
We will leave them unchanged because they meet our requirements:
- Keyboard: English (US)
- Language Support: English (United States)
- Time & Date: America/New York timezone
- Installation Source: Local media
- KDUMP: Kdump is enabled
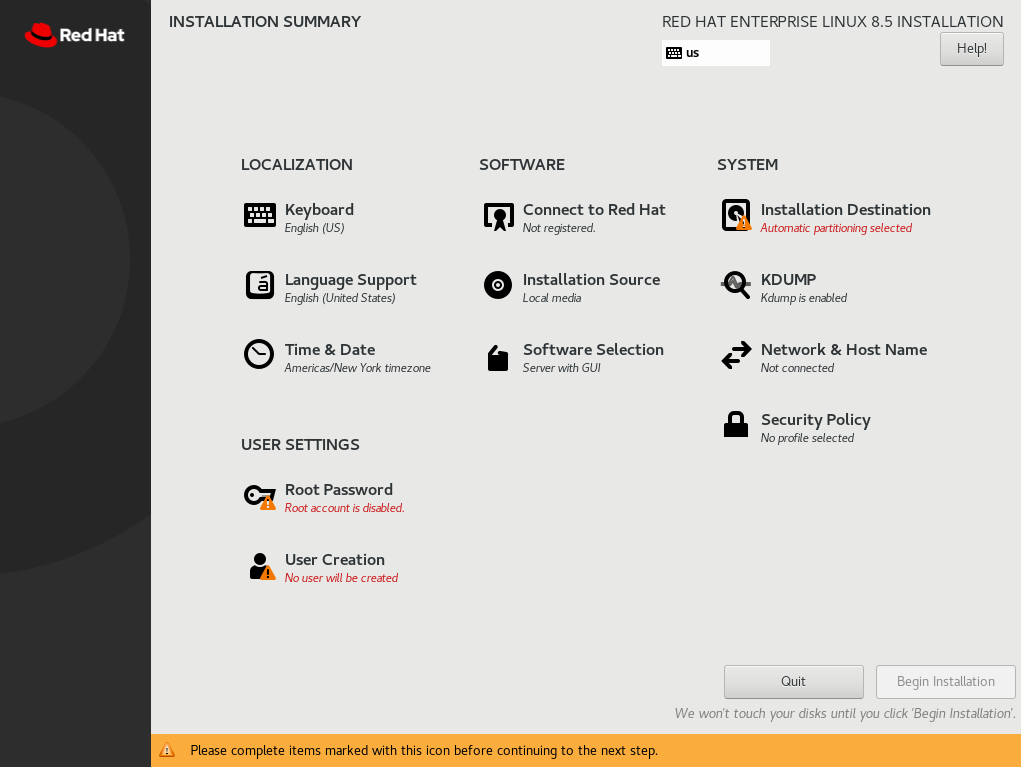
So let’s start by configuring our installation.
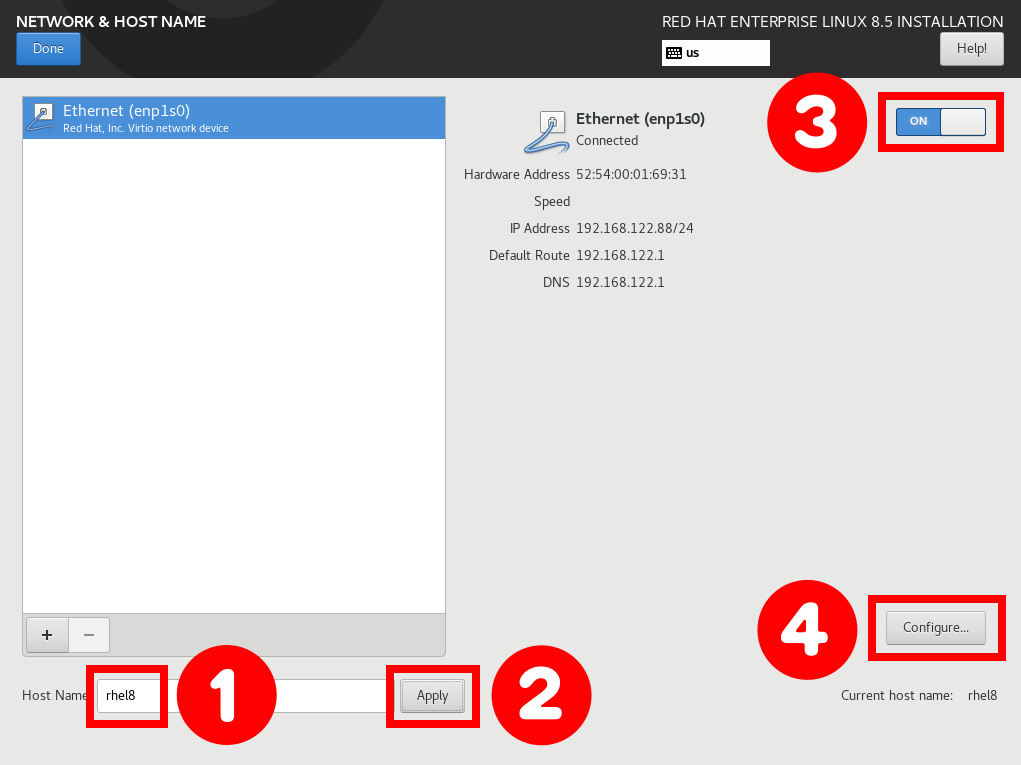
Network & Host Name
Select the “Network and Hostname” option from the installation summary.
The installation program does not force you to configure the system’s network interfaces, and, for some types of installation, network connections are disabled by default.
- The hostname is set to “localhost.localdomain” by default. In the “Host Name” box, enter a custom hostname. In our example, we will set the hostname as “rhel8“.
- Confirm the new hostname by pressing the “Apply” button.
- Bring on your Ethernet adapter by toggling the ON/OFF switch to “ON.”
- Click the “Configure” button.
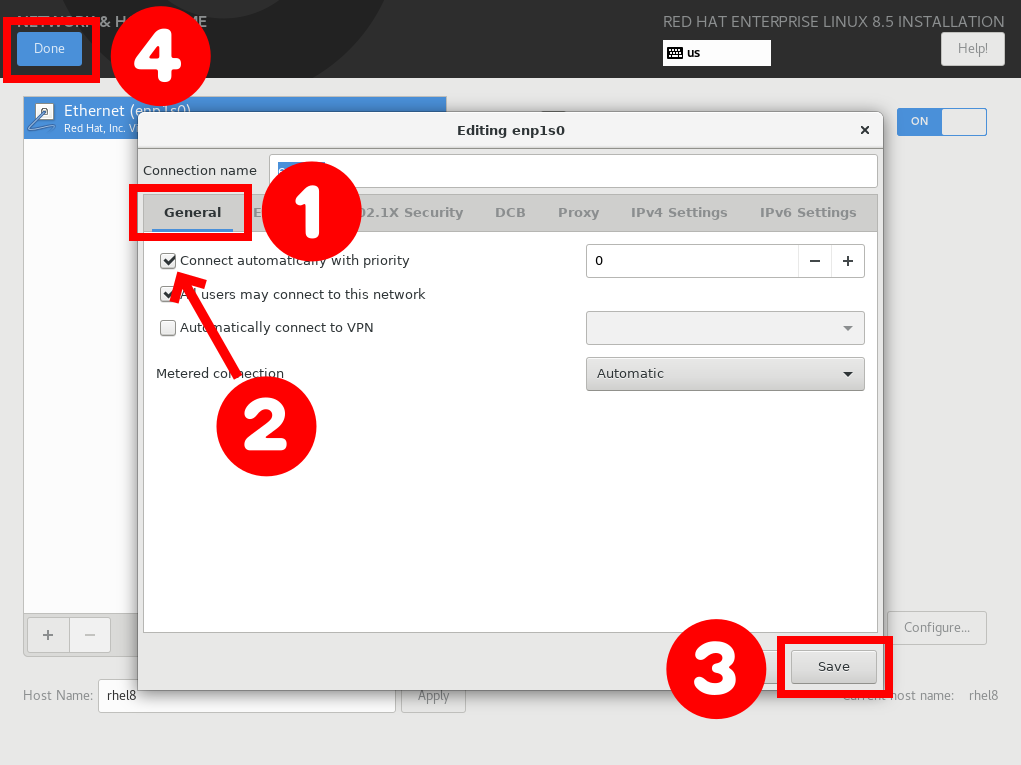
We will set our network adapter to be automatically activated when RHEL 8 starts.
- Choose the “General” tab.
- Mark the “Connect automatically with priority” checkbox.
- Save changes by clicking on the “Save” button.
- Finish configuring the network interface by pressing the “Done” button.
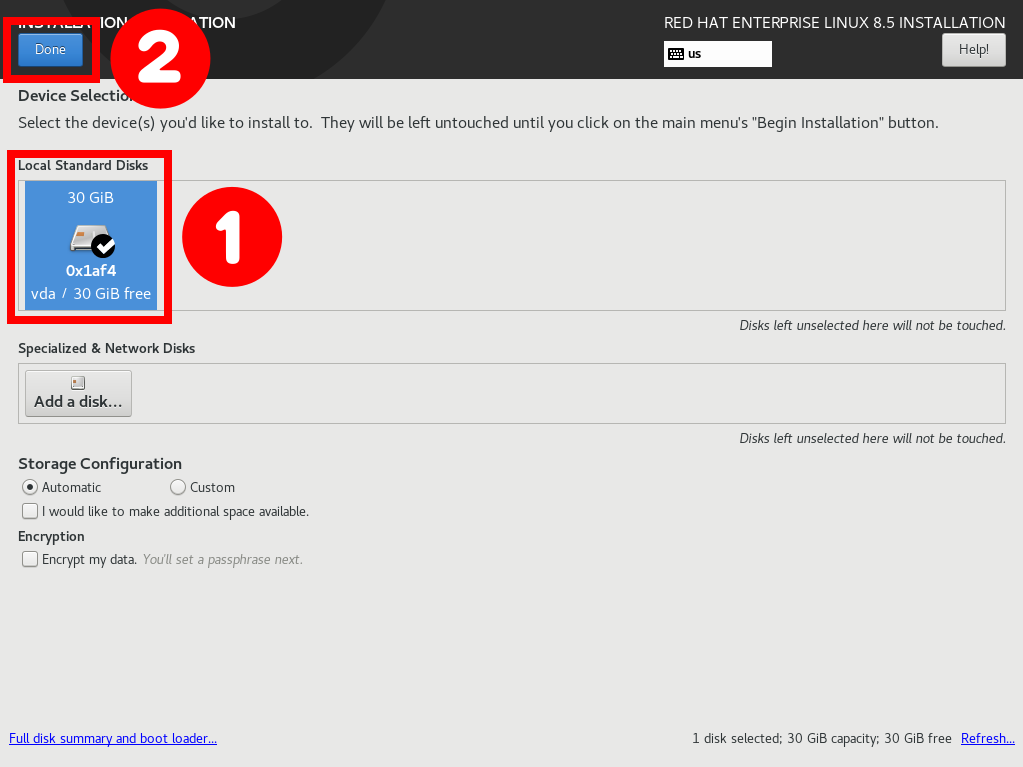
Installation Destination
For our installation, we will use automatic partitioning of the disk. This ensures the selected destination storage disk will automatically be partitioned with required LVM logical volumes and formatted with the XFS file system.
- Check your machine’s storage under the “Local Standard Disks” heading.
- Confirm the changes by pressing the “Done” button.
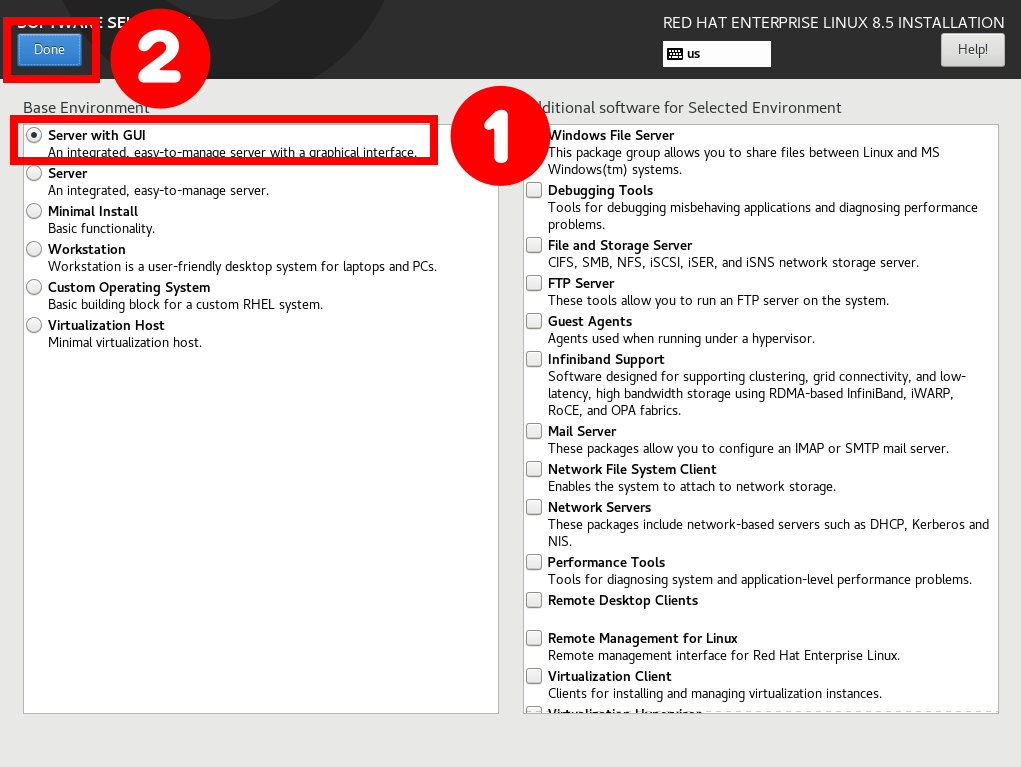
Software Selection
Here you will be presented with a list of predefined Base Environment options and optional add-ons. Of course, this is entirely dependent on your requirements.
The screen is divided into “Base Environment” on the left and “Additional Software for Selected Environment” on the right.
In the “Base Environment” section, you choose an environment that best matches the system’s intended use. Then, in the “Additional Software for Selected Environment” section, you select the software you want to add to your chosen Base Environment.
By default, the “Server with GUI” base environment installs the GNOME desktop, which will be our choice.
- Select your desired “Base Environment” installation type.
- Click the “Done” button.
Of course, if you want a different configuration, you can choose whichever option comes closest to your needs.
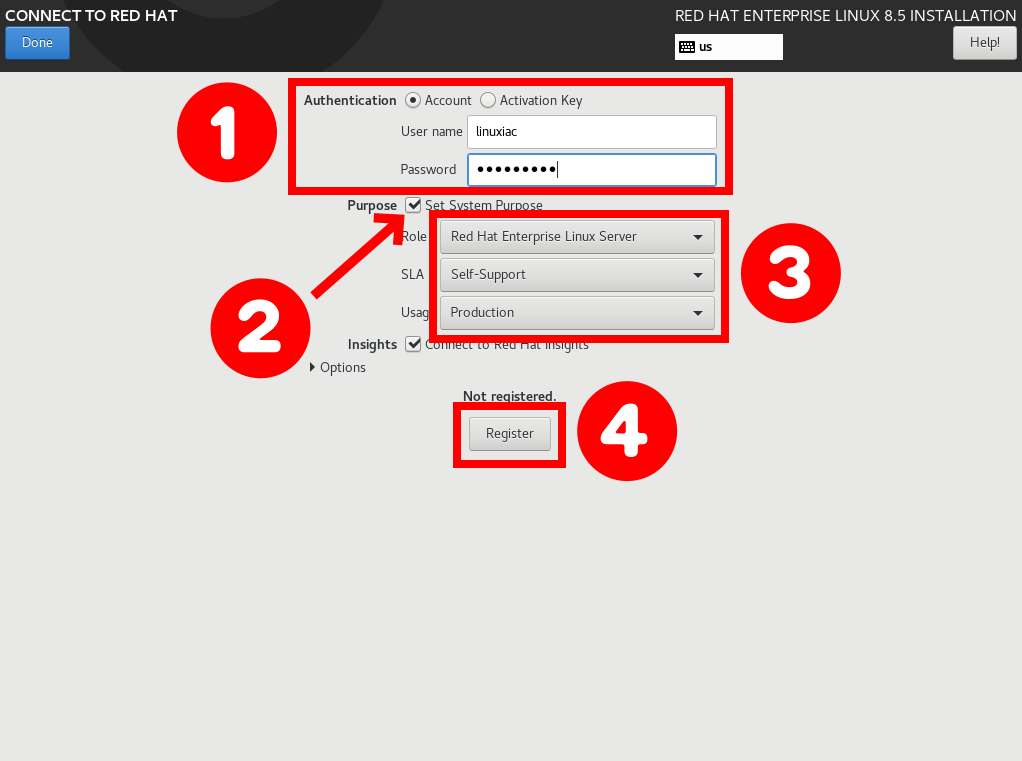
Connect to Red Hat
The next step is to activate our RHEL subscription. Select the “Connect to Red Hat” option from the installation summary.
- Use the same username and password you registered with to download the installation image.
- Mark the “Purpose” checkbox.
- Select the server’s role. For “SLA,” select “Self-Support,” and for “Usage,” choose what the server will be used for.
- Click on the “Register” button.
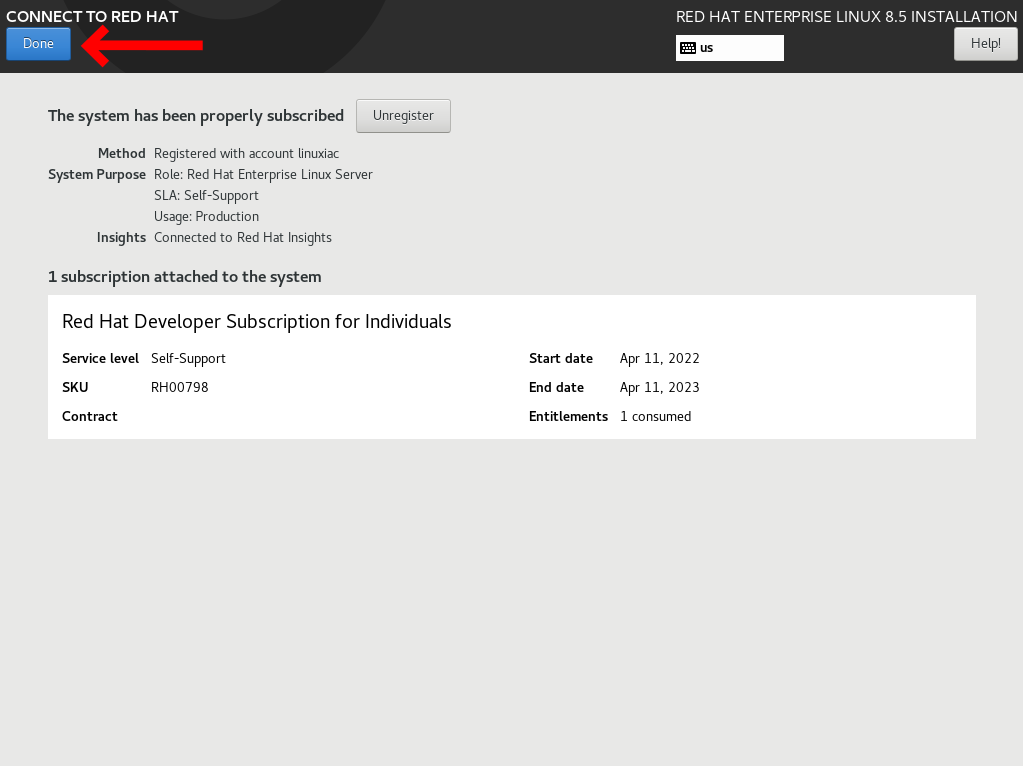
After completing the registration process, you will receive the subscription information shown in the image below.
Click on “Done” to proceed further.
With an active Red Hat subscription, you’ll receive regular updates through your package manager.
However, the RHEL 8 subscription period expires after one year, but you can easily renew it for free and continue to get the latest security and package updates and bug fixes.
Setting the Root Password
Click “Root Password” to display the ROOT PASSWORD screen.
- Enter the root password in the “Root Password” and “Confirm” fields. The screen provides a visual indication of the strength of the password.
- Click “Done” to return to the Configuration screen.

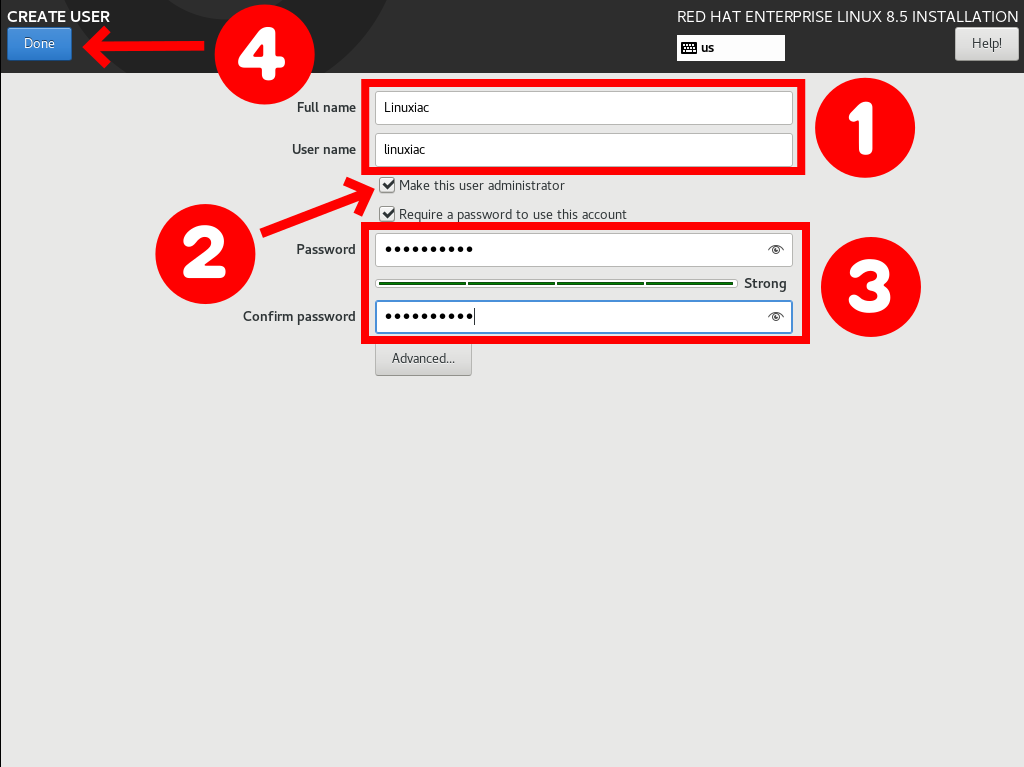
Creating a User
Click “User Creation” to display the CREATE USER screen.
- Enter the information for the new local user account.
- Select “Make this user administrator” if you want the user to run administrative tools using the
sudocommand. - Set the user’s password. Again, there is a visual indication of the password’s strength.
- Once you have configured the user, click “Done” to return to the Configuration screen.
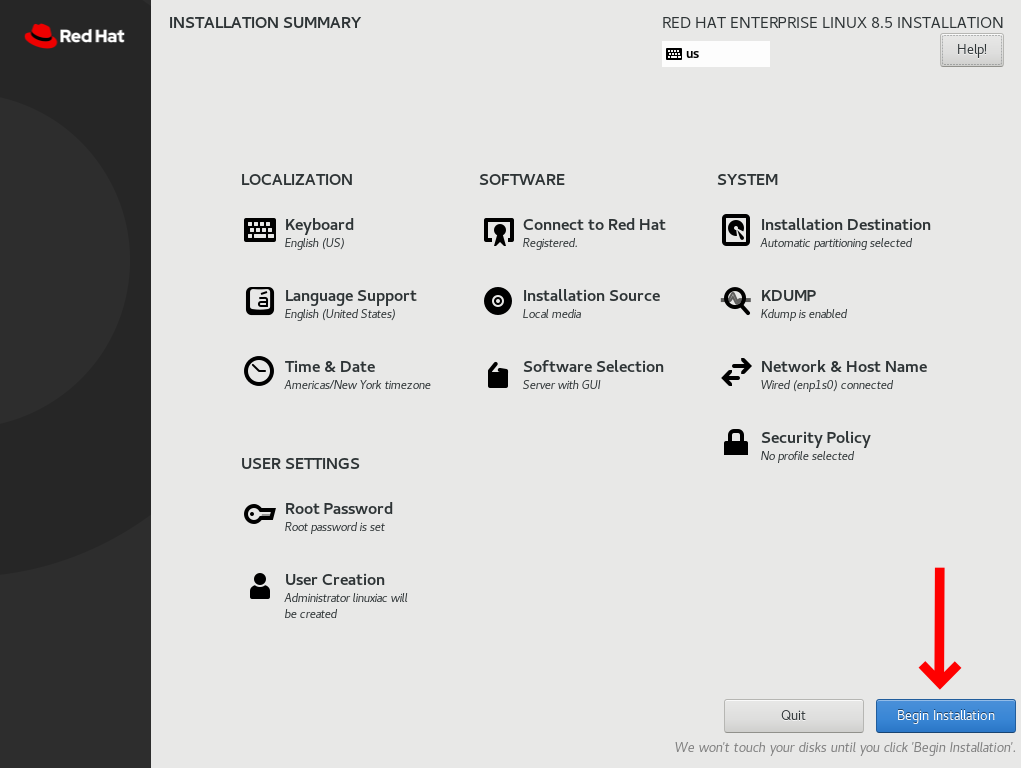
4.4: Start the RHEL 8 Installation Process
Finally, we’re ready to install our Red Hat Enterprise Linux 8 system!
So, once everything is set up according to your liking, hit “Begin Installation” to start the installation. This will start the initial installation process.
Wait for the installation process to complete.
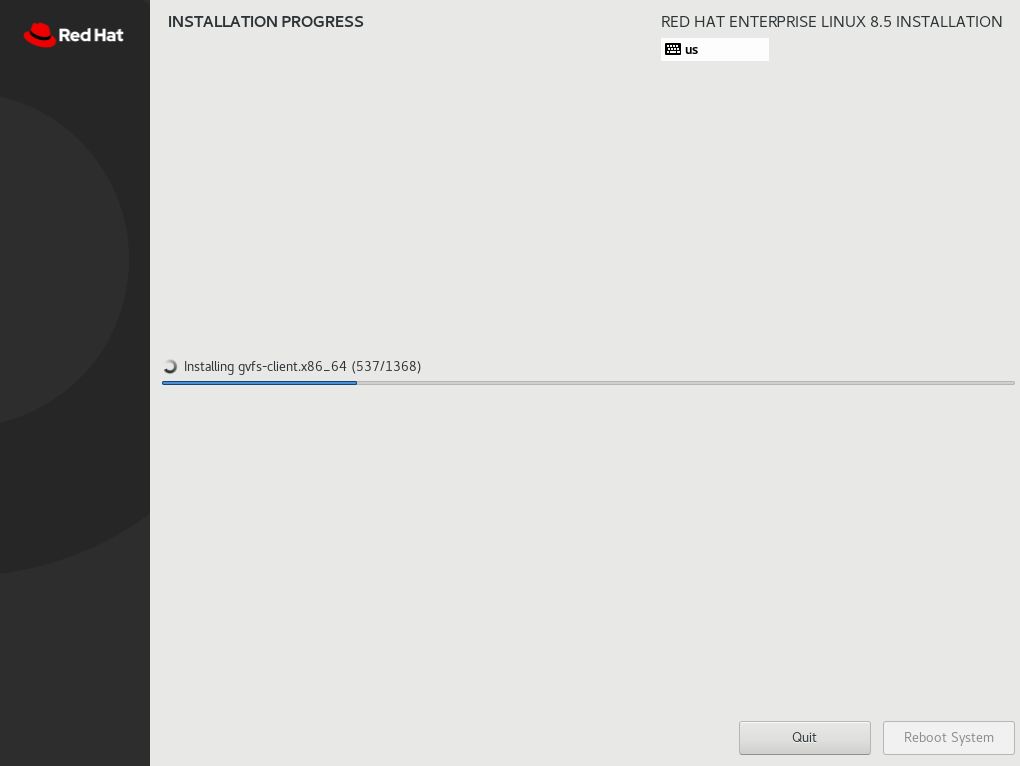
When the installation is finished, the installer will prompt you to restart the system. Click on “Reboot” to restart your system.

Step 5: Post-Installation Setup
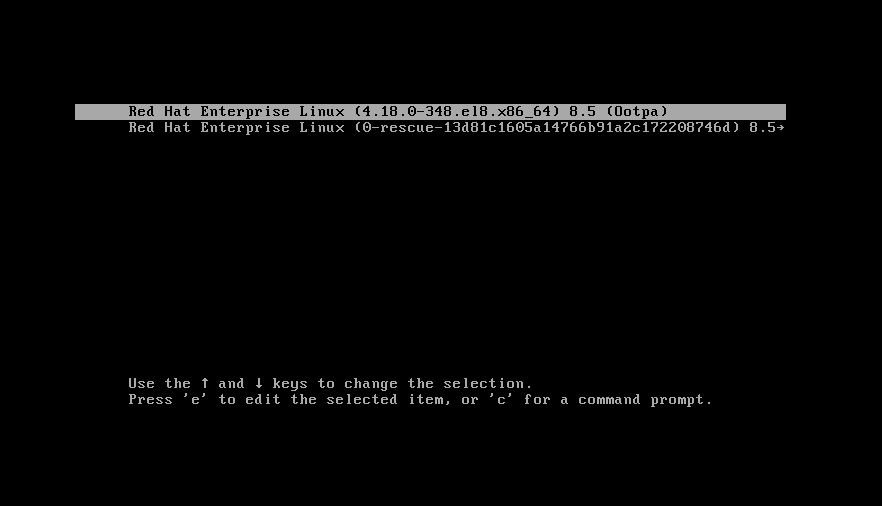
You will be welcomed by the Red Hat Enterprise Linux 8 GRUB menu at boot time.
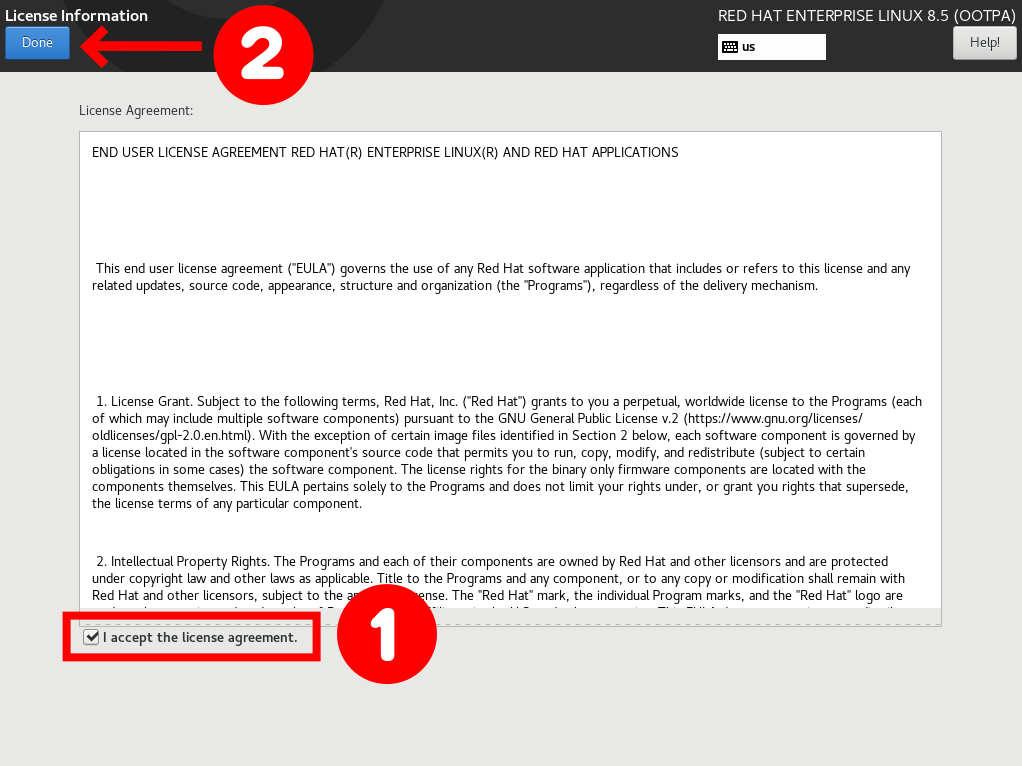
When we reboot the system for the first time after a successful installation, we see the window below, where we must accept the license (EULA).

Mark the “I accept the license agreement” checkbox and confirm by clicking on the “Done” button.
Finish your RHEL 8 system configuration.

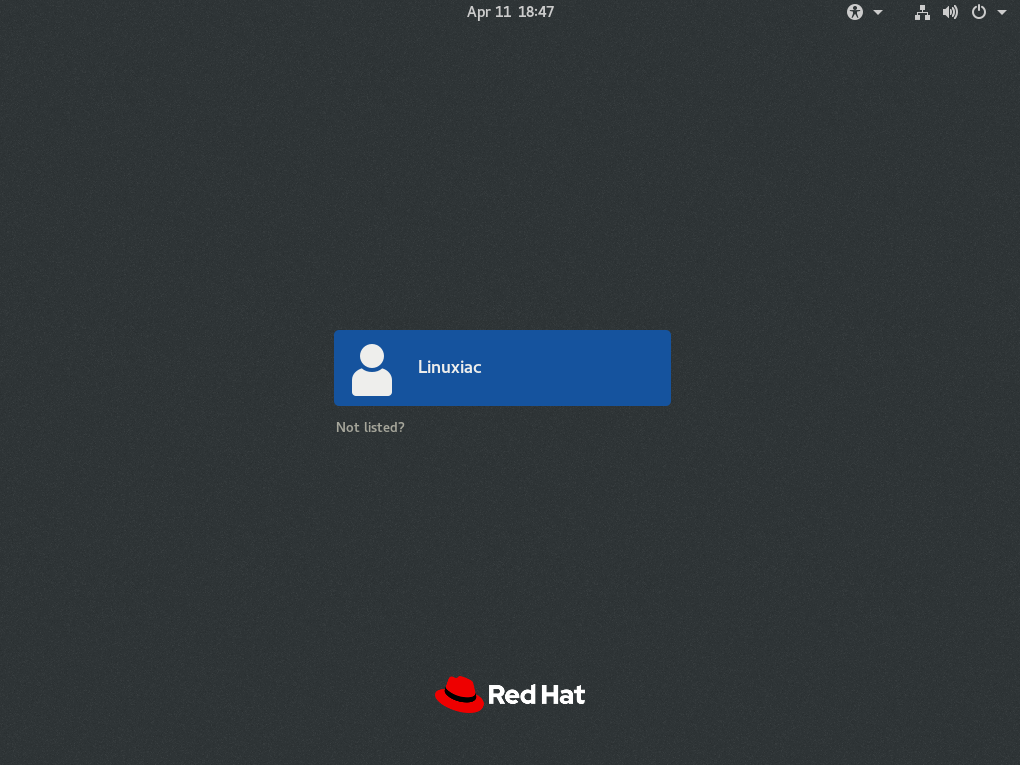
Next, we will get the GNOME login screen because we installed RHEL 8 Server with GUI, so use the username and password we created earlier.
After logging in, we will see a couple of Welcome Screens, and we will need to follow the screen instructions until we reach the following screen, where we will need to click on “Start Using Red Hat Enterprise Linux.”
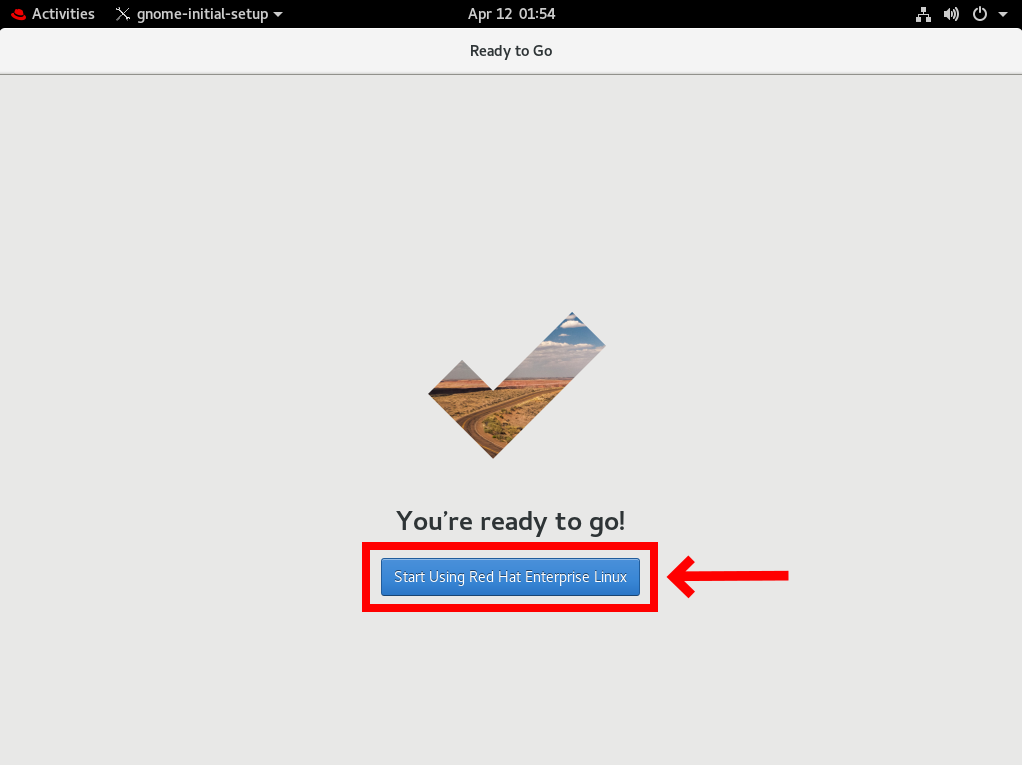
Step 6: Start Using RHEL 8
Congratulations! Red Hat Enterprise Linux 8 has been installed successfully and is ready for use!
Conclusion
This step-by-step guide covers Red Hat Enterprise Linux (RHEL) 8 installation.
As you can see, except for the subscription part, the installation is the same as other RHEL-based distros such as AlmaLinux and Rocky Linux.
RHEL 8 is undoubtedly a rock-solid operating system and a reliable option for your server.
I hope you found this helpful guide. Thanks for using it!
Feel free to share your thoughts in the comments box below.


What if you need it an air gapped environment and want to skip the connect to red hat?
Hi,
The answer to your question is Red Hat Satellite. More on the subject – here.
Best,
Bobby Borisov