How to Install Gatsby.js Node Framework on Ubuntu 22.04
GatsbyJS or Gatsby is a free and open-source framework for building blazing fast, modern apps, and websites with React. Gatsby is optimized for modern website technology such as core web vitals and lighthouse score. It's based on ReactJS, Webpack, javascript, and CSS. Also, it provides a lightspeed load for all your content and is supported with extensive libraries and plugins.
GatsbyJS makes your development process even faster, it provides a starter pack and templates for your websites or applications. GatsbyJS is a framework for building headless CMS with supports multiple CMS backends such as WordPress, Contentful, Drupal, Shopify, Strapi, Ghost, and NetlifyCMS. GatsbyJS combines the control and scalability of dynamically rendered sites with the speed of static-site generate for creating websites or applications.
In this tutorial, you will learn how to install and set up Gatsby.js on the Ubuntu 22.04 machine.
Prerequisites
- An Ubuntu 22.04 machine - You can use the Desktop version or Server version.
- A root or administrator user.
Setup New User
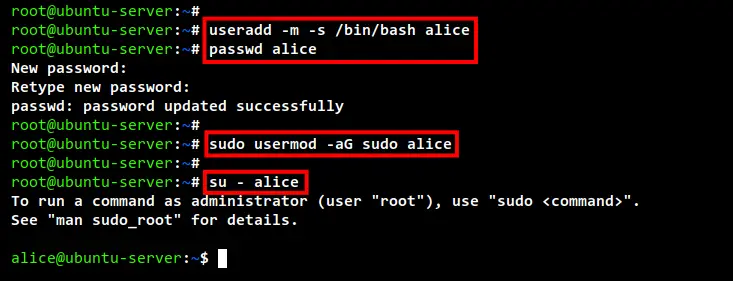
At first, you will be creating a new Linux user on your system that will be used to run the Gatbs.js project/application. In this demo, you will be creating a new user named 'alice'.
Run the following command to create new user alice.
useradd -m -s /bin/bash alice
Now set up the password for the user alice using the below command.
passwd alice
Add the user 'alice' to the group 'sudo' and allows user 'alice' to execute the 'sudo su' command and get the root/administrator privileges.
sudo usermod -aG sudo alice
Now login as user alice using the below command, also run the sudo su command to check and verify the root administrator privileges.
su - alice
sudo su
Input the password for the user alice and press ENTER. If you get the new prompt like "root@ubuntu-machine", then you have successfully got the root privileges.
Input the exit command or press Ctrl+d to exit from the root privileges and you will the normal prompt as user alice.
Installing nvm (Node Version Manager) and Node.js
Gatsby.js is a JavaScript framework written in Node.js, and now you will be installing the Node.js to your Ubuntu system.
There are multiple ways for installing Node.js on the Ubuntu system, this includes using the Node.js provided by the official APT Ubuntu repository, using third-party repositories such as nodesource, and using the NVM (Node Version Manager).
In this example, you will be installing Node.js using NVM (Node Version Manager). And this you will be installed under the user alice that you just created on the first stage.
Refresh and update your Ubuntu repository, then install the curl package to your system using the below commands.
sudo apt update
sudo apt install curl
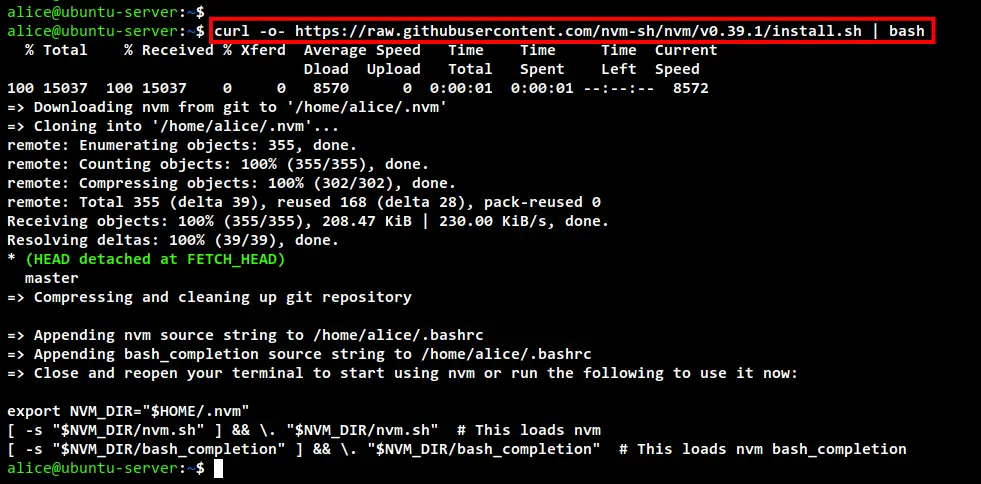
Now download the NVM installer script using the curl command and run it.
curl -o- https://raw.githubusercontent.com/nvm-sh/nvm/v0.39.1/install.sh | bash
Once all process is completed, you will see the output message like the screenshot below. AS you can see, the installer downloads the NVM source code to your home directory and add some configuration to the ~/.bashrc file.
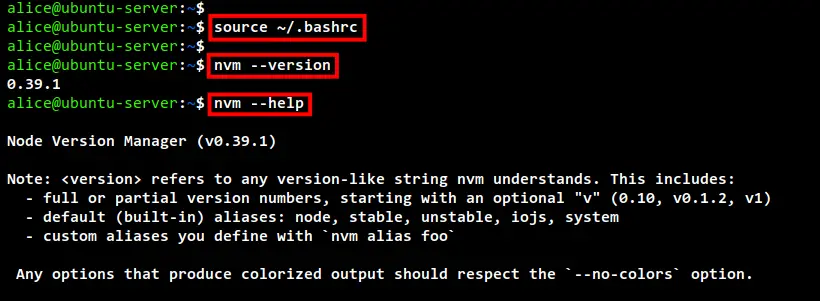
Now run the below command to source the ~/.bashrc file and reload your current bash shell session. Also, this will apply new changes on the ~/.bashrc configuration file and allows you to run and execute the NVM immediately without logging out from the current session.
source ~/.bashrc
Now run the nvm command below to check and verify the nvm (Node Version Manager) installation.
nvm --version
nvm --help
If you get the output of the NVM version and help messages for the nvm command, then your installation is successful and now is ready to install Node.js.
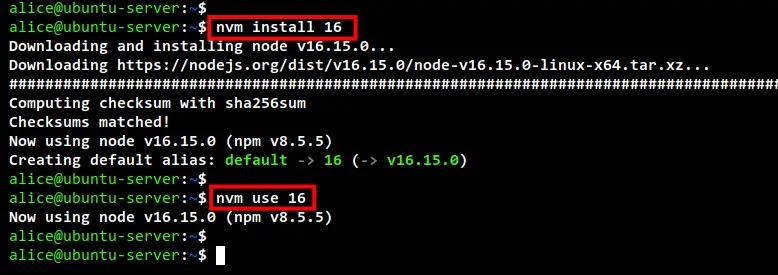
Run the nvm command below to install the Node.js v16 to your system. This installation will only affect the environment of the user alice.
nvm install 16
Now you can see the NVM is downloading the binary file of Node.js v16 and configuring the installation automatically for the user alice.
When all process is completed, run the below command to set up the default Node.js version to v16.
nvm use 16
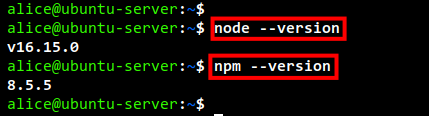
Lastly, you can verify and check the Node.js version and the NPM version using the following command.
node --version
npm --version
As you can see on the following screenshot, the Node.js v16 is now installed on the Ubuntu machine under user alice. And you have installed Node.js using the NVM (Node Version Manager).
Installing Gatsby-CLI
Gatsby-CLI is a command starter for Gatsby applications. It can be used to start and create a new Gatsby project, run the development server for Gatsby, and building out out your Gatsby application for the deployment.
The Gatsby-CLI can be installed from the npm Node.js repository.
Run the npm command below to install the gatsby-cli to your local environment.
npm -g install gatsby-cli
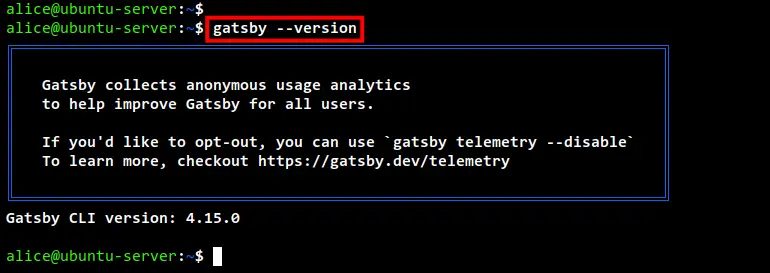
After installation is completed, run the gatsby command below to check the version and verify the Gatsby-CLI installation.
gatsby --version
Below you can see that you have installed the Gatsby CLI v4.15.
Additionally, you also run the below command to disable telemetry and reporting for anonymous data usage on your Gatsby project.
gatsby telemetry --disable
Create First Site with Gatsbyjs
At this point, you have completed the installation of Gatsby-CLI, and now you are ready to create the first application/project using Gatsby.
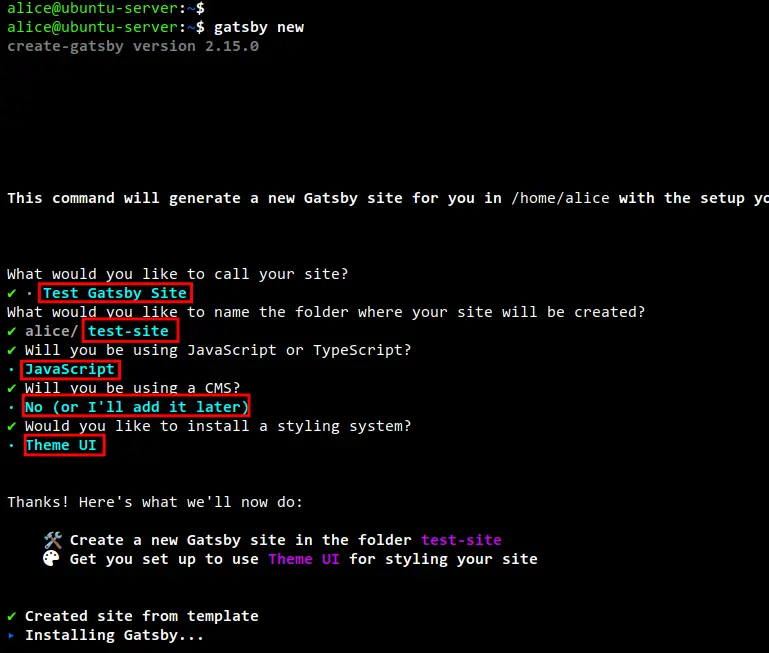
Run the gatsby command below to create a new first project of Gatsby.
gatsby new
Now you will be asked for some configuration of your Gatsby project:
- Input the title for your new Gatsby site/project. this example is the "Test Gatsby site"
- Input the directory name for your new gatsby project. In this example, the directory will be at the "test-site".
- Choose the programing language for your new Gatsby project. You can choose whether JavaScript or TypeScript. This example will be JavaScript.
- For the CMS backend, you can select the option "No (or I'll add it later)". The gatsby supports different types of CMS backend such as WordPress, Ghost, etc.
- For the interface styling system, you can select the framework as your flavor. In this example, you will be using "Theme UI".
And now the installation of dependencies for your new Gatsby project will be starting.
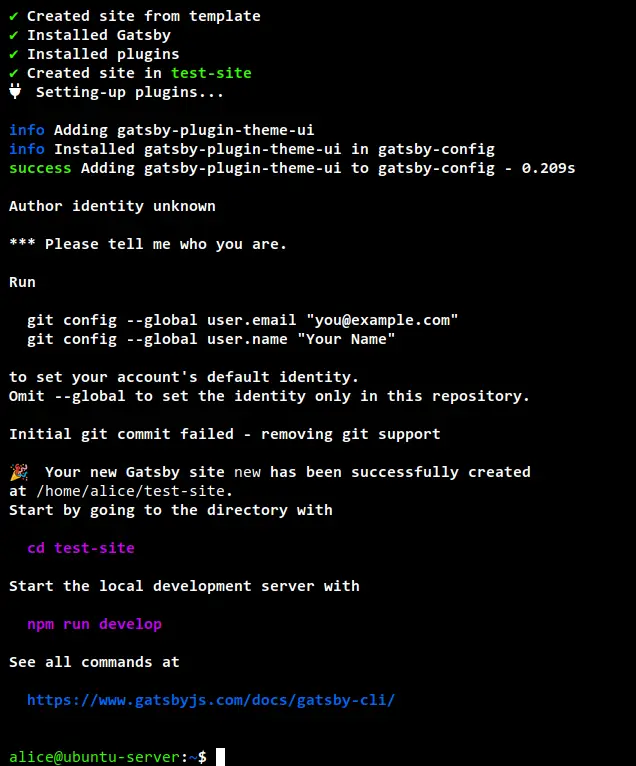
When all process is completed, you can see the output like the following screenshot. Also, you will get a new directory named "test-site" that contains all source code and configuration for your Gatsby project.
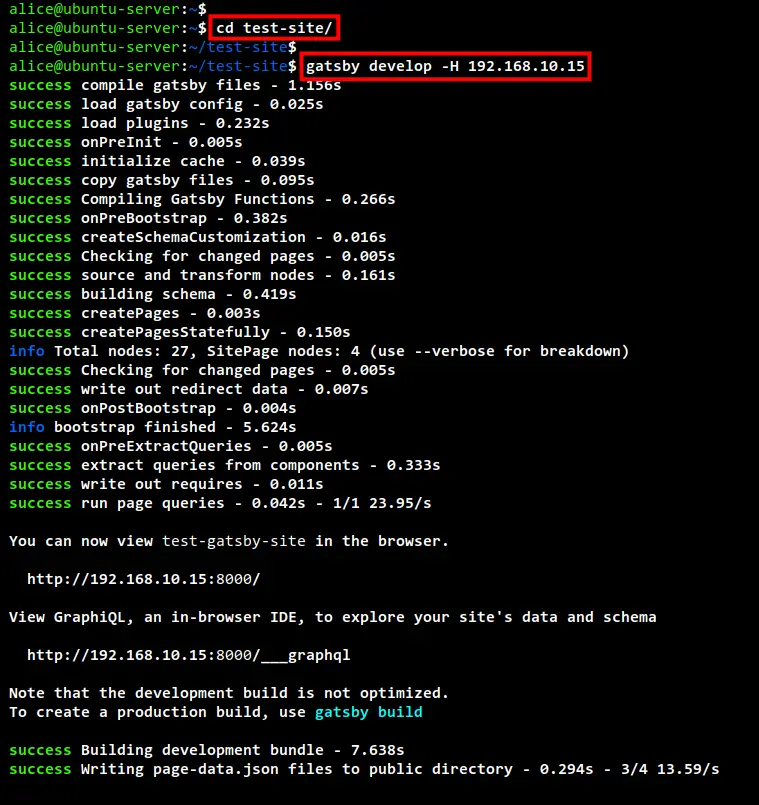
Now change the working directory to "test-site" and run the gatsby development server using the below commands.
cd test-site/
gatsby develop -H 192.168.10.15
The option -H 192.168.10.15 will specify the bind address for your Gatsby local development server. And also you are using the default port 8000 for your Gatsby project.
In the below screenshot you can see the complete process of your Gatsby project. And at the end, you can see the message that you can access your Gatsby project at the address http://192.168.10.15:8000.
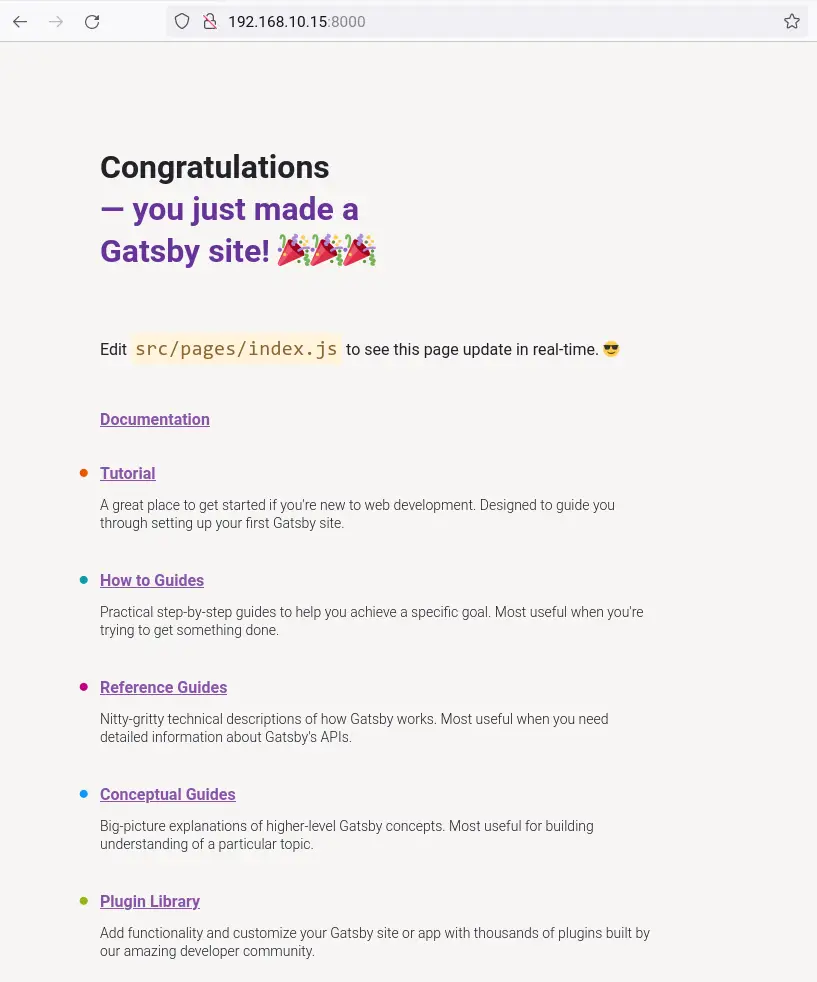
Open your web browser and visit the address of your Gatsby project (e.g http://192.168.10.15:8000/).
And now you can see the default home page of your Gatsby project.
Conclusion
Congratulation! You have now successfully installed the Gatsby on the latest Ubuntu 22.04 machine. You have also learned how to set up and install Node.js using the NVM (Node Version Manager). In the end, you have also learned how to create a new project/site using Gatsby and run the development server of the Gatsby project.

