Enabling Enhanced Monitoring for Amazon RDS
Amazon RDS provides an enhanced monitoring feature for databases. Using this feature, Amazon RDS can monitor and log database metrics to Amazon CloudWatch Logs. However, enabling this feature requires a role to be attached to the Amazon RDS and this itself requires the user to have PassRole permission.
What will we see here?
In this tutorial, you will learn how to use the ‘IAM Passrole’ permission for enabling an enhanced monitoring for Amazon RDS. We will see this by demonstrating a simple example.
What is Passrole permission?
While configuring many AWS services, the user/administrator is required to pass a role to that service. The service then assumes that role to perform the actions that are allowed within that role. In most cases, the role is passed to the service only at one time while setting up the service, and not every time the role is assumed by the service.
A user must have rights to pass a role to a service. This is a strong security aspect as only authorized users are allowed to pass a role to service. Moreover, the administrators can control what type of role a user can pass to the service.
Prerequisites for Passing a Role to a service
An IAM user can pass a role to an AWS service if it has the following three prerequisites:
- First, a policy, for the role we are going to create, that will decide the permission boundary or scope of our IAM role.
- Next, a trust policy associated with this role that will basically allow the AWS service (RDS in our case) to take/assume the role and utilize the permissions listed with the role.
- Finally, an IAM permission policy is attached to the IAM user that allows it to pass the roles which it is authorized to pass.
Creating the Role
In this section, we will create a role called ‘RDS-Monitoring-Role’ and attach an AWS-managed ‘AmazonRDSEnhancedMonitoringRole’ policy to it.
Step 1. Head to the IAM dashboard from the administrator or root account and select ‘Roles’ under the Access management option. Click on the ‘Create Role’ button.
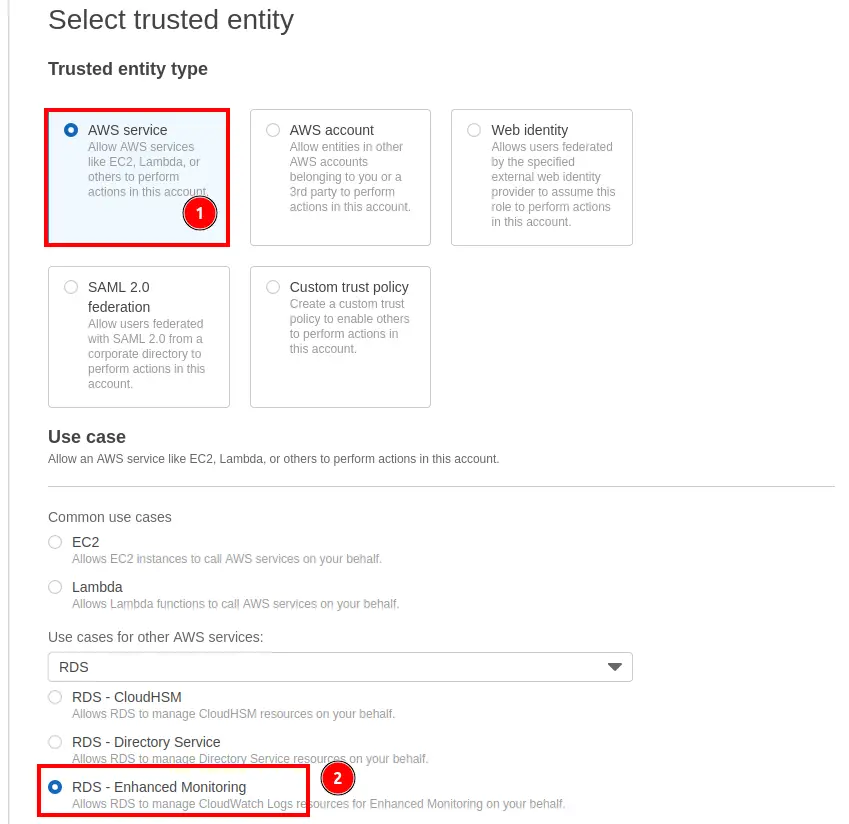
Step 2. In the ‘Select trusted entity’ section, you'll see the ‘Trusted entity type’, select ‘AWS service’ option here. Now search for ‘RDS’ under ‘use cases for other AWS services’ and select ‘RDS - Enhanced Monitoring’ option.
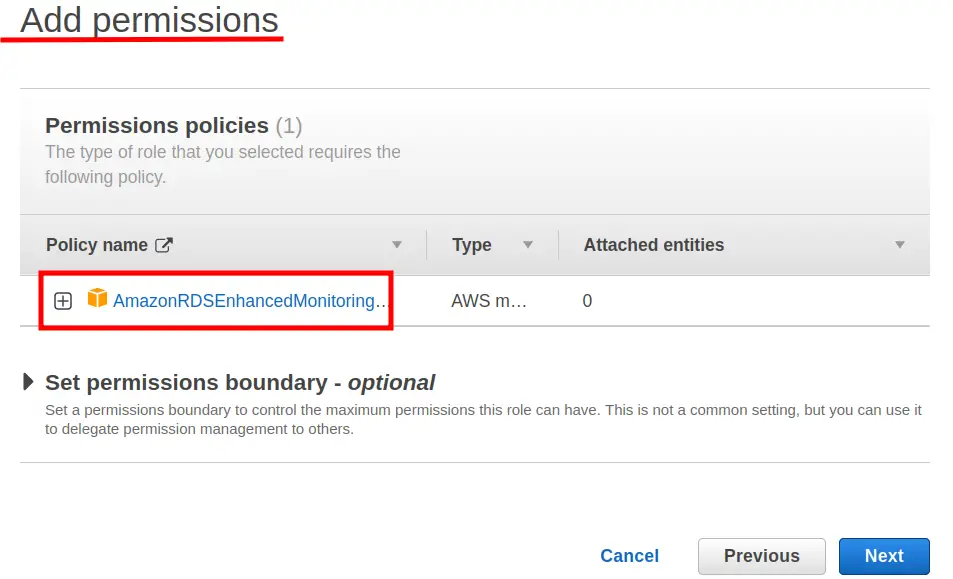
Step 3. In the next section ‘Add permissions’, attach a ‘AmazonRDSEnhancedMonitoringRole’ policy and then click ‘Next’:
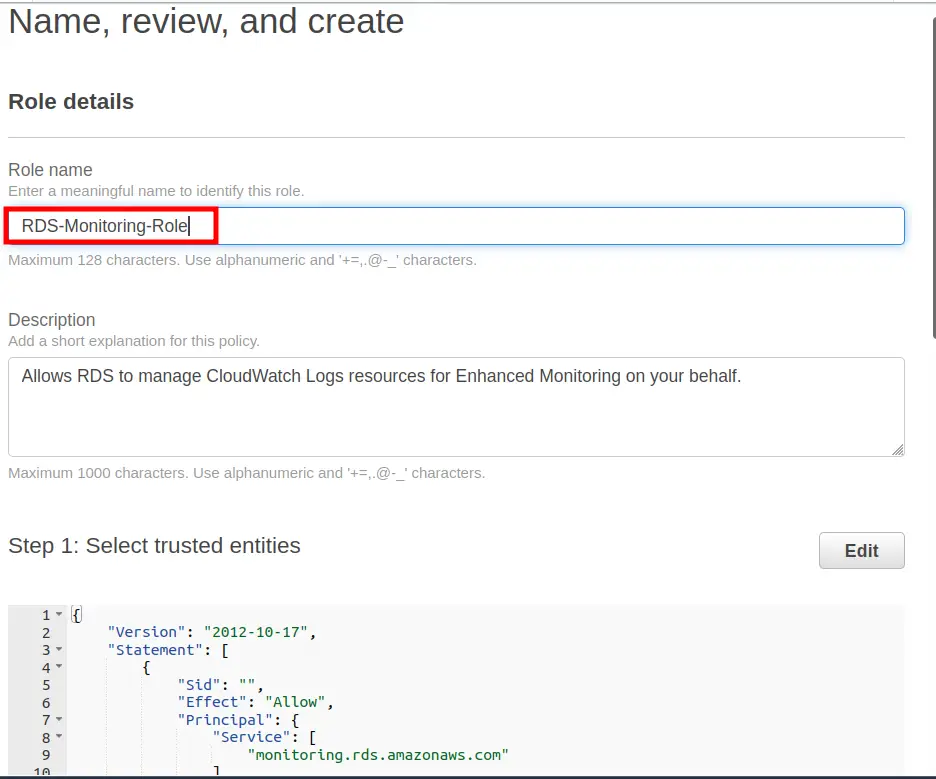
Step 4. Here enter a name for the role:‘RDS-Monitoring-Role’ and an optional description for it. Note that a trust policy will be automatically attached with this role:
{
	"Version": "2012-10-17",
	"Statement": [
    	{
        	"Sid": "",
        	"Effect": "Allow",
        	"Principal": {
            	"Service": "monitoring.rds.amazonaws.com"
        	},
        	"Action": "sts:AssumeRole"
    	}
	]
}
Step 5. Finally, click the ‘Create role’ button to create the above role:
Adding IAM policy for the IAM user
So far we have created a role and attached a policy to it and then we have also got a trusted policy. This has fulfilled two of our prerequisites. Now moving on to the third prerequisite, we will create a policy for the IAM user itself. In this policy, we have given the user permission for full EC2 and RDS access and also permission for associating the above ‘RDS-Monitoring-Role’ role with our RDS instance. You can yourself control the IAM permission level for EC2 and RDS, we are only concerned with demonstrating the PassRole permission:
Step 1. Again head to the IAM dashboard from the administrator or root account and select ‘Policies’ and click on the ‘Create policy’ button.
Step 2. On the Create Policy wizard, click on the JSON tab and simply paste the following JSON code for this policy:
{
	"Version": "2012-10-17",
	"Statement": [
    	{
        	"Sid": "VisualEditor0",
        	"Effect": "Allow",
        	"Action": "iam:PassRole",
        	"Resource": "arn:aws:iam::account_number:role/RDS-Monitoring-Role"
    	},
    	{
        	"Sid": "VisualEditor1",
        	"Effect": "Allow",
        	"Action": [
            	"rds:*",
            	"logs:Describe*",
            	"logs:List*",
            	"logs:StartQuery",
            	"ec2:*",
            	"iam:ListRoles",
            	"logs:StopQuery",
            	"logs:TestMetricFilter",
            	"logs:FilterLogEvents",
            	"logs:Get*",
            	"cloudwatch:GetMetricData"
        	],
        	"Resource": "*"
    	}
	]
}
In the above code, replace ‘IAM_User_ID’ with the account number or ID of the IAM user and ‘RDS-Monitoring-Role’ with the name of the role in your case. Click ‘Next:Tags’.
Step 3. Specify any optional ‘Tags’ you want to use and click ‘Next:Review’:
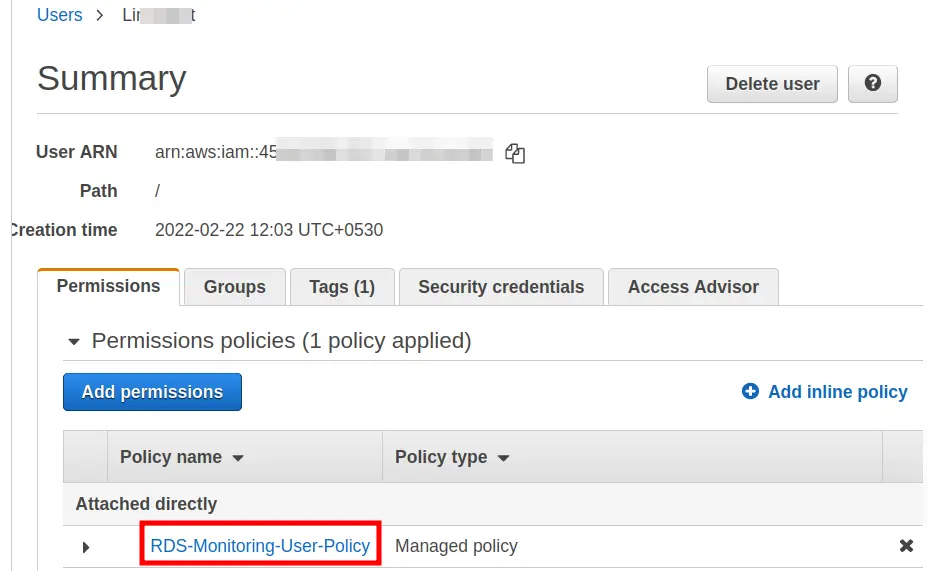
Step 4. Here put a name for this policy(‘RDS-Monitoring-User-Policy’ in our case) and finally, click ‘Create policy’ button to create this policy:

Step 5. Attach the above-created policy to the IAM user:
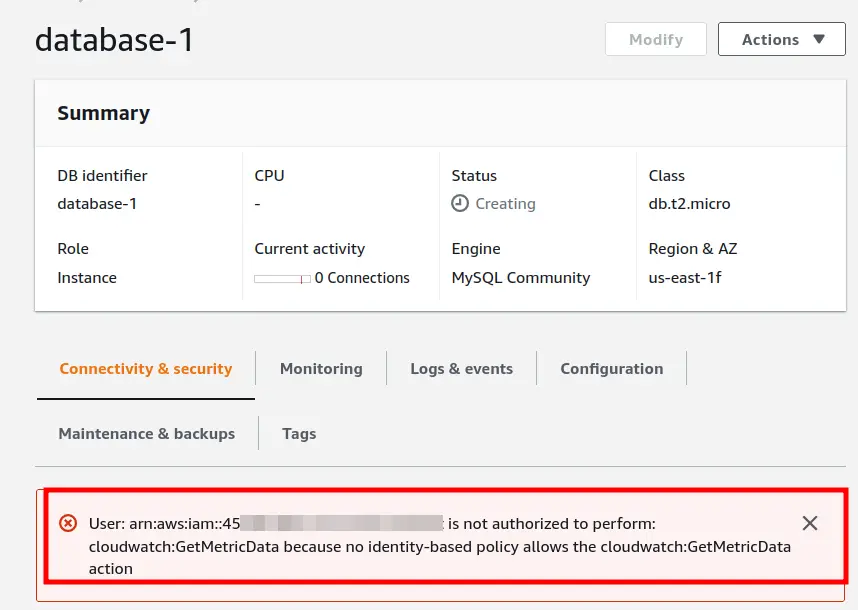
Database Without Role
Below we can see the database configuration scenario without attaching the above-created role(RDS-Monitoring-Role). Here we can see that we are getting an error of cloudwatch:GetMetricData.
Attaching the role to the Database
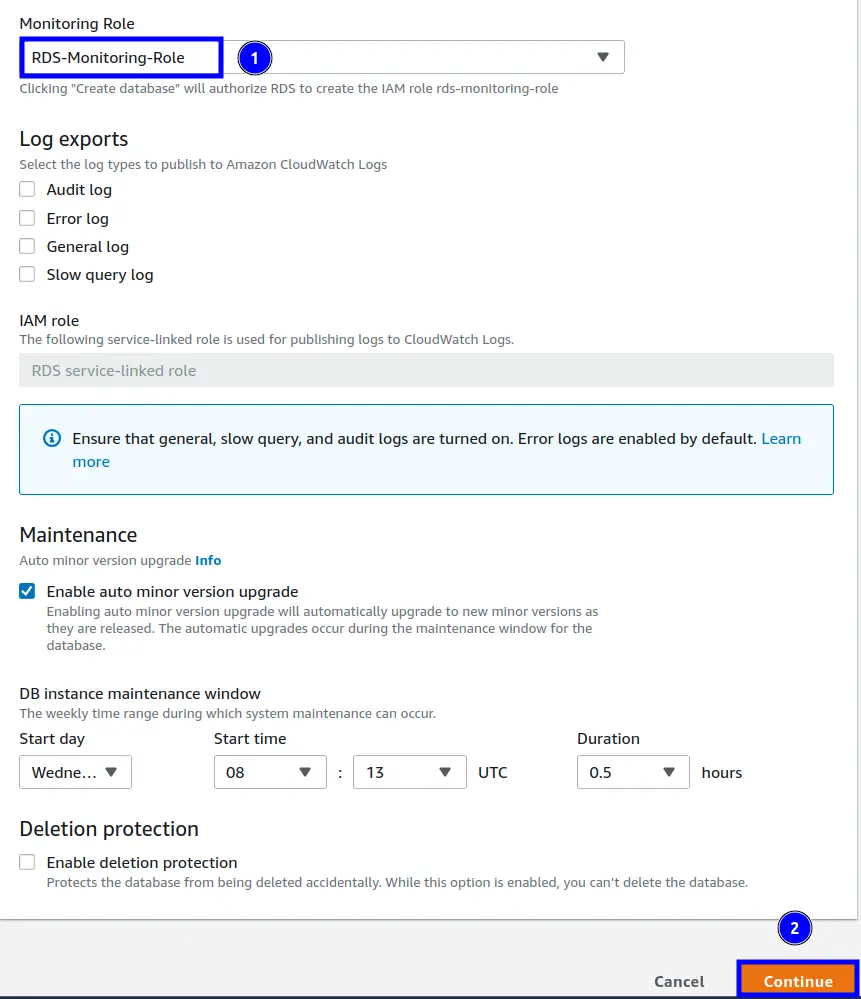
Now we will attach the ‘RDS-Monitoring-Role’ to the database and check if the above CloudWatch error goes or not. A role can be associated with an RDS instance either at the time of creating it or after it has been created. In case you have already created the database, you need to modify the db instance. Whatever the case be, head to the RDS console and open the ‘Additional configuration’ block under the target database setting. Look for the ‘Monitoring’ section and here check the box corresponding to ‘Enable Enhanced monitoring’. Under the ‘Monitoring Role’, select your role from the drop-down menu and click ‘continue’:
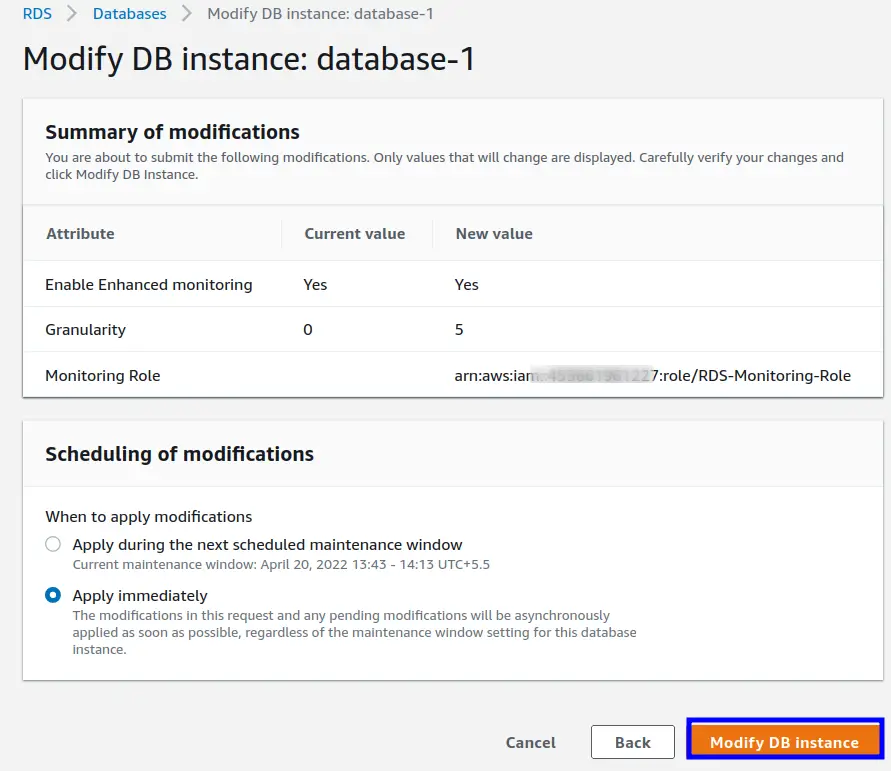
On the next window, choose the action for when to apply the changes and click ‘Modify DB instance’:
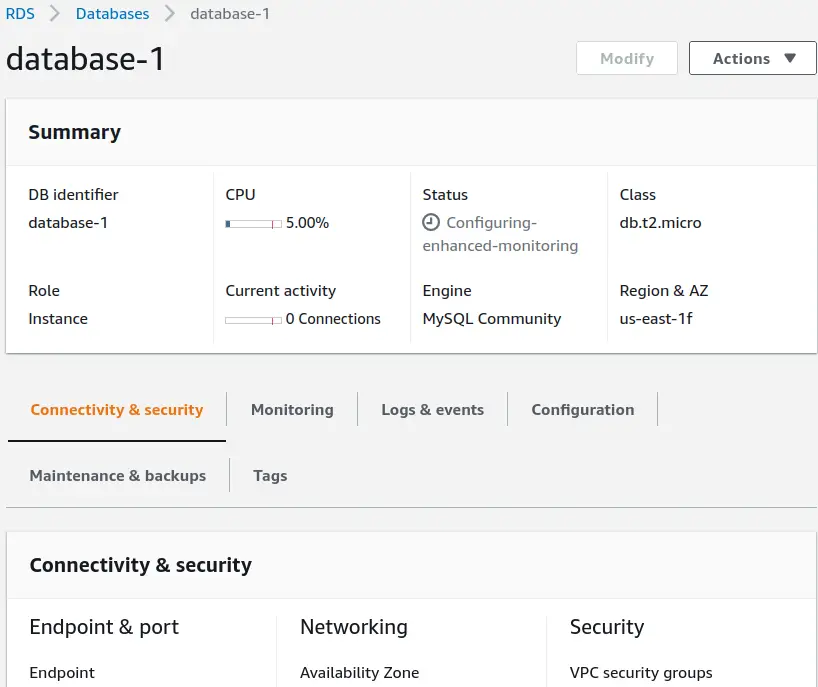
This time when you see the database configuration details, the CloudWatch error should be gone:
Conclusion
In this guide, we have learned how to use the PassRole permission for enabling the Enhanced Monitoring feature for RDS. PassRole is a great feature for granting the least privileges to an IAM user for accessing other AWS services that it is not authorized to access.

