How to Install ionCube Loader on Debian 11
This tutorial exists for these OS versions
- Debian 11 (Bullseye)
- Debian 9 (Stretch)
- Debian 7 (Wheezy)
On this page
IonCube is a PHP extension that can decode secured encrypted PHP files at runtime. Commercial PHP program vendors use the IonCube encoder to protect applications, and the loader we install in this tutorial is required to run IonCube encoded files on your server. The IoncubeLoader is available free of charge. Ioncube loader increases your website loading speed and prevents others from stealing the source code by converting your PHP into byte code.
In this tutorial, we will explain the installation of the IonCube Loader on Debian 11.
Requirements
- A server running Debian 11 with PHP (e.g., a LAMP or LEMP setup installed).
- A non-root user with sudo privileges.
Getting Started
Before starting, update all packages that are installed on your server using the following command:
sudo apt update -y
sudo apt upgrade -y
Installing IonCube Loader
First, you will need to download the latest version of the IonCube Loader from their official website. You can download IonCube loader to the /tmp folder of the system using the following command:
cd /tmp
wget https://downloads.ioncube.com/loader_downloads/ioncube_loaders_lin_x86-64.tar.gz

Once the download is completed, extract the downloaded file using the following command:
tar -xvzf ioncube_loaders_lin_x86-64.tar.gz
By default, the files will be unzipped to a folder ioncube.
Now, change the directory to ioncube folder and run ls command to see all the extension:
cd ioncube
ls
You should see the various ioncube loader files corresponding to various php versions as below:
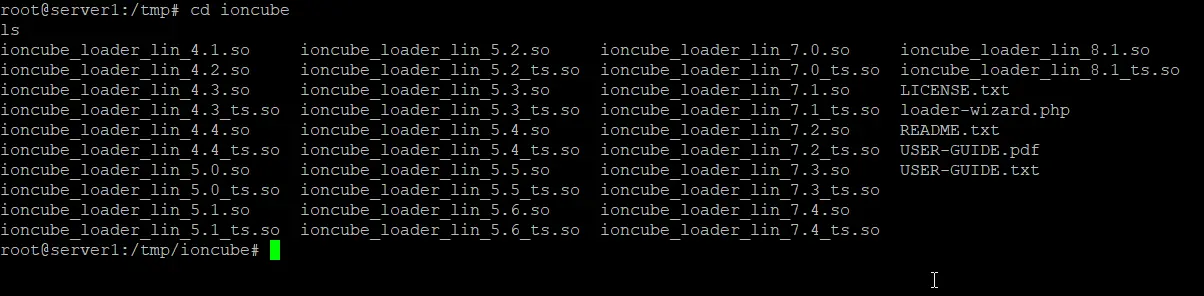
ioncube_loader_lin_4.1.so     ioncube_loader_lin_5.2.so     ioncube_loader_lin_7.0.so     ioncube_loader_lin_8.1.so
ioncube_loader_lin_4.2.so     ioncube_loader_lin_5.2_ts.so  ioncube_loader_lin_7.0_ts.so  ioncube_loader_lin_8.1_ts.so
ioncube_loader_lin_4.3.so     ioncube_loader_lin_5.3.so     ioncube_loader_lin_7.1.so     LICENSE.txt
ioncube_loader_lin_4.3_ts.so  ioncube_loader_lin_5.3_ts.so  ioncube_loader_lin_7.1_ts.so  loader-wizard.php
ioncube_loader_lin_4.4.so     ioncube_loader_lin_5.4.so     ioncube_loader_lin_7.2.so     README.txt
ioncube_loader_lin_4.4_ts.so  ioncube_loader_lin_5.4_ts.so  ioncube_loader_lin_7.2_ts.so  USER-GUIDE.pdf
ioncube_loader_lin_5.0.so     ioncube_loader_lin_5.5.so     ioncube_loader_lin_7.3.so     USER-GUIDE.txt
ioncube_loader_lin_5.0_ts.so  ioncube_loader_lin_5.5_ts.so  ioncube_loader_lin_7.3_ts.so
ioncube_loader_lin_5.1.so     ioncube_loader_lin_5.6.so     ioncube_loader_lin_7.4.so
ioncube_loader_lin_5.1_ts.so  ioncube_loader_lin_5.6_ts.so  ioncube_loader_lin_7.4_ts.so
Now, you will need to select the correct ioncube loader file per the PHP version installed on your server. Run the following command to see the version of PHP installed on your server:
php -v
Output:
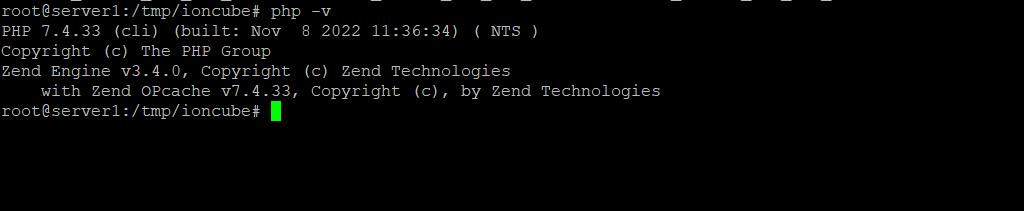
PHP 7.4.33 (cli) (built: Nov  8 2022 11:36:34) ( NTS )
Copyright (c) The PHP Group
Zend Engine v3.4.0, Copyright (c) Zend Technologies
    with Zend OPcache v7.4.33, Copyright (c), by Zend Technologies
In the above output, you should see that the PHP version installed is PHP 7.4.33. So you will need to copy ioncube_loader_lin_7.4.so file from ioncube directory to the PHP extension directory.
First, find the location of the PHP extension directory using the following command:
php -i | grep extension_dir
You should see the following output:
extension_dir => /usr/lib/php/20190902 => /usr/lib/php/20190902
Now, copy ioncube loader file to the PHP extension directory (/usr/lib/php/20151012) using the following command:
cd ioncube
cp ioncube_loader_lin_7.4.so /usr/lib/php/20190902/
Next, you will need to edit php.ini file and add the path of the ioncube extension. The file that needs editing depends on the way you use PHP on your system, the most common ways are mod_php, PHP-FPM, PHP CGI and PHP CLI (Commandline PHP), I'll cover all of them below. If a file does not exist, then you do not use that specific PHP variant and you can skip to the next one.
Apache mod_php
You can do this with the following command:
sudo nano /etc/php/7.4/apache2/php.ini
Add the following line at the end of the php.ini file:
zend_extension=/usr/lib/php/20190902/ioncube_loader_lin_7.4.so
Save the file.
Then restart the Apache service to apply the changes:
sudo systemctl restart apache2
PHP-FPM
You can do this with the following command:
sudo nano /etc/php/7.4/fpm/php.ini
Add the following line at the end of the php.ini file:
zend_extension=/usr/lib/php/20190902/ioncube_loader_lin_7.4.so
Save the file.
Then restart the PHP-FPM service to apply the changes:
sudo systemctl restart php7.4-fpm
PHP CGI
You can do this with the following command:
sudo nano /etc/php/7.4/cgi/php.ini
Add the following line at the end of the php.ini file:
zend_extension=/usr/lib/php/20190902/ioncube_loader_lin_7.4.so
Save the file.
Then restart the Apache service to apply the changes:
sudo systemctl restart apache2
PHP CLI (command line PHP)
You can do this with the following command:
sudo nano /etc/php/7.4/cli/php.ini
Add the following line at the end of the php.ini file:
zend_extension=/usr/lib/php/20190902/ioncube_loader_lin_7.4.so
Save the file.
No service needs to be restarted in this case.
Testing IonCube Loader
Now, everything is configured correctly. It's time to test whether the Ioncube loader is installed or not. You can test it using the following command:
php -v
If everything is fine, you should see the following output:
PHP 7.4.33 (cli) (built: Nov  8 2022 11:36:34) ( NTS )
Copyright (c) The PHP Group
Zend Engine v3.4.0, Copyright (c) Zend Technologies
    with the ionCube PHP Loader + ionCube24 v12.0.5, Copyright (c) 2002-2022, by ionCube Ltd.
    with Zend OPcache v7.4.33, Copyright (c), by Zend Technologies
As you can see in the command output "with the ionCube PHP Loader + ionCube24 v12.0.5", we successfully added IoncubeLoader.

