How to Install OpenSearch via Docker on Ubuntu 22.04
On this page
- Prerequisites
- Setting Up System
- Installing Docker CE and Docker Compose
- Downloading OpenSearch Docker Images
- Setup Project Directory
- Generating SSL/TLS Certificates
- Setting up User
- Setup docker-compose.yml Script
- Set up OpenSearch and OpenSearch Dashboards
- Deploying OpenSearch Cluster and OpenSearch Dashboards
- Accessing OpenSearch Dashboards
- Conclusion
OpenSearch is a community-driven project by Amazon and a fork of Elasticsearch and Kibana. It's a fully open-source search engine and analytics suite with rich features and innovative functionality. The OpenSearch project's main component is OpenSearch (a fork of Elasticsearch) and the OpenSearch Dashboards (a fork of Kibana). Both components provide features such as enterprise security, alerting, machine learning, SQL, index state management, and more.
OpenSearch is 100% open-source and licensed under Apache 2.0-licensed. It enables you to easily ingest, secure, search, aggregate, view, and analyze data for a number of use cases such as log analytics, application search, enterprise search, and more.
In this tutorial, you will install and set up OpenSearch - an open-source search engine and analytics suite - and OpenSearch Dashboards - an open-source visualization tool - via Docker on an Ubuntu 22.04 server. You'll deploy an OpenSearch cluster with multiple containers and a single OpenSearch Dashboard via Docker and Docker Compose. You'll also secure your deployment with custom TLS certificates and authentication and authorization enabled.
This guide uses a fresh generic Ubuntu server, so this tutorial includes installing the Docker engine and Docker Compose on an Ubuntu 22.04 system.
Prerequisites
To complete this guide, you must have the following requirements:
- An Ubuntu 22.04 server with min RAM 4-8GB - This example uses an Ubuntu server with the hostname '' and an IP address ''.
- A non-root user with sudo/root administrator privileges.
When these requirements are ready, you can now start the OpenSearch installation.
Setting Up System
In this first step, you will prepare your Ubuntu system for the OpenSearch deployment. You'll need to disable SWAP and paging, then you'll increase the max memory map via the '/etc/sysctl.conf' file.
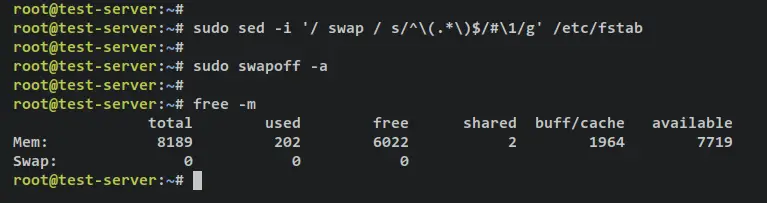
Run the below command to disable the swap on your system. The 'sed' command here will disable swap permanently via the '/etc/fstab' file by adding comment '#' to the beginning of the line swap configuration. The 'swapoff' command will disable swap in the current session.
sudo sed -i '/ swap / s/^\(.*\)$/#\1/g' /etc/fstab
sudo swapoff -a
Next, verify the swap status via the below command. If disabled, you should get an output '0' in the swap section.
free -m
Output:
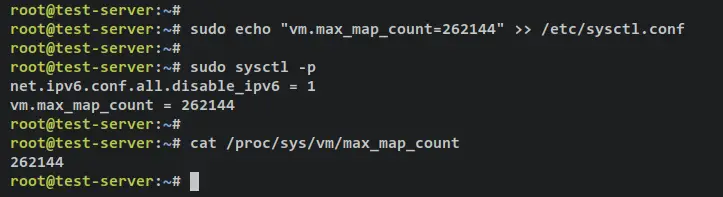
Lastly, you'll add the configuration to the '/etc/sysctl.conf' file to increase the max memory maps on your Ubuntu system.
Run the below command to add the parameter 'vm.max_map_count=262144' to the end of the line of the '/etc/sysctl.conf' file. Then, apply the changes via the 'sysctl -p' command.
sudo echo "vm.max_map_count=262144" >> /etc/sysctl.conf
sudo sysctl -p
Now verify the max memory maps by running the below command. If successful, your max memory map should be '262144'.
cat /proc/sys/vm/max_map_count
Output:
With the swap disabled and the max memory map increased to '262144', you'll next start the installation of the Docker engine and Docker Compose.
Installing Docker CE and Docker Compose
There are multiple ways to deploy and install OpenSearch, you can install OpenSearch in a traditional way on a virtual machine, or install it in the container environment.
If you prefer traditional installation on a virtual machine, you can install OpenSearch manually via Tarball, or via the package manager (for RHEL-based distributions). For container deployment, you can install OpenSearch with Docker and Kubernetes.
In this example, you'll install OpenSearch on the containerized environment via Docker engine and Docker compose. So now, you'll be installing Docker packages from the official Docker repository.
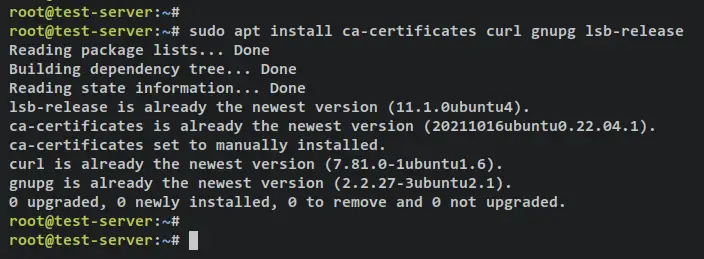
To start, run the below apt command to install basic dependencies. Input y when prompted and press ENTER to proceed.
sudo apt install ca-certificates curl gnupg lsb-release
Output:
Next, run the below command to add the GPG key and repository for Docker packages.
sudo mkdir -p /etc/apt/keyrings
curl -fsSL https://download.docker.com/linux/ubuntu/gpg | sudo gpg --dearmor -o /etc/apt/keyrings/docker.gpg
echo \
  "deb [arch=$(dpkg --print-architecture) signed-by=/etc/apt/keyrings/docker.gpg] https://download.docker.com/linux/ubuntu \
  $(lsb_release -cs) stable" | sudo tee /etc/apt/sources.list.d/docker.list > /dev/null
Output:

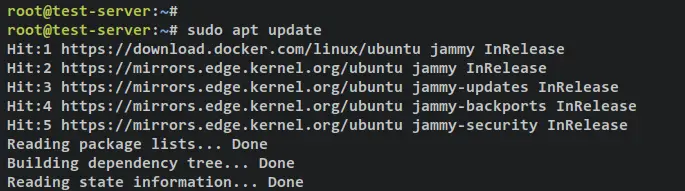
After that, update and refresh your Ubuntu package index via the apt command below.
sudo apt update
Output:
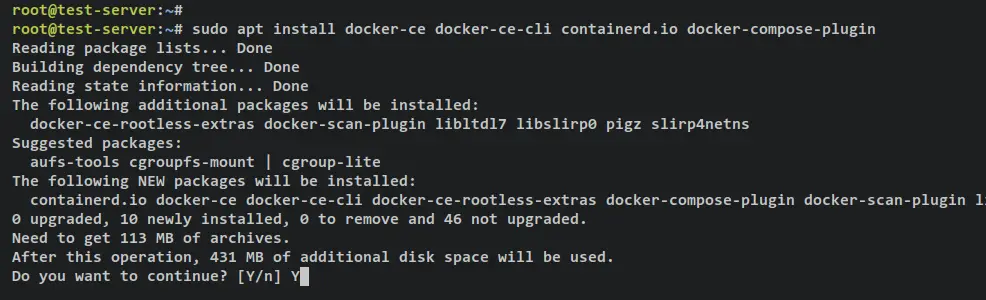
With the Docker repository added, you can now install the Docker engine and Docker Compose plugin using the below apt command. When prompted, input y, then press ENTER to proceed.
sudo apt install docker-ce docker-ce-cli containerd.io docker-compose-plugin
Output:
The Docker service will start and enable automatically. You can verify the Docker service via the following systemctl command utility.
sudo systemctl is-enabled docker
sudo systemctl status docker
You should get an output that the Docker service is enabled and will be run automatically at boot. And the status of the Docker service is running.
Lastly, to allow your non-root user to run the Docker container, you must add your user to the 'docker' group. Run the below usermod command below to add your user to the 'docker' group. Also, be sure to change the username with your user.
sudo usermod -aG docker alice
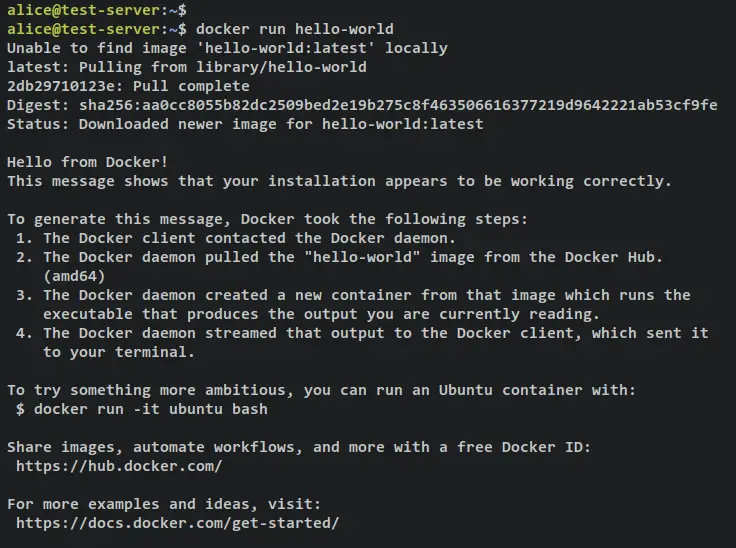
You can now log in as your user and run the Docker container via the below command.
su - alice
docker run hello-world
When successful, you should get the hello-world message from the Docker container like the following screenshot.
Downloading OpenSearch Docker Images
In this step, you will download OpenSearch and OpenSearch Dashboards images from DockerHub. Then, you'll also run a new OpenSearch container for testing purposes.
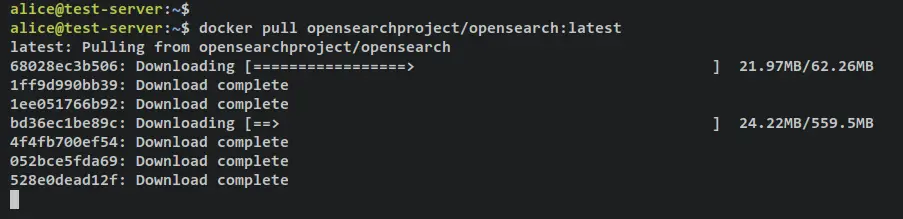
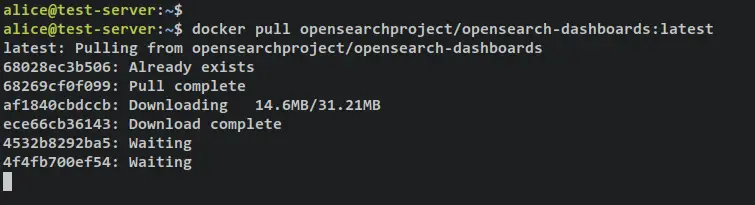
Run the following command to download the OpenSearch and OpenSearch Dashboards images.
docker pull opensearchproject/opensearch:latest
docker pull opensearchproject/opensearch-dashboards:latest
Output:
After downloads is finished, run the below command to check the list of Docker images on your system. You'll see the OpenSearch and OpenSearch Dashboards images is available on your system.
docker images
Output:

Next, you can also run OpenSearch via Docker directly using the below command. This will create and run the OpenSearch container in a single mode and expose the default TCP port 9200 and 9600 on the host machine.
docker run -d -p 9200:9200 -p 9600:9600 -e "discovery.type=single-node" opensearchproject/opensearch:latest
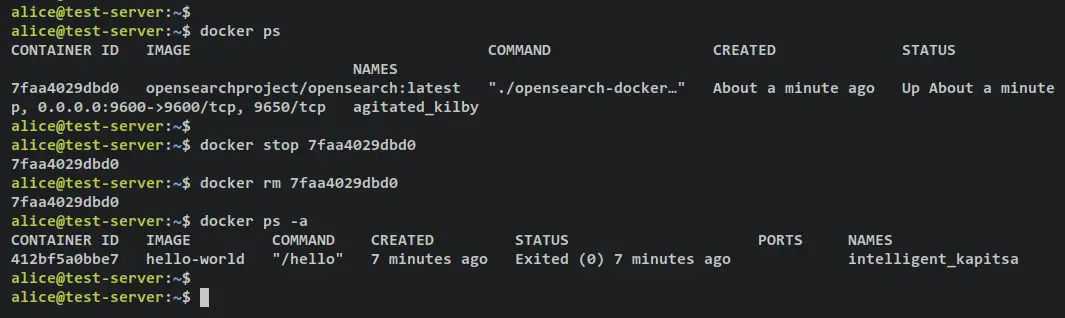
Verify the list of the running container via the 'docker ps' command below.
docker ps
You should receive an output like this - The OpenSearch container is created and it's running. Exposed TCP ports 9200 and 9600 on both the container and Docker host.

You can access your OpenSearch container via the curl command below. The default username and password for the OpenSearch container is 'admin'.
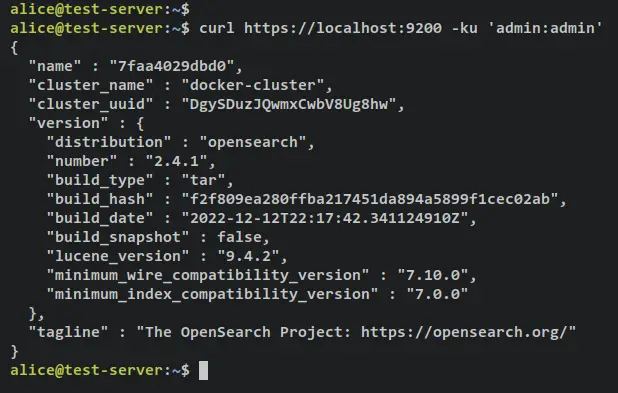
curl https://localhost:9200 -ku 'admin:admin'
When successful, you should get an output like this - The OpenSearch container is running and accessible via the Docker host machine.
You can now run the below 'docker' command to stop and delete the OpenSearch container. Because in the next step, you will be creating an OpenSearch cluster via Docker Compose. Be sure to change the container name in the following command.
docker stop container-name or container-id
docker rm container-name or container-id
To ensure that the OpenSearch container is removed, run the 'docker ps' command with the additional option '-a'. This will show you available containers with both statuses, running and exited.
docker ps -a
Output:
Setup Project Directory
Log in to your user with the following command. This example uses a user 'alice', so be sure to change the username in the below command.
su - alice
Now create a new project directory 'opensearch-project' that will be used as the main root directory of your project, and the 'certs' directory that will be used to store custom TLS certificates.
mkdir -p ~/opensearch-project/certs; cd ~/opensearch-project
Within the 'opensearch-project' directory, run the below command to create new files that will be used to create OpenSearch containers and the OpenSearch Dashboards.
touch docker-compose.yml opensearch.yml opensearch_dashboards.yml internal_users.yml

The list of files:
- docker-compose.yml - the main configuration of Docker Compose for the OpenSearch project.
- opensearch.yml - custom configuration for OpenSearch containers.
- opensearch_dashbaords.yml - custom configuration for OpenSearch Dashboards container.
- internal_users.yml - custom user authentication and authorization for OpenSearch and OpenSearch Dashboards.
Generating SSL/TLS Certificates
In this step, you'll generate multiple TLS certificates that will be used to secure your OpenSearch deployment. You'll generate the following certificates:
- Root CA certificates: These certificates will be used to sign other certificates.
- Admin certificates: These certificates will be used to get administrative rights to perform all tasks related security plugin.
- OpenSearch Dashboards certificates: These certificates will be used to secure the OpenSearch Dashboards and allows you can access OpenSearch Dashboards via HTTPS connections.
- Node and Client Certificates: These certificates will be used by nodes and clients within the OpenSearch cluster.
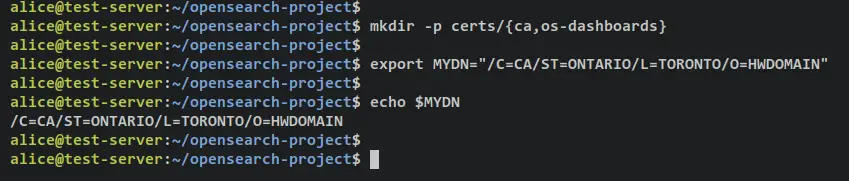
To start, run the below command to create new directories that will be used for string TLS certificates.
mkdir -p certs/{ca,os-dashboards}
Create a new environment variable 'MYDN' that will be used to create new TLS certificates. Be sure to change the details with your information.
export MYDN="/C=CA/ST=ONTARIO/L=TORONTO/O=HWDOMAIN"
Now you're ready to generate TLS certificates for your OpenSearch deployment.
Generate CA Certificates
Generate a private key for the root CA certificates using the below.
openssl genrsa -out certs/ca/ca.key 2048
Now generate a self-signed root CA certificate via the below command. The value of the '-subj' parameter is using the environment variable 'MYDN' that you've created on your current session.
openssl req -new -x509 -sha256 -days 1095 -subj "$MYDN/CN=CA" -key certs/ca/ca.key -out certs/ca/ca.pem
With this, you should get the root CA private key 'ca.key' and the root CA certificate 'ca.pem'. You can verify the CA certificates that you've generated via the following command.
ls certs/ca/
Output - You should get the CA private key 'ca.key' and the CA certificate 'ca.pem' file.

Generate Admin Certificates
Generate the new admin certificate private key 'admin-temp.key' and convert the generated certificate to PKCS#12-compatible algorithm (3DES). With this, your admin private key should be 'admin.key'.
openssl genrsa -out certs/ca/admin-temp.key 2048
openssl pkcs8 -inform PEM -outform PEM -in certs/ca/admin-temp.key -topk8 -nocrypt -v1 PBE-SHA1-3DES -out certs/ca/admin.key
Next, run the below command to generate the admin CSR (Certificate Signing Request) from the 'admin.key' private key. Your generated CSR should now be 'admin.csr' file.
openssl req -new -subj "$MYDN/CN=ADMIN" -key certs/ca/admin.key -out certs/ca/admin.csr
Now run the below command to sign the admin CSR with the root CA certificate and private key. The output of the admin certificate is the 'admin.pem' file.
openssl x509 -req -in certs/ca/admin.csr -CA certs/ca/ca.pem -CAkey certs/ca/ca.key -CAcreateserial -sha256 -out certs/ca/admin.pem
Lastly, verify the list of your certificates via the following command.
ls certs/ca/
Output - You should see admin certificate files 'admin.pem' and private key 'admin.key'.

Generate OpenSearch Dashboards Certificates
Generate the new certificate that will be used for the OpenSearch Dashboards.
Run the following command to generate private key 'os-dashboards-temp.key' and convert the generated certificate to PKCS#12-compatible algorithm (3DES). With this, your admin private key should be 'os-dashboards.key'.
openssl genrsa -out certs/os-dashboards/os-dashboards-temp.key 2048
openssl pkcs8 -inform PEM -outform PEM -in certs/os-dashboards/os-dashboards-temp.key -topk8 -nocrypt -v1 PBE-SHA1-3DES -out certs/os-dashboards/os-dashboards.key
Next, run the below command to generate the CSR (Certificate Signing Request) for the OpenSearch Dashboards. Your generated CSR should now be the 'os-dashboards.csr' file.
openssl req -new -subj "$MYDN/CN=os-dashboards" -key certs/os-dashboards/os-dashboards.key -out certs/os-dashboards/os-dashboards.csr
Now run the below command to sign the OpenSearch Dashboards CSR with the root CA certificate and private key. The output of the admin certificate is the 'os-dashboards.pem' file.
openssl x509 -req -in certs/os-dashboards/os-dashboards.csr -CA certs/ca/ca.pem -CAkey certs/ca/ca.key -CAcreateserial -sha256 -out certs/os-dashboards/os-dashboards.pem
Lastly, run the following command to delete the OpenSearch Dashboards CSR file and verify the list of your certificates for the OpenSearch Dashboards.
rm certs/os-dashboards/os-dashboards-temp.key certs/os-dashboards/os-dashboards.csr
ls certs/os-dashboards/
Output - You should see OpenSearch Dashboards certificate files 'os-dashboards.pem' and private key 'os-dashboards.key'.

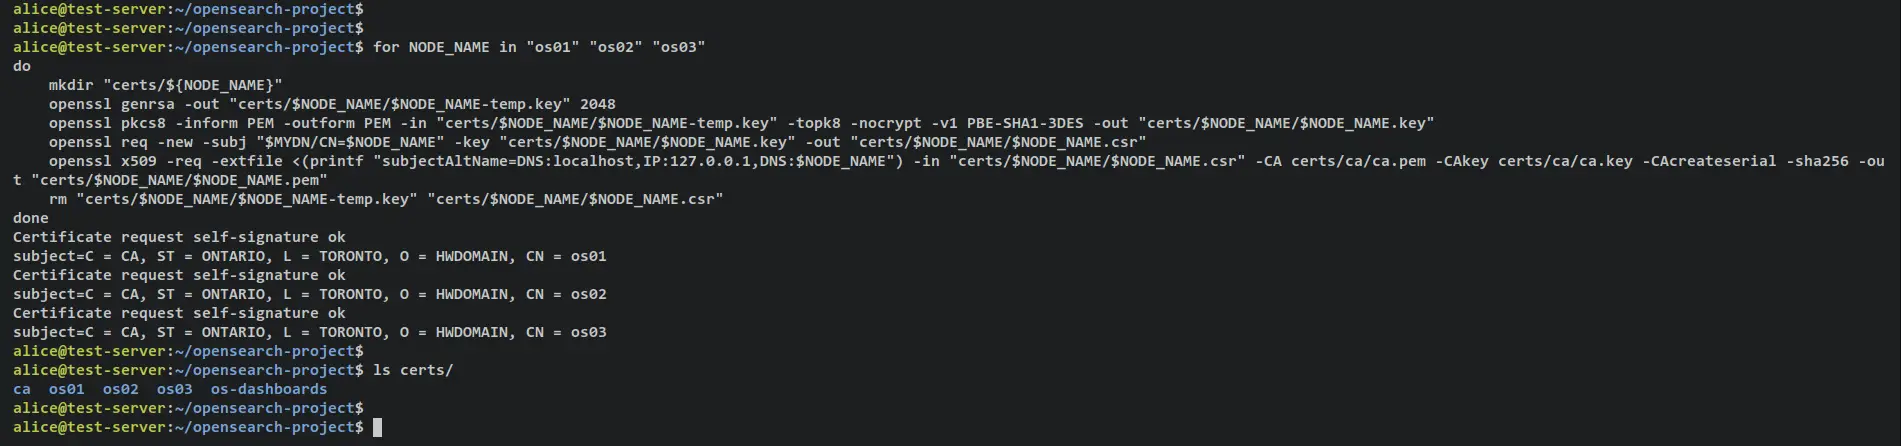
Generate Certificates for OpenSearch Nodes
Run the following command to generate node certificates. With this, you'll create multiple directories under the 'certs' directory and generate TLS certificates for multiple hosts.
for NODE_NAME in "os01" "os02" "os03"
do
    mkdir "certs/${NODE_NAME}"
    openssl genrsa -out "certs/$NODE_NAME/$NODE_NAME-temp.key" 2048
    openssl pkcs8 -inform PEM -outform PEM -in "certs/$NODE_NAME/$NODE_NAME-temp.key" -topk8 -nocrypt -v1 PBE-SHA1-3DES -out "certs/$NODE_NAME/$NODE_NAME.key"
    openssl req -new -subj "$MYDN/CN=$NODE_NAME" -key "certs/$NODE_NAME/$NODE_NAME.key" -out "certs/$NODE_NAME/$NODE_NAME.csr"
    openssl x509 -req -extfile <(printf "subjectAltName=DNS:localhost,IP:127.0.0.1,DNS:$NODE_NAME") -in "certs/$NODE_NAME/$NODE_NAME.csr" -CA certs/ca/ca.pem -CAkey certs/ca/ca.key -CAcreateserial -sha256 -out "certs/$NODE_NAME/$NODE_NAME.pem"
    rm "certs/$NODE_NAME/$NODE_NAME-temp.key" "certs/$NODE_NAME/$NODE_NAME.csr"
done
Verify the list of directories on the 'certs' directory.
ls certs/
Output - You should get new directories 'os01, os02, and os03.
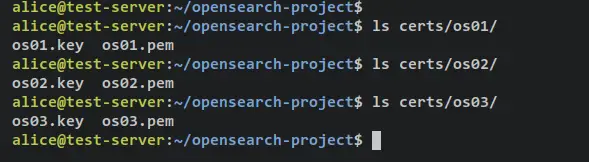
Lastly, verify the list of certificates that are available on the os01, os02, and os03 directories via the below command.
ls certs/os01/
ls certs/os02/
ls certs/os03/
Output - On each directory, you should get two certificates 'osX.key' and 'osX.pem'.
Lastly, you must change the ownership of the 'certs' directory to '1000' via the below command. This will allow Docker containers to access the 'certs' directory.
sudo chown -R 1000:1000 certs/
With TLS certificates generated, you'll next generate hashed passwords and define OpenSearch users.
Setting up User
In this step, you'll generate a password hash that will be used by OpenSearch and OpenSearch Dashboards. You'll generate two password hashes for two different users, then you'll modify the config file 'internal_users.yml' and OpenSearch users.
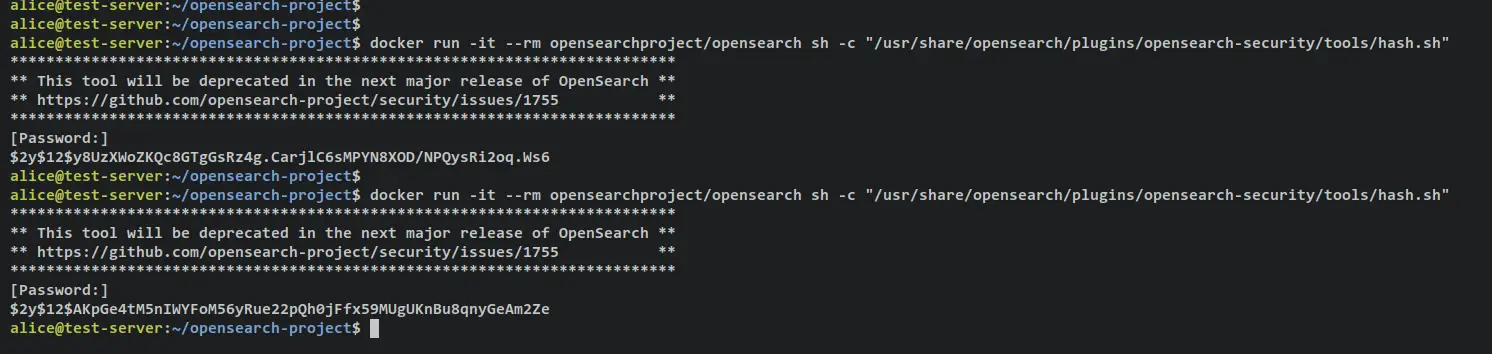
Run the following docker command to generate a new password hash. This will run a temporary OpenSearch container and run the script 'hash.sh' for generating a password hash.
docker run -it --rm opensearchproject/opensearch sh -c "/usr/share/opensearch/plugins/opensearch-security/tools/hash.sh"
Now input your password and you should get the hashed password on your terminal. Copy the generated hash password and rerun the command to generate another hash password.
Output - To hashed password generated for OpenSearch users.
Next, open the file 'internal_users.yml' using the following nano editor command.
nano internal_users.yml
Add the following lines to the file and be sure to change the hashed password with your generated password. With this, you'll define two users for your OpenSearch deployment. the user 'admin' as an administrator for OpenSearch and the user 'kibanaserver' that will be used to connect to OpenSearch Dashboards.
---
# This is the internal user database
# The hash value is a bcrypt hash and can be generated with plugin/tools/hash.sh

_meta:
  type: "internalusers"
  config_version: 2

# Define your internal users here

admin:
  hash: "$2y$12$y8UzXWoZKQc8GTgGsRz4g.CarjlC6sMPYN8XOD/NPQysRi2oq.Ws6"
  reserved: true
  backend_roles:
  - "admin"
  description: "Admin User"

kibanaserver:
  hash: "$2y$12$AKpGe4tM5nIWYFoM56yRue22pQh0jFfx59MUgUKnBu8qnyGeAm2Ze"
  reserved: true
  description: "OpenSearch Dashboards user"
Save the file and exit the editor when finished.

Setup docker-compose.yml Script
In this step, you will create a new Docker Compose script for deploying OpenSearch and OpenSearch Dashboards. You'll create multiple OpenSearch containers to set up the OpenSearch cluster, and you'll set up an OpenSearch Dashboards container that will be connected to the OpenSearch cluster.
Open the file 'docker-compose.yml' using the following nano editor command.
nano docker-compose.yml
Add the following lines to the file.
version: '3.7'

services:

  os01:
    restart: always
    image: opensearchproject/opensearch:latest
    environment:
      OPENSEARCH_JAVA_OPTS: "-Xms1024m -Xmx1024m" # minimum and maximum Java heap size, recommend setting both to 50% of system RAM
      node.name: os01
      discovery.seed_hosts: os01,os02,os03
      cluster.initial_master_nodes: os01,os02,os03
      plugins.security.ssl.transport.pemkey_filepath: certificates/os01/os01.key # relative path
      plugins.security.ssl.transport.pemcert_filepath: certificates/os01/os01.pem
      plugins.security.ssl.http.pemkey_filepath: certificates/os01/os01.key
      plugins.security.ssl.http.pemcert_filepath: certificates/os01/os01.pem
      DISABLE_INSTALL_DEMO_CONFIG: "true"
      JAVA_HOME: /usr/share/opensearch/jdk
      bootstrap.memory_lock: "true" # along with the memlock settings below, disables swapping
      network.host: "0.0.0.0"
    ulimits:
      memlock:
        soft: -1
        hard: -1
    volumes:
      - "./opensearch.yml:/usr/share/opensearch/config/opensearch.yml"
      - "./internal_users.yml:/usr/share/opensearch/config/opensearch-security/internal_users.yml"
      - "os-data1:/usr/share/opensearch/data"
      - "./certs:/usr/share/opensearch/config/certificates:ro"
    ports:
      - 9200:9200
      - 9600:9600 # required for Performance Analyzer

  os02:
    restart: always
    image: opensearchproject/opensearch:latest
    environment:
      OPENSEARCH_JAVA_OPTS: "-Xms1024m -Xmx1024m" # minimum and maximum Java heap size, recommend setting both to 50% of system RAM
      node.name: os02
      discovery.seed_hosts: os01,os02,os03
      cluster.initial_master_nodes: os01,os02,os03
      plugins.security.ssl.transport.pemkey_filepath: certificates/os02/os02.key # relative path
      plugins.security.ssl.transport.pemcert_filepath: certificates/os02/os02.pem
      plugins.security.ssl.http.pemkey_filepath: certificates/os02/os02.key
      plugins.security.ssl.http.pemcert_filepath: certificates/os02/os02.pem
      DISABLE_INSTALL_DEMO_CONFIG: "true"
      JAVA_HOME: /usr/share/opensearch/jdk
      bootstrap.memory_lock: "true" # along with the memlock settings below, disables swapping
      network.host: "0.0.0.0"
    ulimits:
      memlock:
        soft: -1
        hard: -1
    volumes:
      - "./opensearch.yml:/usr/share/opensearch/config/opensearch.yml"
      - "./internal_users.yml:/usr/share/opensearch/config/opensearch-security/internal_users.yml"
      - "os-data2:/usr/share/opensearch/data"
      - "./certs:/usr/share/opensearch/config/certificates:ro"

  os03:
    restart: always
    image: opensearchproject/opensearch:latest
    environment:
      OPENSEARCH_JAVA_OPTS: "-Xms1024m -Xmx1024m" # minimum and maximum Java heap size, recommend setting both to 50% of system RAM
      node.name: os03
      discovery.seed_hosts: os01,os02,os03
      cluster.initial_master_nodes: os01,os02,os03
      plugins.security.ssl.transport.pemkey_filepath: certificates/os03/os03.key # relative path
      plugins.security.ssl.transport.pemcert_filepath: certificates/os03/os03.pem
      plugins.security.ssl.http.pemkey_filepath: certificates/os03/os03.key
      plugins.security.ssl.http.pemcert_filepath: certificates/os03/os03.pem
      DISABLE_INSTALL_DEMO_CONFIG: "true"
      JAVA_HOME: /usr/share/opensearch/jdk
      bootstrap.memory_lock: "true" # along with the memlock settings below, disables swapping
      network.host: "0.0.0.0"
    ulimits:
      memlock:
        soft: -1
        hard: -1
    volumes:
      - "./opensearch.yml:/usr/share/opensearch/config/opensearch.yml"
      - "./internal_users.yml:/usr/share/opensearch/config/opensearch-security/internal_users.yml"
      - "os-data3:/usr/share/opensearch/data"
      - "./certs:/usr/share/opensearch/config/certificates:ro"

  osdashboards:
    restart: always
    image: opensearchproject/opensearch-dashboards:latest
    ports:
      - 5601:5601
    volumes:
      - "./certs:/usr/share/opensearch-dashboards/config/certificates:ro"
      - "./opensearch_dashboards.yml:/usr/share/opensearch-dashboards/config/opensearch_dashboards.yml"
    environment:
      OPENSEARCH_HOSTS: '["https://os01:9200","https://os02:9200","https://os03:9200"]' # must be a string with no spaces when specified as an environment variable
      DISABLE_INSTALL_DEMO_CONFIG: "true"

volumes:
  os-data1:
  os-data2:
  os-data3:
Save and exit the file 'docker-compose.yml' when finished.
With this, you will create 4 containers/services for the OpenSearch deployments. Below is detailed information about each container.
- 3 OpenSearch containers os01, os02, and os03 - This will be used to create OpenSearch cluster. These containers are based on image 'opensearchproject/opensearch:latest' and the same configurations 'opensearch.yml' and 'internal_users.yml'.
- An OpenSearch Dashboards container 'osdashboards' is based 'opensearchproject/opensearch-dashboards:latest' image and is connected to three hosts of OpenSearch os01, os02, and os03. Also, you'll disable the demo config on the OpenSearch Dashboards container.
- All containers OpenSearch and OpenSearch Dashboards will be secured via custom TLS certificates that are available in the 'certs' directory.
- The OpenSearch container will expose two ports 9200 and 9600, and the OpenSearch Dashboards container will expose port 5601.
Set up OpenSearch and OpenSearch Dashboards
In this step, you will be creating a new configuration for OpenSearch 'opensearch.yml' and OpenSearch Dashboards 'opensearch_dashbaords.yml'. In the end, you must ensure that all necessary configurations and certificates are available in the OpenSearch project directory.
Open the OpenSearch config file 'opensearch.yml' using the following nano editor command.
sudo nano opensearch.yml
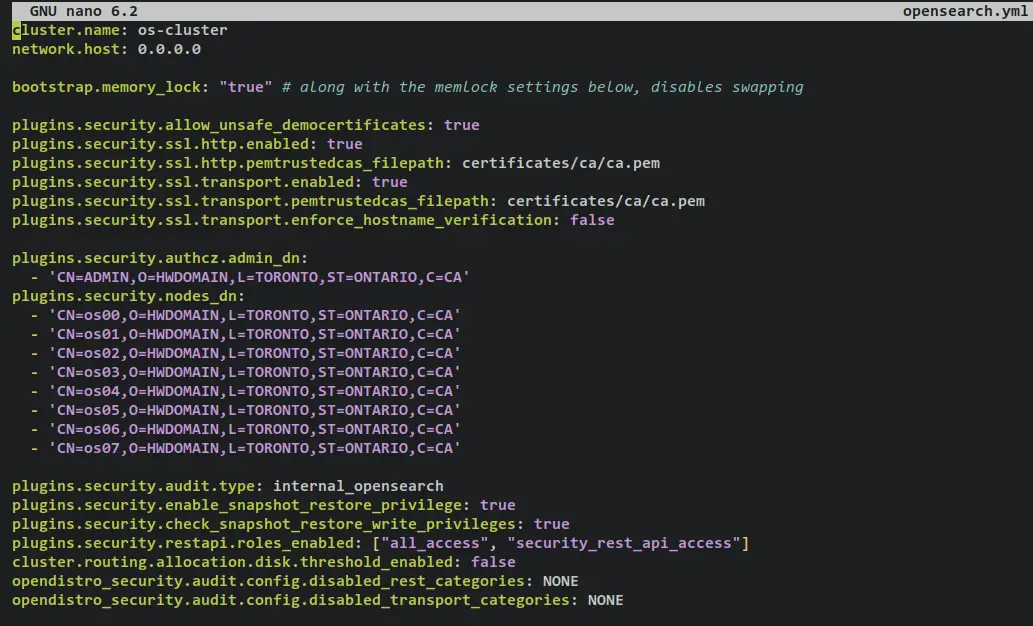
Add the following lines to the file. Be sure to change the path of CA certificates and DN for both admin and node certificates. With this, you will set up an OpenSearch cluster with the name 'os-cluster'.
cluster.name: os-cluster
network.host: 0.0.0.0

bootstrap.memory_lock: "true" # along with the memlock settings below, disables swapping

plugins.security.allow_unsafe_democertificates: true
plugins.security.ssl.http.enabled: true
plugins.security.ssl.http.pemtrustedcas_filepath: certificates/ca/ca.pem
plugins.security.ssl.transport.enabled: true
plugins.security.ssl.transport.pemtrustedcas_filepath: certificates/ca/ca.pem
plugins.security.ssl.transport.enforce_hostname_verification: false

plugins.security.authcz.admin_dn:
  - 'CN=ADMIN,O=HWDOMAIN,L=TORONTO,ST=ONTARIO,C=CA'
plugins.security.nodes_dn:
  - 'CN=os00,O=HWDOMAIN,L=TORONTO,ST=ONTARIO,C=CA'
  - 'CN=os01,O=HWDOMAIN,L=TORONTO,ST=ONTARIO,C=CA'
  - 'CN=os02,O=HWDOMAIN,L=TORONTO,ST=ONTARIO,C=CA'
  - 'CN=os03,O=HWDOMAIN,L=TORONTO,ST=ONTARIO,C=CA'
  - 'CN=os04,O=HWDOMAIN,L=TORONTO,ST=ONTARIO,C=CA'
  - 'CN=os05,O=HWDOMAIN,L=TORONTO,ST=ONTARIO,C=CA'
  - 'CN=os06,O=HWDOMAIN,L=TORONTO,ST=ONTARIO,C=CA'
  - 'CN=os07,O=HWDOMAIN,L=TORONTO,ST=ONTARIO,C=CA'

plugins.security.audit.type: internal_opensearch
plugins.security.enable_snapshot_restore_privilege: true
plugins.security.check_snapshot_restore_write_privileges: true
plugins.security.restapi.roles_enabled: ["all_access", "security_rest_api_access"]
cluster.routing.allocation.disk.threshold_enabled: false
opendistro_security.audit.config.disabled_rest_categories: NONE
opendistro_security.audit.config.disabled_transport_categories: NONE
Save the file 'opensearch.yml' and exit the editor when finished.
Next, open the OpenSearch Dashboards config file 'opensearch_dashboards.yml' using the below nano editor command.
nano opensearch_dashboards.yml
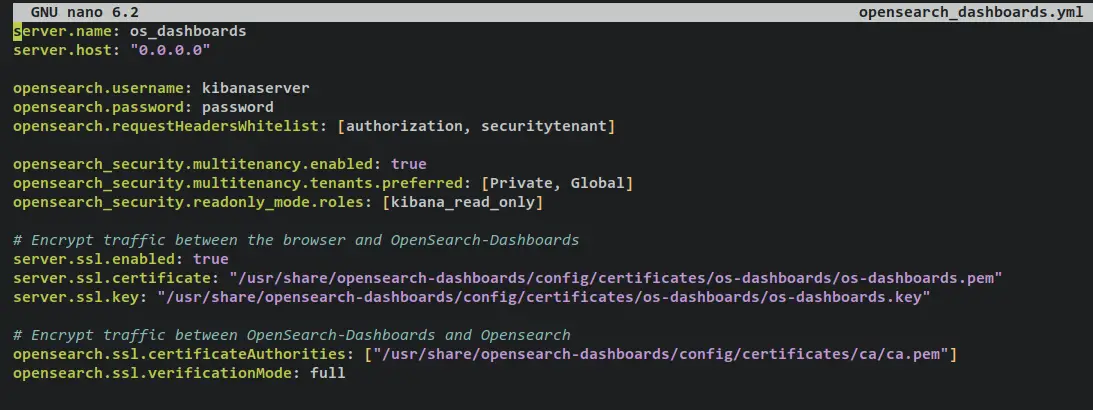
Add the following lines to the file. Be sure to change the username and password of the OpenSearch Dashboards with the details of user 'kibanaserver' on the 'internal_users.yml' file.
server.name: os_dashboards
server.host: "0.0.0.0"

opensearch.username: kibanaserver
opensearch.password: password
opensearch.requestHeadersWhitelist: [authorization, securitytenant]

opensearch_security.multitenancy.enabled: true
opensearch_security.multitenancy.tenants.preferred: [Private, Global]
opensearch_security.readonly_mode.roles: [kibana_read_only]
# Use this setting if you are running opensearch-dashboards without https
opensearch_security.cookie.secure: false

# Encrypt traffic between the browser and OpenSearch-Dashboards
server.ssl.enabled: true
server.ssl.certificate: "/usr/share/opensearch-dashboards/config/certificates/os-dashboards/os-dashboards.pem"
server.ssl.key: "/usr/share/opensearch-dashboards/config/certificates/os-dashboards/os-dashboards.key"

# Encrypt traffic between OpenSearch-Dashboards and Opensearch
opensearch.ssl.certificateAuthorities: ["/usr/share/opensearch-dashboards/config/certificates/ca/ca.pem"]
opensearch.ssl.verificationMode: full
Save and exit the file when finished.
Lastly, run the below apt command to install the tree package and verify your OpenSearch deployment's list of files and directories.
sudo apt install tree
tree .
You should receive an output like this.
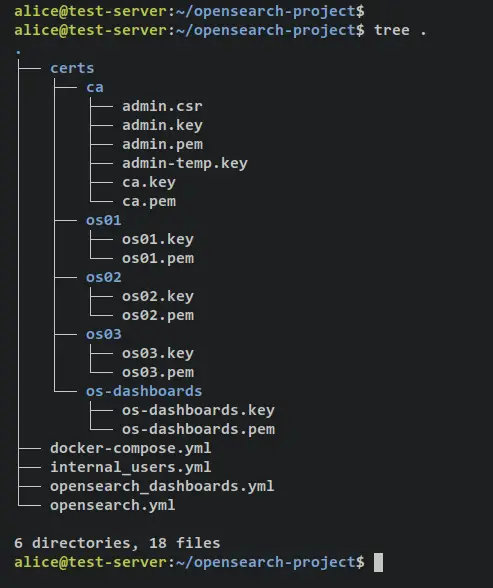
With this, all preparation for deploying OpenSearch via Docker is finished. You're ready to deploy OpenSearch via Docker and Docker Compose.
Deploying OpenSearch Cluster and OpenSearch Dashboards
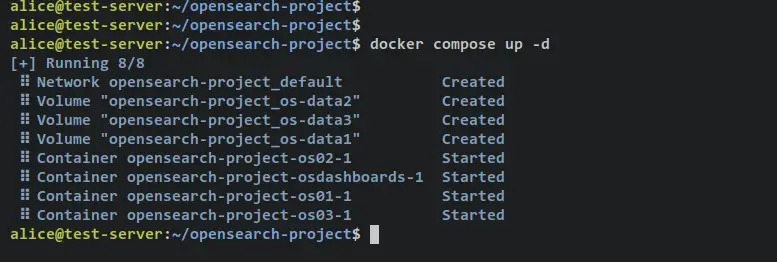
Before you start, ensure that you're on the OpenSearch project directory 'opensearch-project'. Then, run the following 'docker compose' command to create and start the OpenSearch deployment.
docker compose up -d
You should receive an output like this - There are 3 OpenSearch containers os01, os02, and os03 created and started. Also, the OpenSearch Dashboards container 'osdashboards' is created and started.
Verify the list of running services/containers on your OpenSearch project via the following command.
docker compose ps
If you see the 'STATUS' is 'Up', then the container/service is running. On the 'PORTS' section you should see exposed ports by container to the host machine.

With the OpenSearch cluster running, you must now apply the new user configuration that you've created via the 'internal_users.yml' file. To achieve this, you can run the following 'docker' command. Also, be sure to wait around 30-60 seconds before running this command to ensure that the OpenSearch cluster is running.
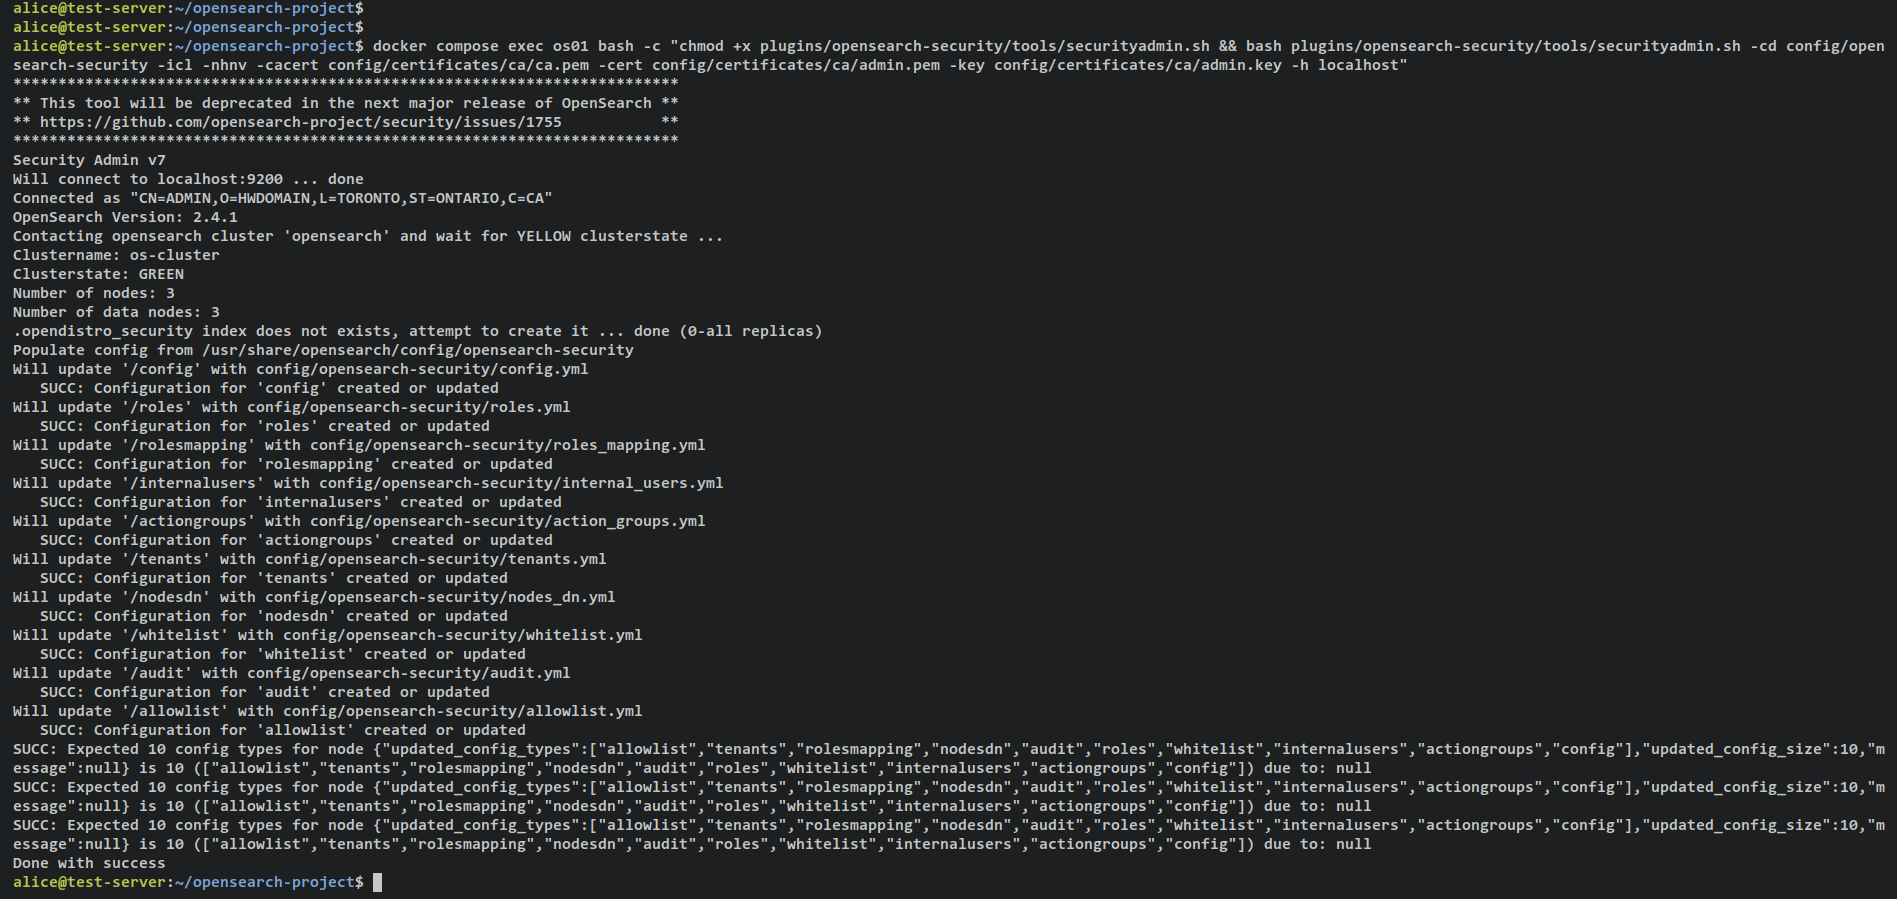
The following command will run the bash script 'securityadmin.sh' on the 'os01' container/service and apply new users on your OpenSearch cluster.
docker compose exec os01 bash -c "chmod +x plugins/opensearch-security/tools/securityadmin.sh && bash plugins/opensearch-security/tools/securityadmin.sh -cd config/opensearch-security -icl -nhnv -cacert config/certificates/ca/ca.pem -cert config/certificates/ca/admin.pem -key config/certificates/ca/admin.key -h localhost"
Output:
Next, run the following command to ensure that the container is running. Then, you can verify the list of open ports on the Docker host via the ss command below.
docker compose ps
ss -tulpn
Output - ports 9200 and 9600 are used by the OpenSearch cluster and port 5601 is used by OpenSearch Dashboards.

Lastly, you can verify to authenticate to the OpenSearch cluster via the usernmame and password that you've created on the 'internal_users.yml' file.
Make an authentication as an admin user to the OpenSearch cluster.
curl https://192.168.5.100:9200 -u admin:password -k
Output - Authentication is successful and you should see details of the OpenSearch software that you're currently using on your cluster.

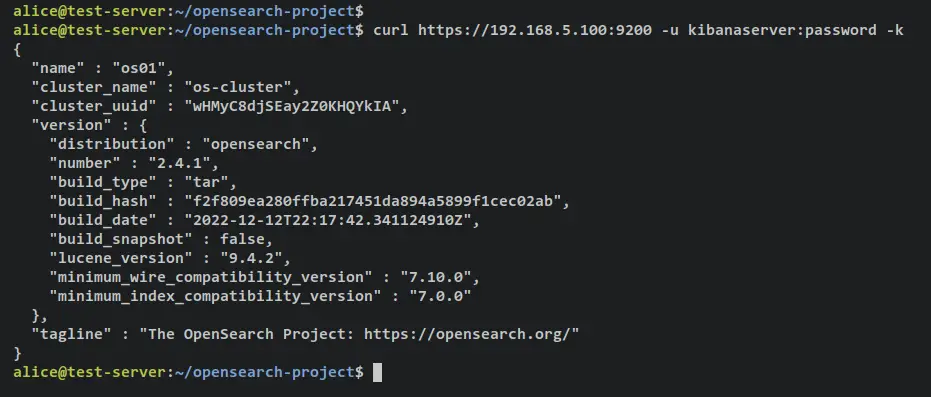
Make an authentication as a kibanaserver user to the OpenSearch cluster.
curl https://192.168.5.100:9200 -u kibanaserver:password -k
Output - Authentication is successful and you should see details of the OpenSearch software that you're currently using on your cluster.
With this, you've now deployed the OpenSearch cluster and OpenSearch Dashboards via Docker and Docker Compose. In the next step, you'll access your OpenSearch Dashboards deployment and verify the connection between OpenSearch Dashboards and OpenSearch cluster.
Additionally, when you have an error on your OpenSearch deployment, you can check the logs for each container via the 'docker compose' command below.
Basic usage 'docker compose' for checking logs.
docker compose logs
docker compose logs SERVICE
Checking logs for specific containers/service via the 'docker compose' command.
docker compose logs osdashboards
docker compose logs os01
docker compose logs os02
docker compose logs os03
Accessing OpenSearch Dashboards
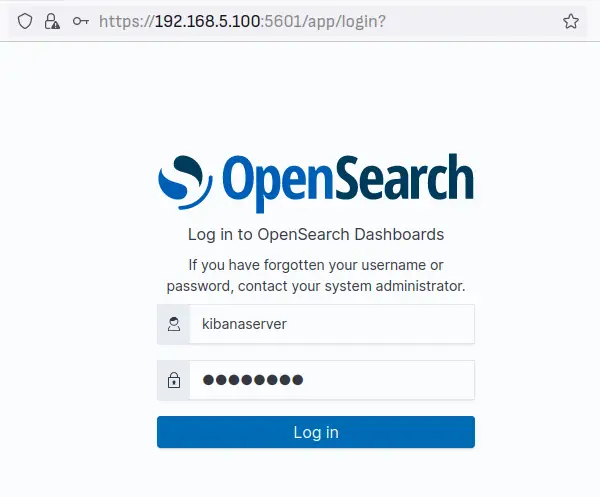
Open your web browser and visit your server IP address followed by the OpenSearch Dashboards port '5601' (i.e: https://192.168.5.100:5601/). You should get the OpenSearch Dashboards login page.
Input the user 'kibanaserver' and the password, then click 'Log in'.
When successful, you should get the following page. Click 'Explore on my own' and you should see the OpenSearch Dashboard home page.
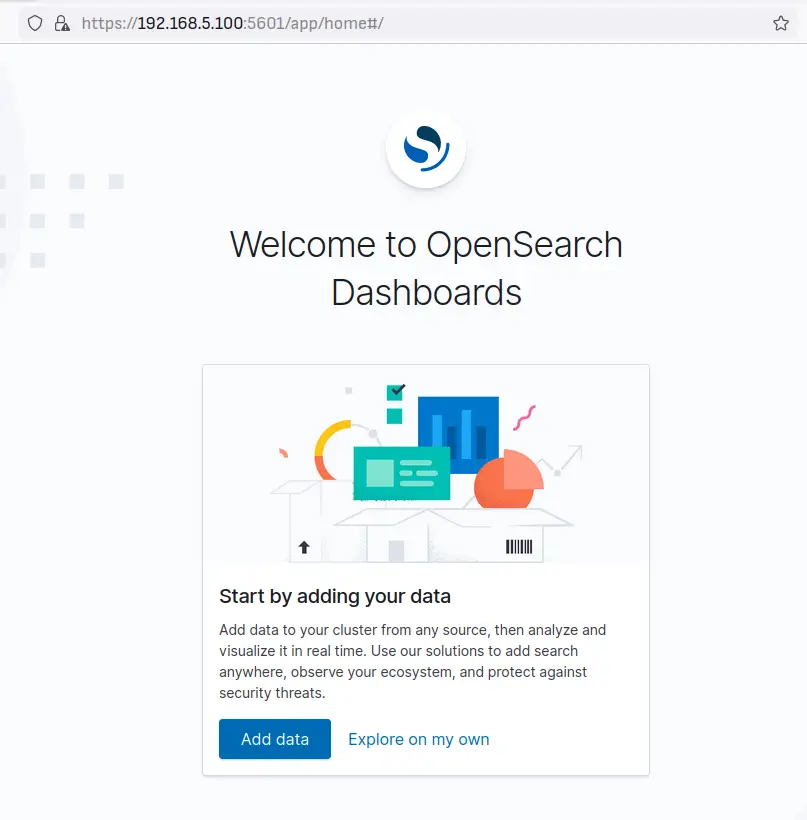
With this, you have the OpenSearch Dashboards is running and the authentication is enabled. Also, the OpenSearch Dashboards are running under secure HTTPS connections via SSL/TLS certificates that you've generated.
Next, verify the connection between OpenSearch Dashboards and OpenSearch cluster via OpenSearch API.
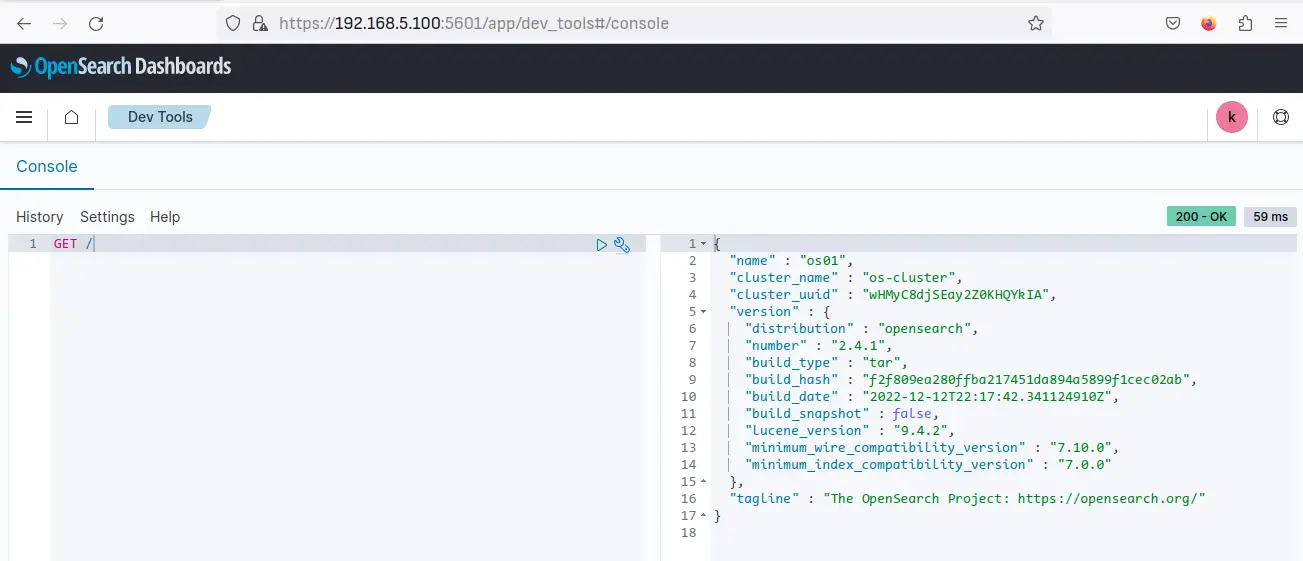
Click on the left menu move to the Management section and click 'Dev Tools'.

Now input the query 'GET /' on the console and click the play button. When successful, you should see the output on the right side with detailed information about your OpenSearch server. Also, you can see on the top right the HTTP code '200 - OK' which confirms that the query is executed without error.
Input another query 'GET _cat/nodes?format=json&filter_path=ip,name' to verify the OpenSearch nodes that are available on the OpenSearch cluster. You should see three different nodes on the OpenSearch cluster, os01 with IP address 172.23.0.5, os02 with IP address '172.23.0.3', and os3 with IP address '172.23.0.2'.
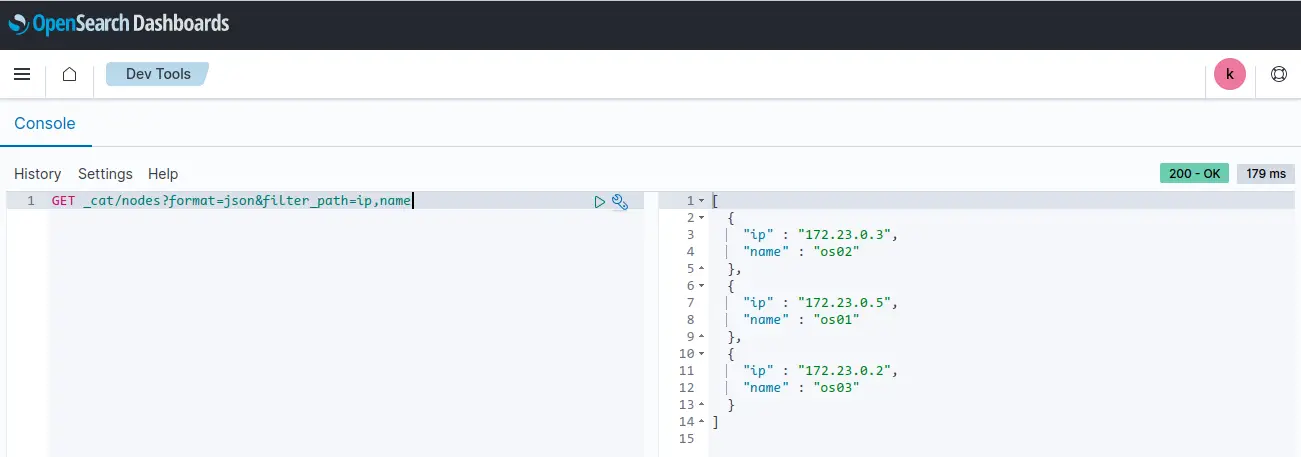
This confirms that the OpenSearch Dashboards are connected to the OpenSearch cluster.
Conclusion
In this tutorial, you've installed OpenSearch via Docker and Docker Compose on Ubuntu 22.04 server. You've created OpenSearch Cluster with 3 different containers on Docker. You've also secured OpenSearch with TLS certificates, enabled authentication and authorization, and configured users in OpenSearch. In addition to that, you've also configured and optimized a Ubuntu Linux server for deploying OpenSearch.
You've also installed the OpenSearch Dashboards via Docker and Docker Compose. Then, you've also connected the OpenSearch Dashboards container to OpenSearch Cluster.
With this setup, you can now explore more about OpenSearch, add some integration to your OpenSearch, set up additional authentication, and many more. You learn more all of those about OpenSearch from OpenSearch's official documentation.

