How to Install Adminer Database Administration Tool on Debian 12
Adminer (formerly phpMinAdmin) is a fully-featured database administration tool written in PHP that supports both RDBMS (Relational Database Management System) such as MySQL/MariaDB, PostgreSQL, SQLite, MS SQL, and Oracle and the NoSQL such as MongoDB and others (via plugin).
Adminer is an alternative to phpMyAdmin. it's a lightweight, user-friendly, and high-performance database management tool that can be used easily to manage your databases.
In this guide, we will show you how to install the Adminer database administration tool on the Debian 12 server. You also will secure Adminer via the Apache basic_auth module.
Prerequisites
Before you start, make sure you have the following:
- A Debian 12 server.
- A non-root user with administrator privileges.
- A MySQL/MariaDB database was installed.
Installing Adminer on Debian
Adminer is an alternative to phpMyAdmin but also supports the PostgreSQL database. It is also written in PHP and can run almost any OS with Apache or Nginx web server.
On Debian, the adminer package is available by default, and you can easily install it via the repository. We recommend you install adminer on the fresh server because because it will automatically install PHP packages and the Apache web server.
Before installing adminer, update your Debian package index with the following command.
sudo apt update

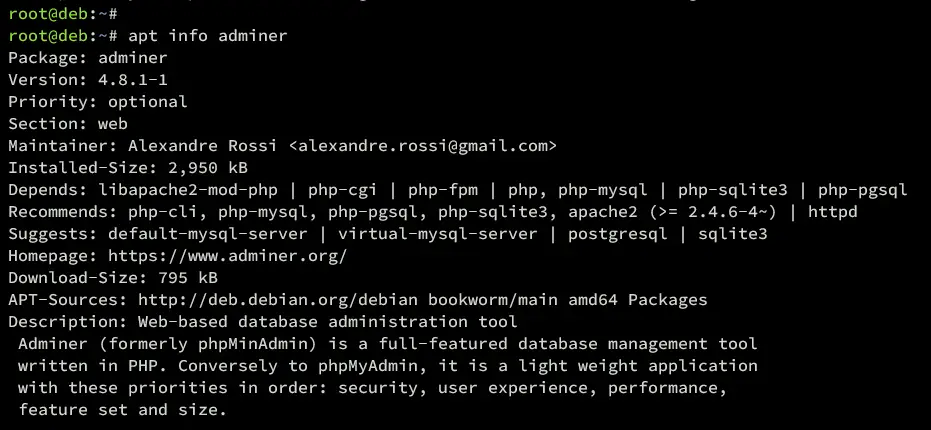
Find the adminer package on the default Debian repository with the command below.
sudo apt info adminer
You can see below the adminer package is available on the `web` section of the Debian repository and requires at least PHP 8.2 and an Apache web server.
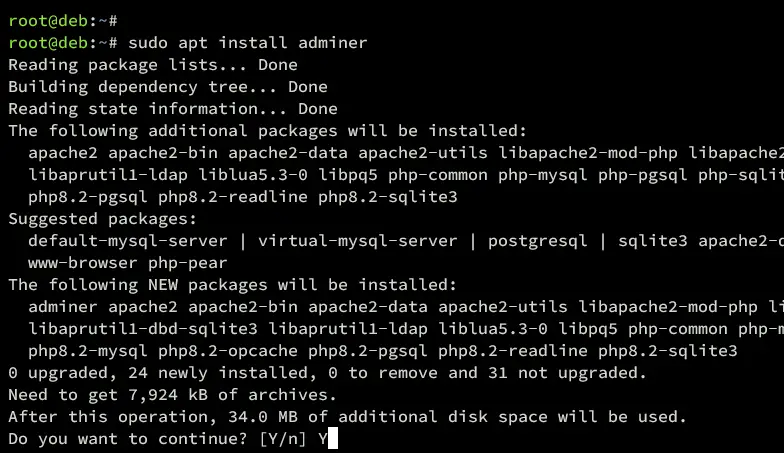
Now install the adminer with the following command. This also installs required packages such as PHP and Apache automatically. Type y to confirm with the installation.
sudo apt install adminer
After the installation is complete, verify the Apache service with the command below. Make sure the Apache service is running.
sudo systemctl status apache2

Securing Adminer Installation
Now that you have installed adminer, the next step is to configure your adminer installation. In this example, you will change the default URL path for Adminer and add additional authentication via basic_auth. This way, you will have two layers of authentication.
Also, you must know that adminer generates new Apache configuration files at /etc/apache2/conf-available/adminer.conf. You will modify this file to configure the adminer installation.
Before editing the configuration, run the command below to generate the password file /etc/adminer/.htpasswd . Also, make sure to change the username dbmanager with your user.
The /etc/adminer/.htpasswd will be used as additional authentication via the Apache basic_auth module for Adminer.
sudo htpasswd -B -c /etc/adminer/.htpasswd dbmanager
Type your password when prompted and repeat.

Now open the generated Apache configuration for adminer /etc/apache2/conf-available/adminer.conf using nano editor.
sudo nano /etc/apache2/conf-available/adminer.conf
At the top line, change the default url for '/adminer' to the new URL path. In this example, the adminer will be accessible via URL path '/dbmanager'.
Alias /dbmanager /etc/adminer

<Directory /etc/adminer>
Require all granted
DirectoryIndex conf.php
</Directory>
Insert the configuration below to enable Apache basic_auth for the '/dbmanager' path. With this, every time you access the '/dbmanager' path, you will be prompted with additional authentication Apache basic_auth.
<Location /dbmanager>
 AuthType Basic
 AuthName "Restricted Resource"
 AuthBasicProvider file
 AuthUserFile /etc/adminer/.htpasswd
 Require valid-user
</Location>
Save and close the file when you're done.
Next, run the command below to activate the additional configuration 'adminer.conf' on Apache and verify overall your Apache syntax.
sudo a2enconf adminer.conf
sudo apachectl configtest
Make sure you have proper syntax and get an output such as Syntax OK.
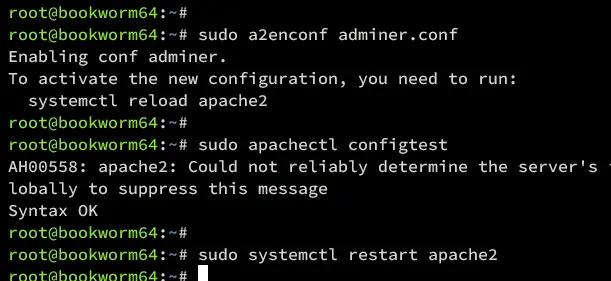
Lastly, run the command below to restart the Apache service and apply the new configuration for Adminer. After executing the command, your Adminer installation should be ready.
sudo systemctl restart apache2
Setting MySQL/MariaDB Server
At this point, your Adminer is ready, but you still need to prepare your MySQL server by creating a new user that is specified for Adminer login. It's not recommended to use the root user directly.
Note: If you're connecting through a remote host, make sure you're via SSH tunneling to encrypt your connection. If you're using a single server (MySQL + Adminer on the same server), you're ready to go.
Log in to the MySQL/MariaDB server with the command below. Input your MySQL root password when prompted.
sudo mysql -u root -p
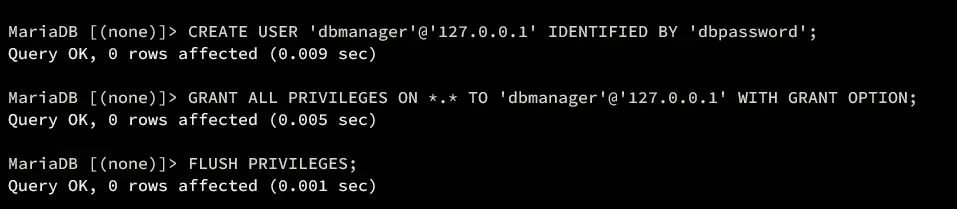
Run the following queries to create a new user dbmanager for your MySQL server. In this example, this user will be used to log in to the MySQL server via Adminer. So make sure to change the following password with a new password.
CREATE USER 'dbmanager'@'127.0.0.1' IDENTIFIED BY 'dbpassword';
GRANT ALL PRIVILEGES ON *.* TO 'dbmanager'@'127.0.0.1' WITH GRANT OPTION;
FLUSH PRIVILEGES;
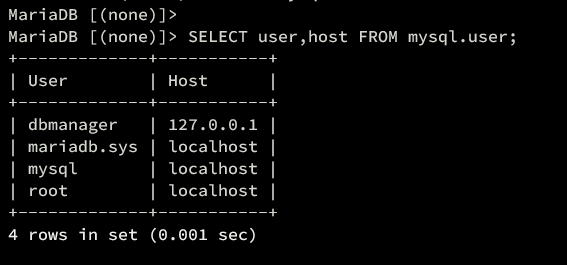
Now, run the following query to verify the list user in your MySQL server. You should see the user dbmanager with the default host 127.0.0.1.
SELECT user,host FROM mysql.user;
Lastly, type quit to exit from the MySQL server.
Logging into MySQL Server via Adminer
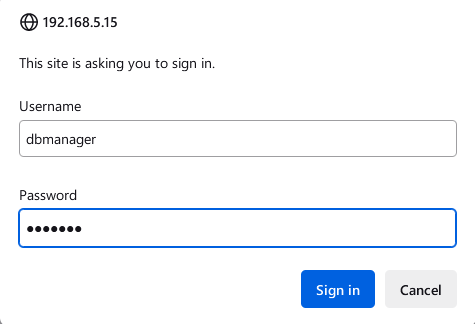
Open your web browser and visit the Adminer installation URL http://192.168.5.15/dbmanager. If your installation is successful, you should be prompted with the basic_auth authentication. Input your username and password that you have created and click Sign In.
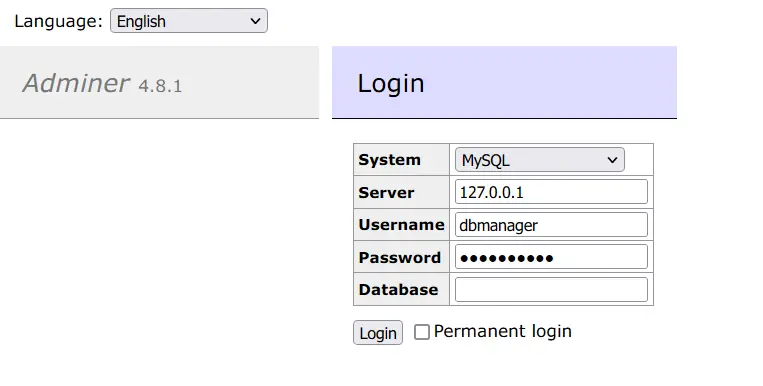
Once successful, you should get the Adminer login page. Now select the database system as MySQL, then input details of the host and port, username, and password of your MySQL server. Click Login to confirm.
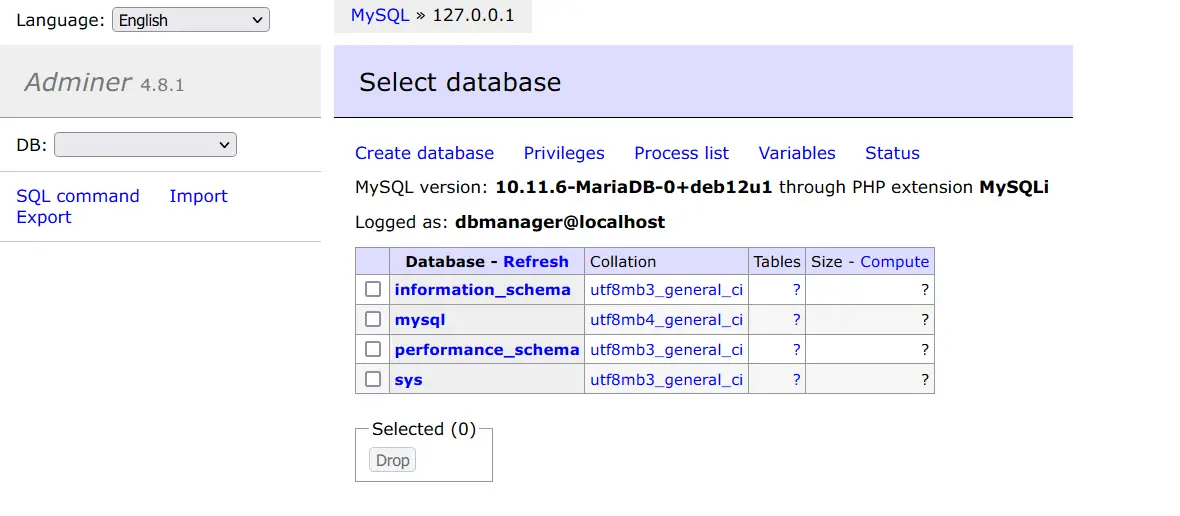
If you have proper database credentials, you should be connected to MySQL via Adminer.
Creating a New Database and User via Adminer
In this section, you will learn how to create a new database and user on MySQL/MariaDB via Adminer. Then, you will also log in to the new database via new user.
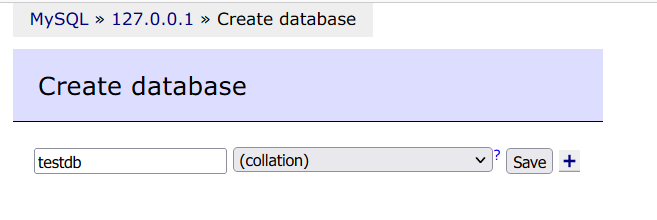
On the Adminer dashboard, click the Create Database link. You will be presented with the following page.
Input your new database name and click Save. In this example, you will create a new database testdb.
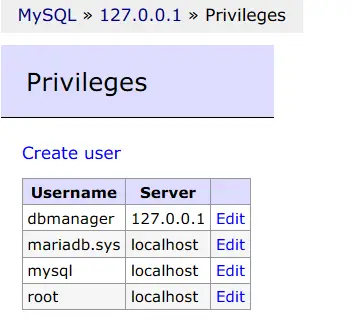
Next, to create a new MySQL/MariaDB user, click on the Privileges on the dashboard, then click Create user.
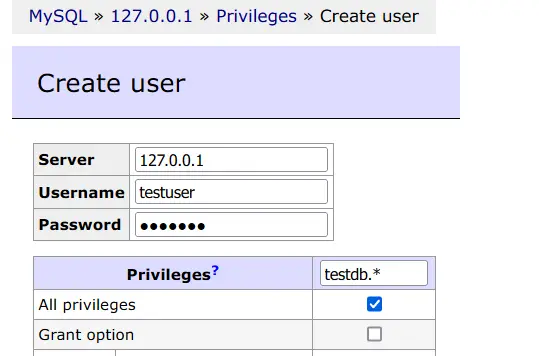
Input the database username and password, then input your database name within the privileges section. Scroll down and click Save.
In the following example, you will create a new user testuser and give the user privileges to the database testdb.
Lastly, login to the Adminer with the user testuser to the database testdb.
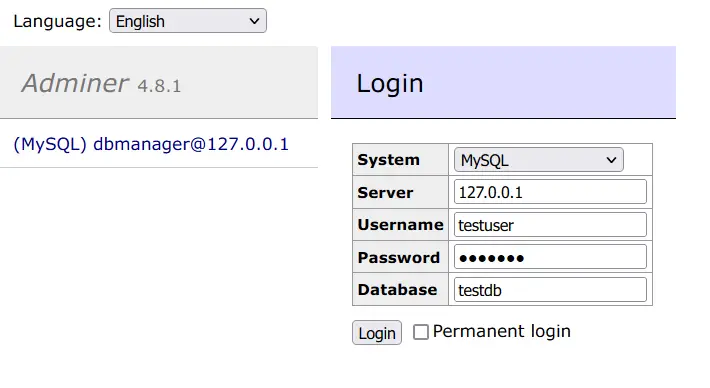
If successful, you should be logged to the testdb via Adminer.
Pict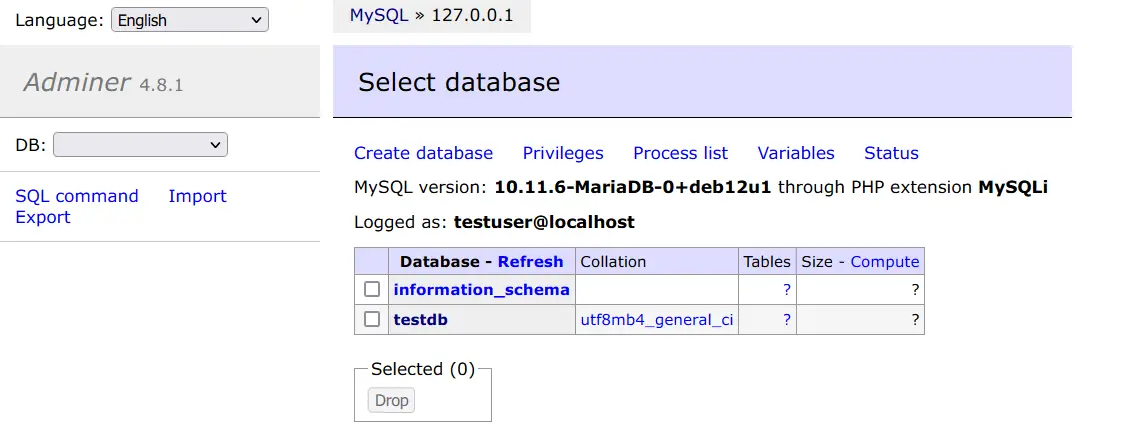 ure
ure
Conclusion
Congratulations! You have now successfully installed Adminer as the database management tool for MySQL/MariaDB and PostgreSQL on Debian 12 server. You also have secured Adminer by changing the default URL path and enabling an additional authentication layer via the Apache basic_auth module. Through the end, you have logged in to the MySQL server via the Adminer tool.

