Running A File-, Print-, Proxy-, DHCP-, AND Time-Server For Small/Medium Enterprises
Version 1.0
Author: Falko Timme
This article shows how to run a file-, print-, HTTP proxy- DHCP-, and time server for small and medium enterprises (SME) on one single Debian Sarge system. It is very easy to set up, and management is done with an easy-to-use web interface called eBox so once the system is set up, you can forget about the command line. eBox was developed to administrate advanced services for corporate networks, and it was created for Debian Sarge.
I want to say first that this is not the only way of setting up such a system. There are many ways of achieving this goal but this is the way I take. I do not issue any guarantee that this will work for you!
1 Preliminary Note
I assume you have already set up a basic Debian Sarge system. You can set up your system as described on the first two pages of this tutorial: The Perfect Setup - Debian Sarge (3.1).
I use 192.168.0.100 as the IP address and server1.example.com as the hostname of my Debian Sarge system in this tutorial. If your Debian Sarge system does not have a static IP address you should now change its network configuration so that it will have a static IP address in the future:
vi /etc/network/interfaces
# /etc/network/interfaces -- configuration file for ifup(8), ifdown(8)
# The loopback interface
auto lo
iface lo inet loopback
# The first network card - this entry was created during the Debian installation
# (network, broadcast and gateway are optional)
auto eth0
iface eth0 inet static
        address 192.168.0.100
        netmask 255.255.255.0
        network 192.168.0.0
        broadcast 192.168.0.255
        gateway 192.168.0.1
|
(If you use a different gateway than 192.168.0.1, change the gateway IP address in /etc/network/interfaces.)
Then restart your network:
/etc/init.d/networking restart
Edit /etc/resolv.conf and add some nameservers:
vi /etc/resolv.conf
search server nameserver 145.253.2.75 nameserver 193.174.32.18 nameserver 194.25.0.60 |
Edit /etc/hosts and add your new IP address:
vi /etc/hosts
127.0.0.1 localhost.localdomain localhost 192.168.0.100 server1.example.com server1 # The following lines are desirable for IPv6 capable hosts ::1 ip6-localhost ip6-loopback fe00::0 ip6-localnet ff00::0 ip6-mcastprefix ff02::1 ip6-allnodes ff02::2 ip6-allrouters ff02::3 ip6-allhosts |
2 Install eBox
There are Debian packages available for eBox. To install them, we must edit our /etc/apt/sources.list first:
vi /etc/apt/sources.list
Add the following lines to your existing sources.list:
deb http://ebox-platform.com/debian/stable/ ebox/ deb http://ebox-platform.com/debian/stable/ extra/ |
Then update your package database:
apt-get update
Afterwards we can install eBox with all needed modules with one single command:
apt-get install ebox libebox ebox-network ebox-objects ebox-firewall ebox-logs ebox-samba ebox-dns-cache ebox-dhcp ebox-squid ebox-usersandgroups ebox-software ebox-ntp ebox-printers
You will be asked a few questions. Most of the time you can simply accept the default values:
Where should the PostgreSQL database be created? <-- /var/lib/postgres/data
Should the data be purged as well as the package files? <-- No
What locale should be used by the database backend? <-- en_US
Choose European or US day/month order in dates. <-- European / US [depends on where you come from]
DNS domain name: <-- example.com
Name of your organization: <-- example.com
Admin password: <-- somepassword
Confirm password: <-- somepassword
Allow LDAPv2 protocol? <-- No
Apache-Perl needs to be reconfigured. <-- Ok
Enable suExec? <-- No
Which paper size should be the system default? <-- a4
On what network interfaces should the DHCP server listen? <-- [Leave it blank.]
Please configure the DHCP server as soon as the installation finishes. <-- Ok
The version 3 DHCP server is now non-authoritative by default <-- Ok
Workgroup/Domain Name? <-- WORKGROUP
Use password encryption? <-- Yes
Modify smb.conf to use WINS settings from DHCP? <-- No
How do you want to run Samba? <-- daemons
Create samba password database, /var/lib/samba/passdb.tdb? <-- No
LDAP server host address <-- 127.0.0.1
distinguished name of the search base <-- dc=example,dc=com
LDAP version to use <-- 3
database requires login <-- No
make configuration readable/writeable by owner only <-- No
nsswitch.conf is not managed automatically <-- Ok
Send daily reminders to users over quota <-- No
Now the packages are getting installed. When you see this:
Configuration file `/etc/dhcp3/dhclient.conf'
==> File on system created by you or by a script.
==> File also in package provided by package maintainer.
   What would you like to do about it ?  Your options are:
    Y or I  : install the package maintainer's version
    N or O  : keep your currently-installed version
      D     : show the differences between the versions
      Z     : background this process to examine the situation
The default action is to keep your current version.
*** dhclient.conf (Y/I/N/O/D/Z) [default=N] ?
answer with N.
Please note: If you're installing this using SSH, you will lose your SSH connection at this point:
Setting up ebox-firewall (0.7.1) ...
EBox: restarting firewall:
This is nothing to worry, it happens because the eBox firewall closes port 22 by default. Despite this, the installation is successful, and you can open up port 22 again using the eBox web interface.
3 Logging In To eBox
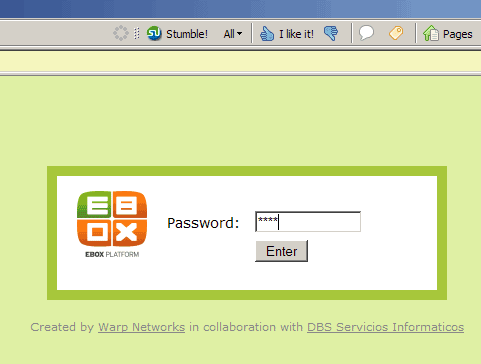
Now that eBox is installed, open your browser and go to https://192.168.0.100. The login screen appears. Enter the default password ebox and log in:
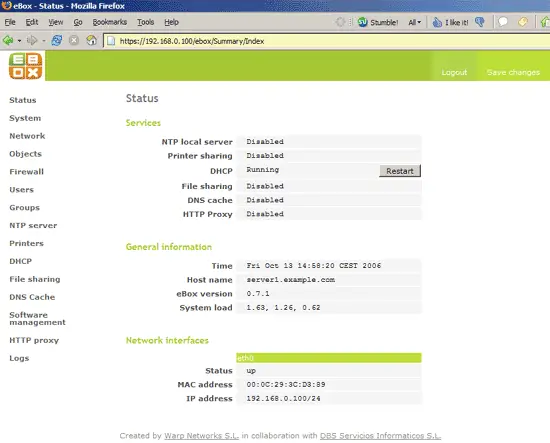
After the login, you'll see the eBox status page: