Modify Your Partitions With GParted Without Losing Data
Version 1.0
Author: Falko Timme
This article shows how you can modify the partitioning of your Linux system with GParted (Gnome Partition Editor) without losing data. This includes resizing partitions (enlarging and shrinking), moving partitions on the hard drive, creating and deleting partitions, and even modifying filesystem types. GParted is a free partition editor available as a desktop program and also as a Live-CD. It supports the following filesystems: ext2, ext3, fat16, fat32, hfs, hfs+, jfs, linux-swap, reiserfs, reiser4, ufs, xfs, and even ntfs (Windows).
A full list of supported operations is available here: http://gparted.sourceforge.net/features.php
I do not issue any guarantee that this will work for you!
1 Preliminary Note
As partitions must be unmounted in order to be modified, I think it's a good idea to use the GParted Live-CD instead of using the desktop application. Therefore I have downloaded the latest GParted Live-CD (0.3.3 at the time of this writing) from here: http://sourceforge.net/project/showfiles.php?group_id=115843&package_id=173828 and burnt it onto a CD.
Obviously this method doesn't work for remote systems to which you don't have physical access, but for such a case this tutorial might be interesting for you: How To Resize ext3 Partitions Without Losing Data
It is very important that you back up all your data before you modify your partitions with GParted. If all goes well, no data should be lost, but you can never know!
In the following I will perform some operations just to show you how GParted works and what it can do. I don't say that all these operations make sense on a production system, but for demonstration purposes they are ok.
2 Working With GParted
Shut down your Linux system and make it boot from the GParted Live-CD. Hit ENTER at the boot prompt and choose your language and keymap later on in the boot process. It will also ask you for your preferred screen resolution. Afterwards the GParted desktop should come up:
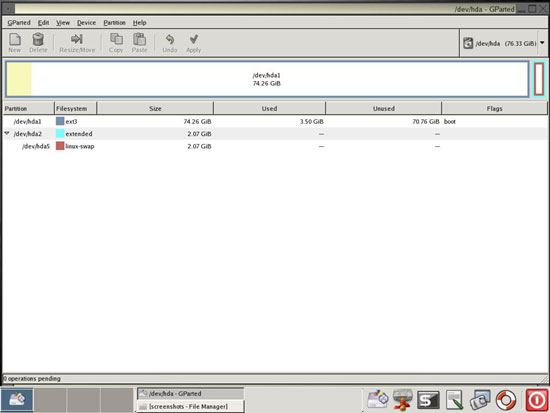
The GParted application will start automatically and show you the current partitions (including their filesystem types) on the hard disk(s):
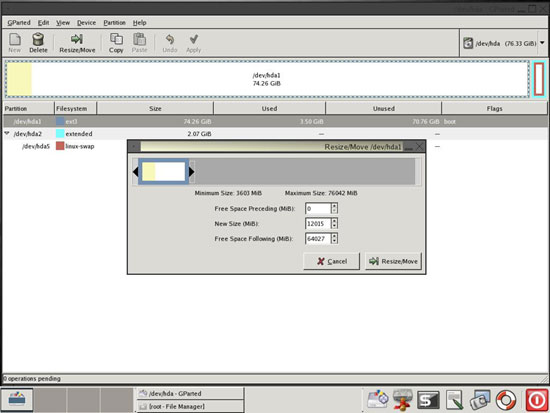
In the next step I want to shrink /dev/hda1, so I mark it and click on Resize/Move. The following window pops up:
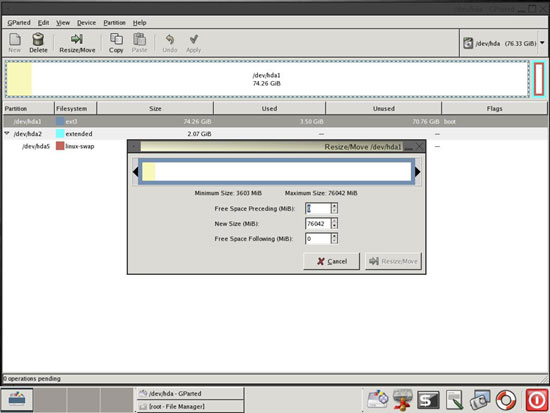
Click on the right black arrow and drag it until the partition has its new (desired) size, then click on the Resize/Move button:
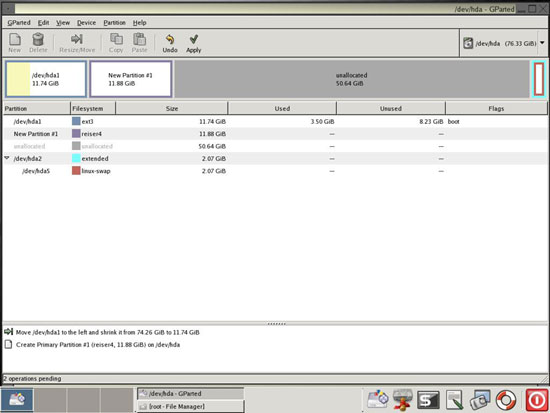
As you see, /dev/hda1 has been shrinked, and the new, free space is unallocated:
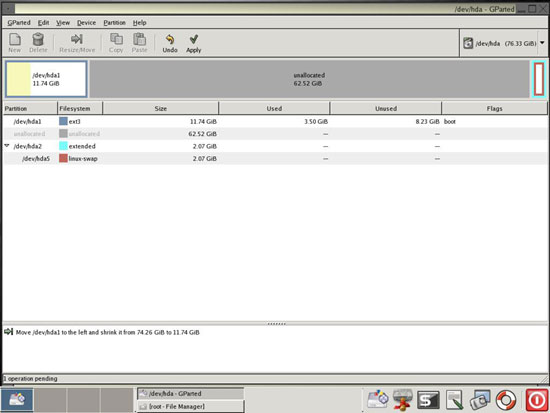
To create a new partition on the unallocated space, mark it and click on New:
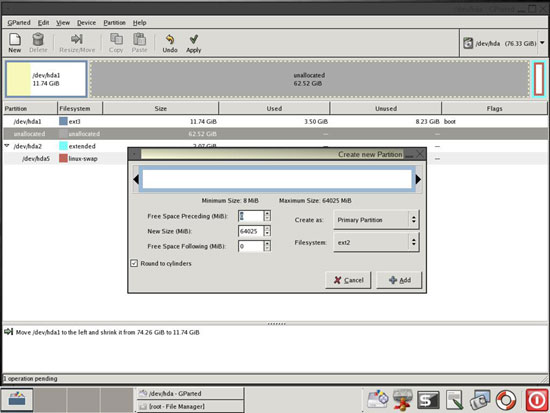
Specify the size of the new partition (either by dragging the black arrows or by typing it into the input boxes) and select the filesystem. I choose ntfs here. Then click on Add:
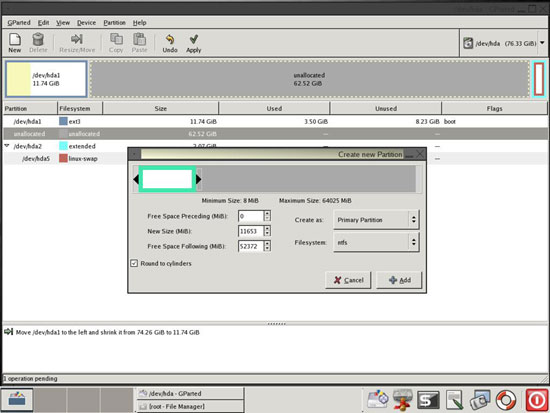
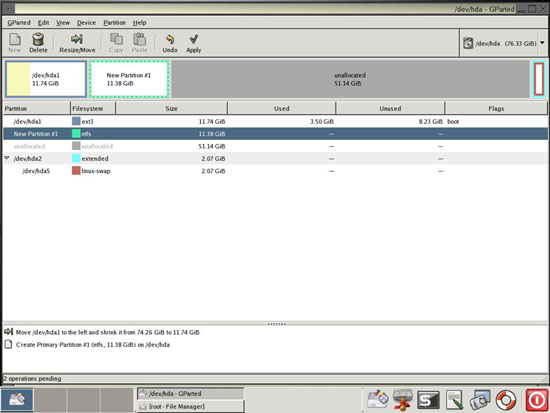
The result is as follows:
Now I decided that ntfs is not the right filesystem for my new partition and that I'd like to use reiser4 instead. So I right-click the new partition and select reiser4 as filesystem. The result looks like this: