How to secure an SSL VPN with one-time passcodes and mutual authentication
SSL-based VPNs were designed to eliminate the need for complex configurations on the user's PC. Unfortunately, that was before the dangers of public WiFi networks and tougher regulatory requirements came into being. Thanks to WiFi, many attacks that were difficult are now quite simple. In particular, a man-in-the-middle attack can intercept SSL-encrypted traffic, rendering SSL-based VPNs useless - even if it's protected by a typical one-time password system. The man-in-the-middle can easily feed the one-time password into the SSL-based VPN within the alloted time.
In order to thwart this attack, mutual authentication is required. Mutual authentication means that the user is validated to the site and the site is validated to the user. In this document, we will show how to configure the WiKID Strong Authentication System to provide strong, mutual authentication for SSL-Explorer. To make life easy, we will be using the VMware versions of both SSL-Explorer and WiKID. We'll show you what to expect when it works and what to expect when it doesn't.
While you might be tempted to use client certificates for SSL VPN authentication, there are a few reasons why WiKID might be better for you. First, you more than likely have non-SSL VPN remote services. Perhaps you have OpenVPN or SSH that require two-factor authentication. WiKID gives you one central remote user database. Moreover, becuase WiKID validates the PIN on the server, it is not susceptible to passive brute-force attacks and therefore is more secure than typical certificates. WiKID is much easier to manage and requires no CRL list management.
We assume that you already have the servers configured with networking, etc. and are ready to add two-factor authentication.
Configure the WiKID Server
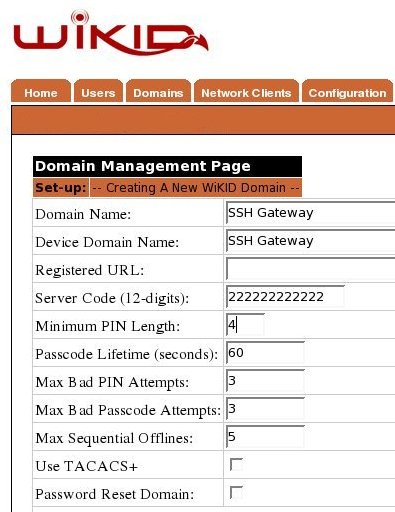
Add a domain to the WiKID server
This is fairly easy. From the WiKID server's web administration interface, click on the Domains tab and Create New Domain. Enter a domain name for the gateway and a device name. The device name will show up on the WiKID token. In the Registered URL box put the URL of the SSL VPN server. When the domain is created, the WiKID server will fetch the certificate from the VPN, so make sure that you enter 'https:'. The server code will be the routable, zero-padded IP Address of the WiKID server (e.g. 10.1.1.1 = 010001001001). Set the other parameters as you see fit. While a longer PIN may increase security mathematically, a four digit PIN may be better: if a user uses his ATM PIN, he is more likely to protect it.
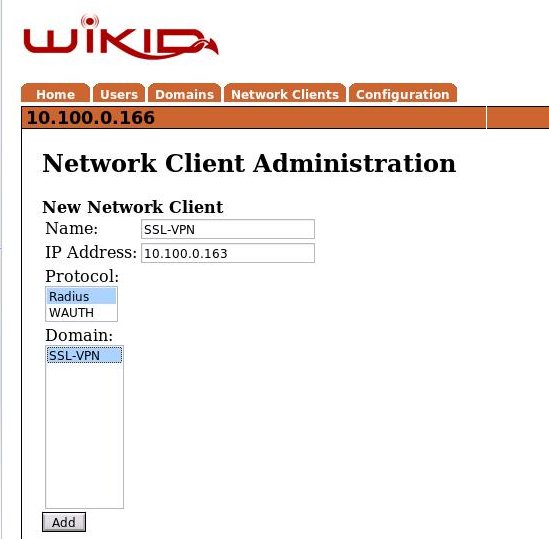
Create a network client
After saving the domain information, click on the Network Client tab and Create New Network Client. Enter a name for this client and the IP Address of the SSL VPN server on the internal network. Select Radius as the protocol and the domain you created above as the domain.
Add a user
If you have a large number of users, or you prefer to let users do their own work, you can configure some simple scripts to allow users to validate themselves on the WiKID server. There are ASP scripts, for example, that you can run on your LAN that will configure users based on their Active Directory credentials. Examples are also provided with the Java, Python, PHP and Ruby network client packages. In this example, we will be manually adding a user.
If you haven't already, you can download a copy of the the open source WiKID PC token client. The Blackberry, Palm, Windows Mobile and J2ME token clients do not yet support mutual authentication. The first time you launch the token client, you need to create a passphrase. Once started, select Actions and Create New Domain
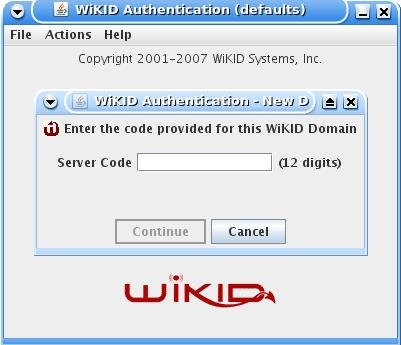
Enter the 12 digit domain identifier and the public key will be sent to the WiKID server. You will be prompted for a PIN.
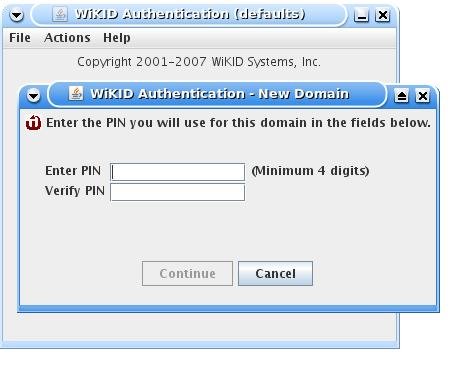
The WiKID server will store the PIN and return a registration code.

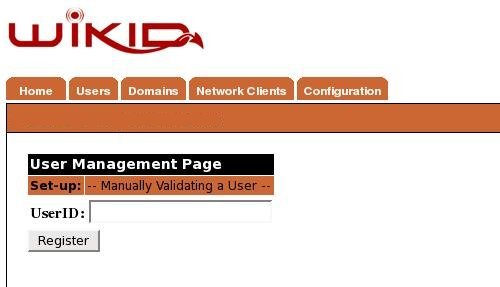
At this point, the account has been created on the WiKID server, but it is not active. We will manually validate the user on the WiKID server. From the WiKIDAdmin web interface, click on Users and Manually Validate A User. Click on the Registration Code and enter a user name.
Now, from the token client, select the domain you created and enter your PIN. You should get the one-time passcode back (it will be copied into your clipboard) and your browser should launch to the Registered URL.

