How To Set Up VMware Tools On Various Linux Distributions
Version 1.0
Author: Oliver Meyer <o [dot] meyer [at] projektfarm [dot] de>
This document explains how to set up the VMware Tools in the following guest operating systems: Ubuntu 7.04, Fedora 7, PCLinuxOS 2007 and Debian Etch. Installing VMware Tools in your guest operating systems will help maximize performance, provide mouse synchronization and copy & paste functionality. This article also shows a way of making VMware Tools start automatically when you start a guest operating system.
I used the VMware Tools v1.0.3-44356 provided by VMware Server v1.03.
This howto is meant as a practical guide; it does not cover the theoretical backgrounds. They are treated in a lot of other documents in the web.
This document comes without warranty of any kind! I want to say that this is not the only way of setting up such a system. There are many ways of achieving this goal but this is the way I take. I do not issue any guarantee that this will work for you!
1 Preparation
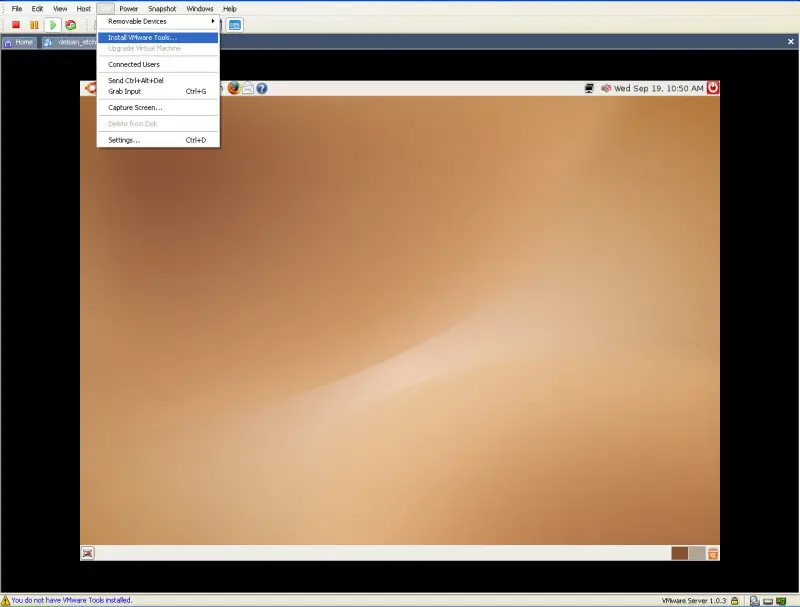
Set up a virtual machine of your choice. Click on VM in the top menu of the VMware Server console and select Install VMware Tools.

2 Ubuntu 7.04
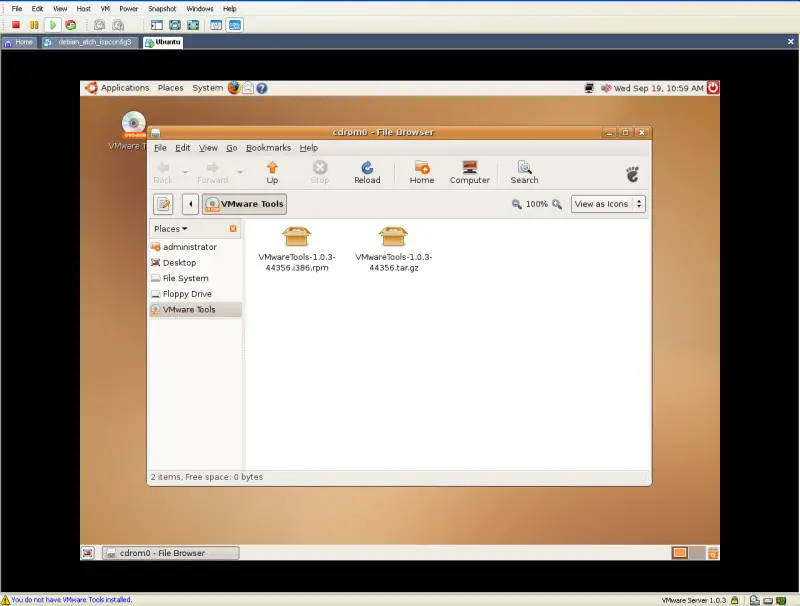
First copy the VMware Tools from the mounted iso to the temporary folder:
cp /media/cdrom/VMwareTools-1.0.3-44356.tar.gz /tmp/
Afterwards switch to the temporary folder and unpack the VMware Tools:
cd /tmp/
tar xvfz VMwareTools-1.0.3-44356.tar.gz
Next switch to the folder with the unpacked files and execute the installer:
cd vmware-tools-distrib/
sudo ./vmware-install.pl
Now you will be asked a few questions relating to installation paths etc. Choose the default value every time (simply hit enter).
After the installation/configuration finished you have to start the VMware Tools:
vmware-toolbox &
You can automatize the start of the VMware Tools - have a look at step 6 of this howto.
Note: If you close the VMware Tools window, the VMware Tools will be disabled immediately.
3 Fedora 7 (Kernel 2.6.22.5-76.fc7)
First become root and install some needed packages:
su -
%yourrootpassword%
yum install kernel-devel gcc gcc-c++
Next copy the VMware Tools from the mounted iso to the temporary folder:
cp /media/VMware\ Tools/VMwareTools-1.0.3-44356.tar.gz /tmp/
Afterwards switch to the temporary folder and unpack the VMware Tools:
cd /tmp/
tar xvfz VMwareTools-1.0.3-44356.tar.gz
Now we have to fix the vmxnet module:
cd vmware-tools-distrib/lib/modules/source
tar xf vmxnet.tar
cp vmxnet-only/vmxnet.c vmxnet-only/vmxnet.c.orig
wget http://www.thoughtpolice.co.uk/vmware/howto/patch2-vmxnet.c.patch
patch -u vmxnet-only/vmxnet.c < patch2-vmxnet.c.patch
tar cf vmxnet.tar vmxnet-only/
cd /tmp/vmware-tools-distrib
./vmware-install.pl
You will be asked a few questions relating to installation paths etc. Choose the default value every time (simply hit enter).
Next step is to fix the xorg.conf:
vi /etc/X11/xorg.conf
Add the following lines:
Section "Monitor"
   Identifier "vmware"
EndSection
After this you have to run the configuration again:
vmware-config-tools.pl
Choose the default value every time (simply hit enter) till you reach the question Do you want to change your guest X resolution? - choose yes and select your desired resolution.
The last step is to fix the integration of the vmxnet module by manually loading it (otherwise you might obtain problems with the network):
/etc/init.d/networking stop
rmmod pcnet32
rmmod vmxnet
depmod -a
modprobe vmxnet
/etc/init.d/networking start
Afterwards reboot the vm. After the vm has rebooted, you can start the VMware Tools via:
vmware-toolbox &
You can automatize the start of the VMware Tools - have a look at step 6 of this howto.
Note: If you close the VMware Tools window, the VMware Tools will be disabled immediately.
4 PCLinuxOS 2007
Become root, switch to the mounted iso and install the rpm package:
su -
%yourrootpassword%
cd /media/VMware\ Tools/
rpm -ivh VMwareTools-1.0.3-44356.i386.rpm
Afterwards run the configuration:
vmware-config-tools.pl
You will be asked a few questions relating to installation paths etc. Choose the default value every time (simply hit enter).
Afterwards reboot the vm. After the vm has rebooted, you can start the VMware Tools via:
vmware-toolbox &
You can automatize the start of the VMware Tools - have a look at step 6 of this howto.
Note: If you close the VMware Tools window, the VMware Tools will be disabled immediately.
5 Debian Etch
First install some needed pakages:
apt-get install autoconf automake binutils cpp gcc linux-headers-$(uname -r) make psmisc
Next copy the VMware Tools from the mounted iso to the temporary folder:
cp /media/cdrom/VMwareTools-1.0.3-44356.tar.gz /tmp/
Afterwards switch to the temporary folder and unpack the VMware Tools:
cd /tmp/
tar xvfz VMwareTools-1.0.3-44356.tar.gz
Next switch to the folder with the unpacked files and execute the installer:
cd vmware-tools-distrib/
./vmware-install.pl
Now you will be asked a few questions relating to installation paths etc. Choose the default value every time (simply hit enter).
Afterwards reboot the vm. After the vm has rebooted, you can start the VMware Tools via:
vmware-toolbox &
You can automatize the start of the VMware Tools - have a look at step 6 of this howto.
Note: If you close the VMware Tools window, the VMware Tools will be disabled immediately.

