Fig 1.: Saving new document as template.
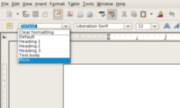
Fig 2.: Style and Formatting drop-down menu.
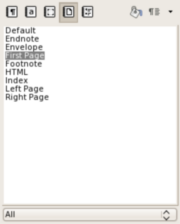
Fig 3.: The Formatting floating tool.
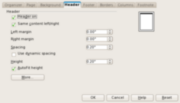
Fig 4.: Configuring the First Page style.
Fig 5.: Document with blank header.
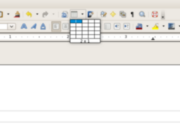
Fig 6.: Adding columns.
Fig 7.: Header with columns.

Fig 8.: The graphic's properties box.

Fig 9.: Header with company logo in left column.
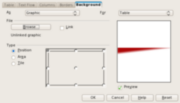
Fig 10.: Table's background properties.

Fig 11.: Table's border properties.

Fig 12.: User data.

Fig 13.: Inserting the user data fields in the template.
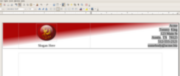
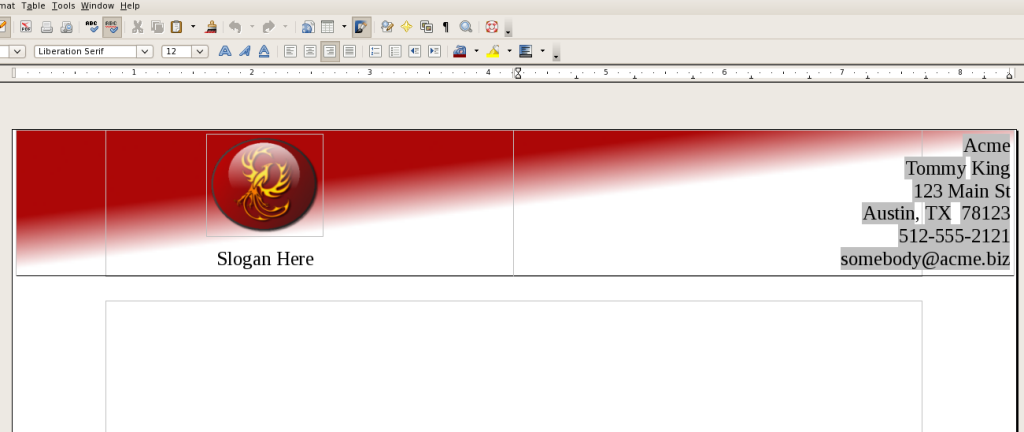
Fig 14.: The final letterhead.
|
Disclaimer: Our letterhead was designed using Open Office 2.3 in Fedora 8.
Here are the basic steps:
- Make a new template document (.ott).
- Change to the First Page style and modify it to include a header.
- Inside the header, create a table with two columns (more, less, or none according to your preferences).
- Enter a graphic and slogan in the left column, and the name/address/phone/etc in the right column.
- Add a background to the table.
- Set a bottom border to the table to set it off.
Make a new template document
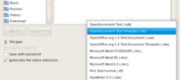
When you first start Open Office Writer, it usually presents you with a new document ready to use. Of course, create a new document if you need to. Let's immediately set this up as a template and not a regular document by clicking File > Save As, choose the name for your template, the location, and "OpenDocument Text Template (.ott)" as the file type (see fig. 1). Save this now and be sure to save often during your designing.
First Page style changes
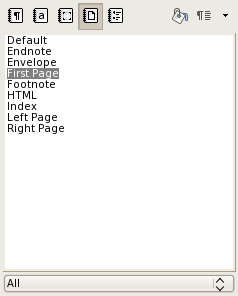
Here is where we begin laying the foundation for the letterhead. Click on the Style and Formatting drop-down menu in the top-left corner (see fig. 2) and select "More...". This will open a floating toolbox labeled "Styles and Formatting". Within this toolbox, click on the page icon (see fig. 3) and notice the different options. Right-click "First Page" and select "Modify", which will open the style dialog for this style type. We are going to use this style so that any following pages should not include this header, If you do find that following pages include the header, change the page style to "Default".
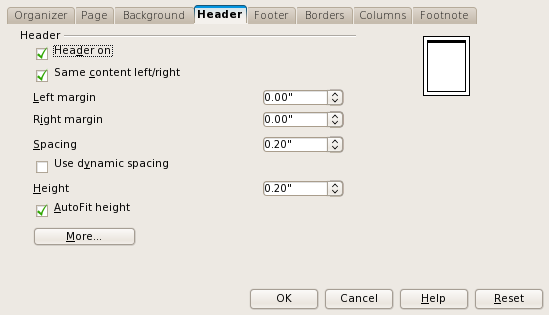
Select the "Header" tab and check "Header on" (see fig. 4). You may also see other options you may want to investigate; I make sure that the left and right margins are at zero, but keep in mind this doesn't push the headers to the left and right sides of the page. We'll take care of that in a minute in case you want your letterhead stretched across the top of the page. Experiment with these settings to get what you want and click OK (see fig. 5).
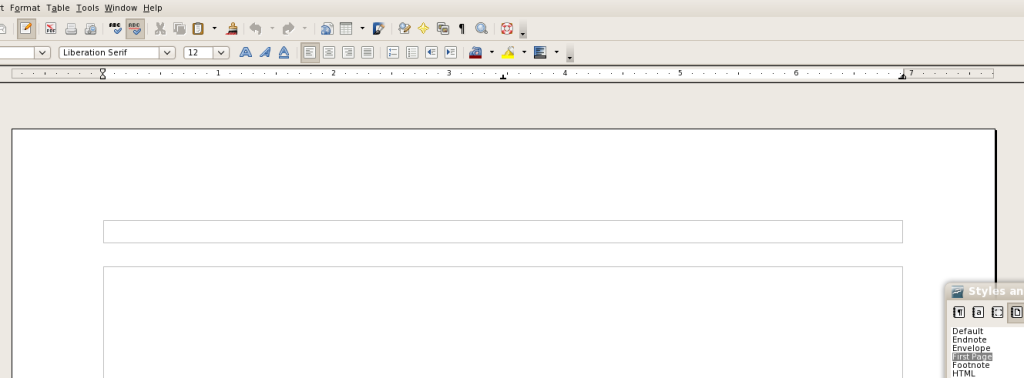
This would be an excellent time to save your template. Remember, save early and save often!
Insert table
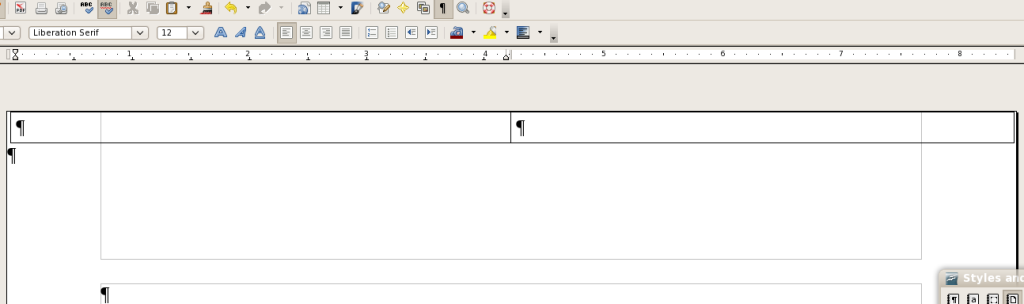
I like using tables since they help with keeping text alignments much easier, especially if I use several columns of text. In this case, let's insert a table with two columns and one row. First ensure your cursor is inside the header, then find the table icon in the toolbar and select the appropriate number of cells (see fig. 6). Now let's stretch the header table to fit across the width of the page and fit up to the top of the page. Use the horizontal and vertical rulers to widen the margin of the header and then drag the borders of the table to the desired width (see fig. 7).
Graphics
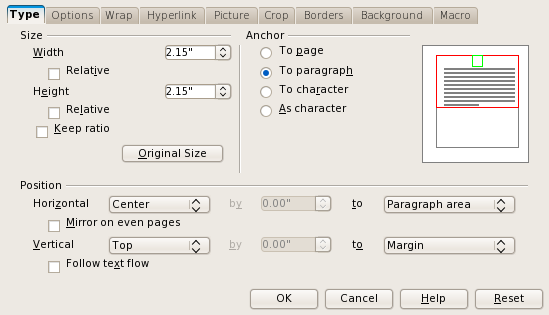
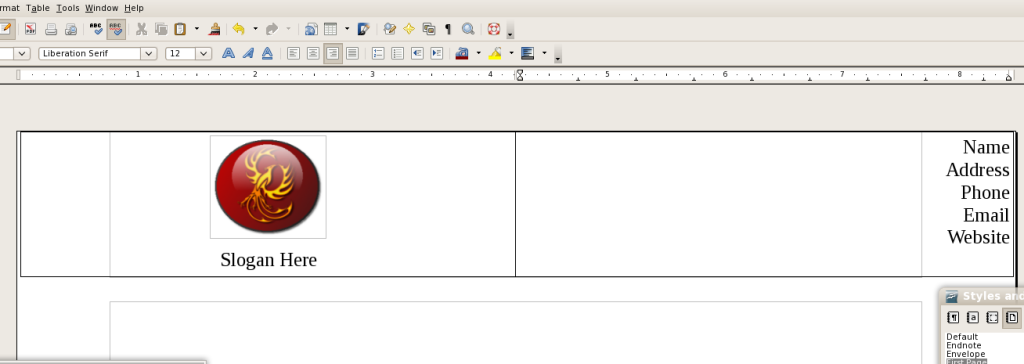
There are two graphics that I used in this tutorial, one being the company logo and the other the background gradient for the header table. To include the company brand, click on Insert > Picture > From File, and open the graphic you want. In the example I will be using the Fixed by Linux logo. To enable us to scale the graphic correctly, let's open the picture properties - I did it by double-clicking on the picture (see fig. 8). In the Type tab, check "Keep ratio" to keep the shape correctly in case you want to change the size using Width and Height in this tab. In the Crop tab, check "Keep scale" so that dragging the borders of the graphic will scale the picture instead of crop it. Again, experiment with the settings in properties to get your desired effect. Click on OK and then use the drag points to resize the graphic (if you didn't already use the Width and Height in properties) and then position the graphic where you want it. I would then pull the bottom of the table so that you have plenty of space below the graphic for the slogan. Type in the slogan either using a text box in the Drawing toolbar (View > Toolbars > Drawing) or simply entering a few blank lines. Be careful using the latter, however, since it exhibited some strange behavior when I began hitting the Enter key from the top of the table! Click inside the right column and enter your contact information (see fig. 9). I'll show you how to insert text fields later so that the letterhead is more portable.
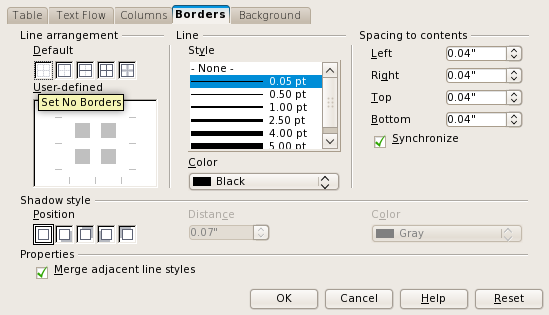
For the background image, I used GIMP to create a blank drawing, 7" x 1", and used the GIMP's gradient tool to make the background you see. I used the color chooser to grab the foreground color from the company graphic so that it would flow better. Once I saved that file, I returned to the document and clicked on Table > Table Properties > Background tab. You will change "For" to Table, and "As" to Graphic. Browse to and select the background graphic file and select "Area" (see fig. 10). You'll notice I had the Type as Position, but I later found that Area gave me a better result. You can also go to the Border tab and take off the current borders and/or select your own borders (see fig. 11).
An alternative to creating the background in the GIMP is to use the rectangle drawing tool in the Drawing toolbar. Draw the rectangle to the shape of the table. Right-click on the drawing and select "Area" > Gradients tab. Set up the gradient you want and click OK. You'll notice that it covers everything in the header right now, but don't worry! Right-click again on the new drawing and select Arrange > To Background. It should now show up behind everything.
This would be an excellent time to save your template. Remember, save early and save often!
Using fields for contact info
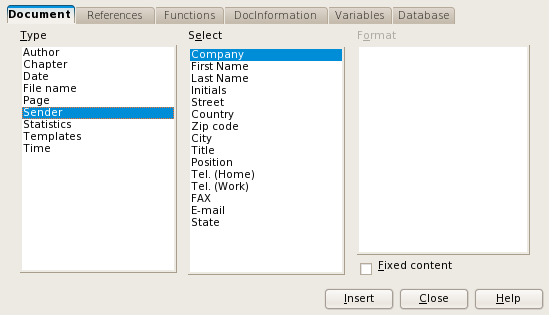
In order to make your letterhead truly portable for other users, you'll want to use fields instead of static text. Be aware this will take the data from the personal information properties in Open Office, so if it's empty, that line will end up empty as well. Double check by clicking on Tools > Options, expand OpenOffice.org and select User Data (see fig. 12).
Highlight the first line in the right cell and delete that text. Now, click on Insert > Fields > Other (or type CTRL F2), open the Document tab, and select "Sender" (see fig. 13). In the middle pane you should now see all of the field labels from User Data. Let's select Company and click Insert. Click on Close. Go to the second line, highlight and delete the current text, and do the same steps for First Name and Last Name. You will most likely need to add a space between them afterwards. Repeat these for each line of the contact information you wish to include. Let's protect the header contents by selecting the entire table, and then clicking on Table > Protect Cells. Once you have finished, save the template again and you should be done! See figure 14 for our result.
Conclusion
This is your template, do with it as you wish! Change the font to a different type (I used Liberation Serif in this tutorial) or different size, use different graphics, place the contact information in its own row that spans the width of the page ... whatever your heart and creativity desires!
|